Last updated: November 1, 2026
Black forest cake is a chocolate layer cake stacked with tart cherry filling and clouds of whipped cream, and this version walks you through every step so it comes out right the first time.
Read the full method below in plain language, or use the recipe card further down for the quick version.
How to Make Black Forest Cake Step by Step
This black forest cake uses two 9-inch chocolate layers, a cooked cherry filling, and a mascarpone-stabilized whipped cream, and it serves 12.

Plan on about 3 hours and 20 minutes from start to finish, most of which is hands-off cooling and chilling.
Gather Your Ingredients
For the cake layers, you need 1 3/4 cups (220 g) all-purpose flour, 2 cups (400 g) granulated sugar, and 3/4 cup (65 g) unsweetened cocoa powder. Add 1 1/2 teaspoons baking powder, 1 1/2 teaspoons baking soda, and 1 teaspoon salt to the dry mix.
The wet ingredients are 2 large eggs, 1 cup whole milk, 1/2 cup vegetable oil, 2 teaspoons vanilla extract, and 1 cup hot brewed coffee. The coffee deepens the chocolate flavor without making the cake taste like coffee.
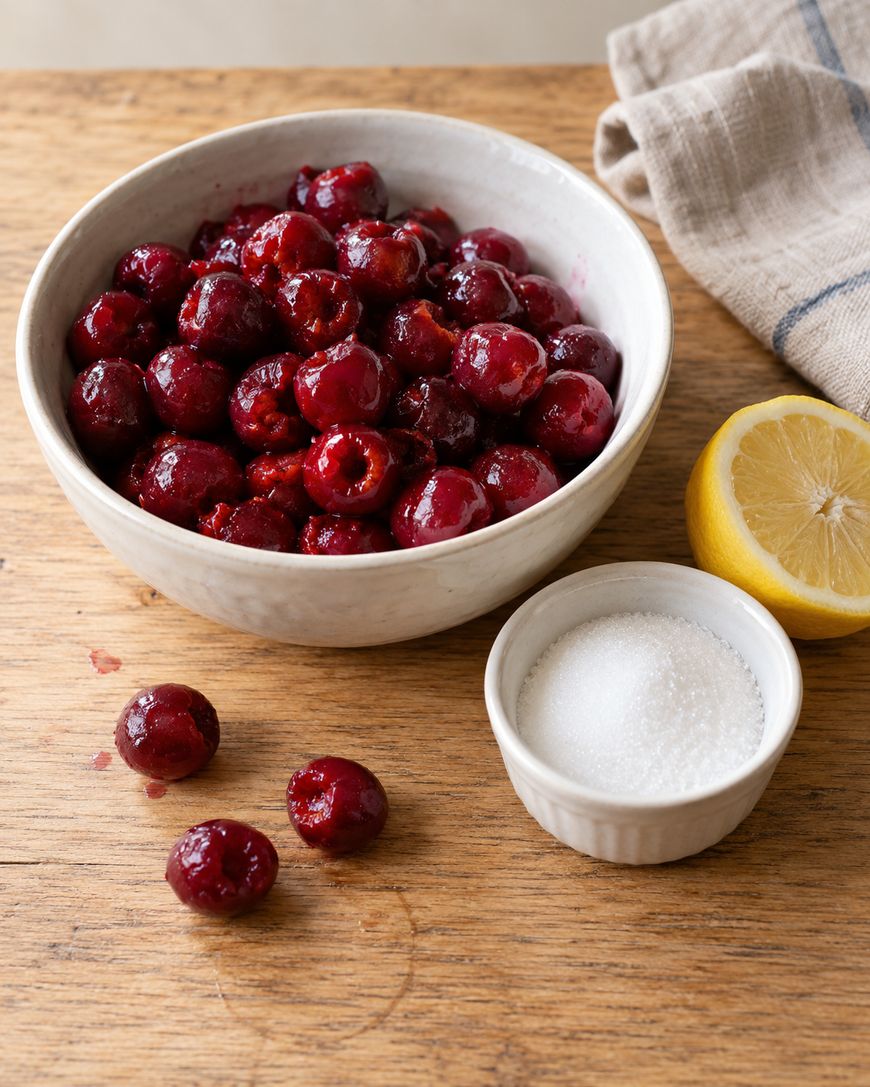
For the cherry filling, you need two 14.5-ounce cans of pitted tart cherries packed in water, 1/2 cup (100 g) granulated sugar, 3 tablespoons cornstarch, and 1 teaspoon lemon juice. Drain the cherries and save the liquid, because you need about 1 cup of it.
For the whipped cream, you need 2 1/2 cups (600 ml) cold heavy cream, 1/2 cup (115 g) cold mascarpone, 1/2 cup (60 g) powdered sugar, and 2 teaspoons vanilla extract. To finish the cake, you need 2 tablespoons kirsch (optional), a 4-ounce (115 g) bar of bittersweet chocolate for shaving, and 12 cherries for the top.
Bake the Chocolate Layers
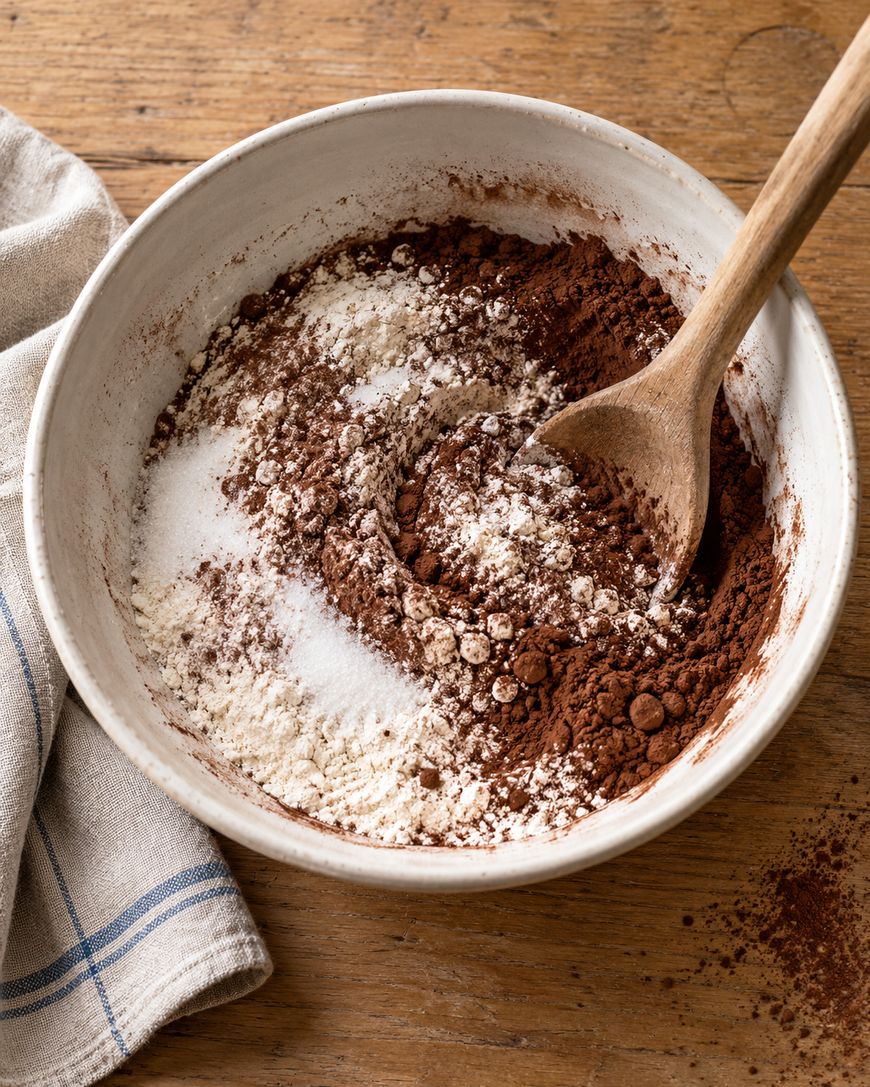
Heat your oven to 350°F (175°C), grease two 9-inch round cake pans, and line the bottoms with parchment circles. Whisk the flour, sugar, cocoa, baking powder, baking soda, and salt together in a large bowl.
Add the eggs, milk, oil, and vanilla, then beat on medium speed for 2 minutes until the batter is smooth. Stir in the hot coffee, and expect a very thin batter, which is exactly what you want.

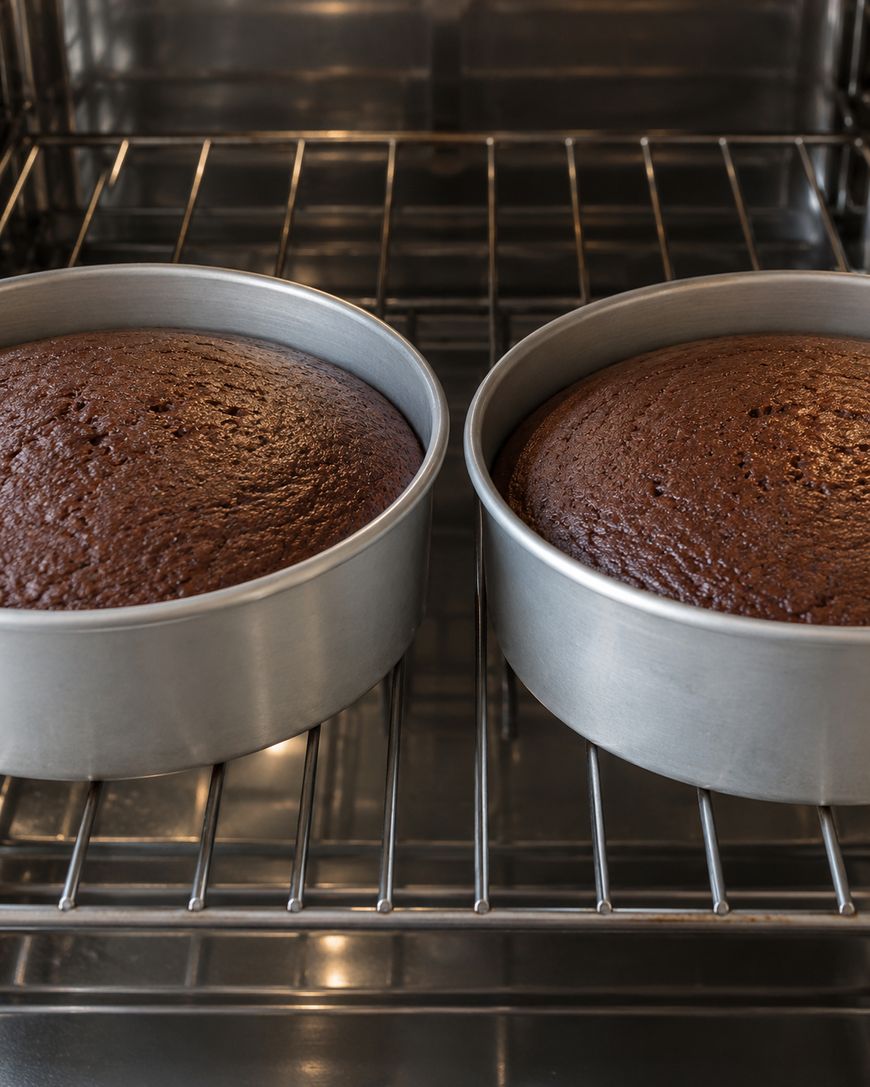
Divide the batter evenly between the pans and bake for 30 to 35 minutes, until a toothpick in the center comes out clean. Cool the layers in the pans for 10 minutes, then turn them out onto a wire rack and let them cool completely, about 1 hour.
Cook the Cherry Filling
Stir the drained cherries, 3/4 cup of the reserved cherry liquid, 1/2 cup sugar, the cornstarch, and the lemon juice together in a medium saucepan. Cook over medium heat, stirring often, for 4 to 5 minutes until the mixture bubbles and turns thick and glossy.

Let it bubble for 1 more minute, then cool it completely, about 45 minutes. A warm filling slides right off the cake and melts the cream.
Whip the Cream
Chill your mixing bowl and beaters for 15 minutes before you start. Beat the cream, mascarpone, powdered sugar, and vanilla on medium-high speed for 3 to 4 minutes, until stiff peaks form.

Stop as soon as the peaks hold their shape, because overwhipped cream turns grainy.
Assemble and Decorate the Cake
Trim any domes off the cooled layers with a serrated knife so they sit flat. Set one layer on a serving plate, then stir the kirsch together with 2 tablespoons of the reserved cherry liquid and brush half of it over the layer.

Pipe or spread a ring of whipped cream about 1 inch tall around the edge of the layer. Spoon about 1 1/2 cups of the cooled filling inside the ring, then spread a thin layer of cream over the filling.
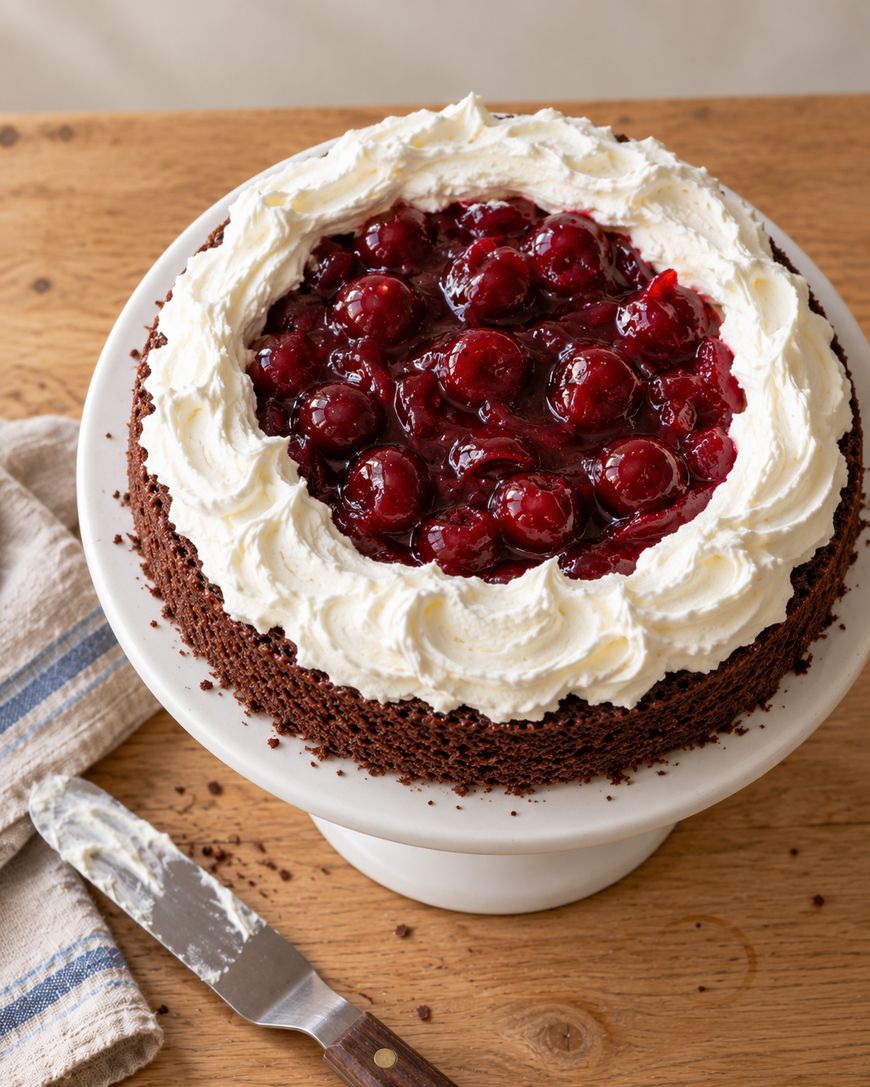
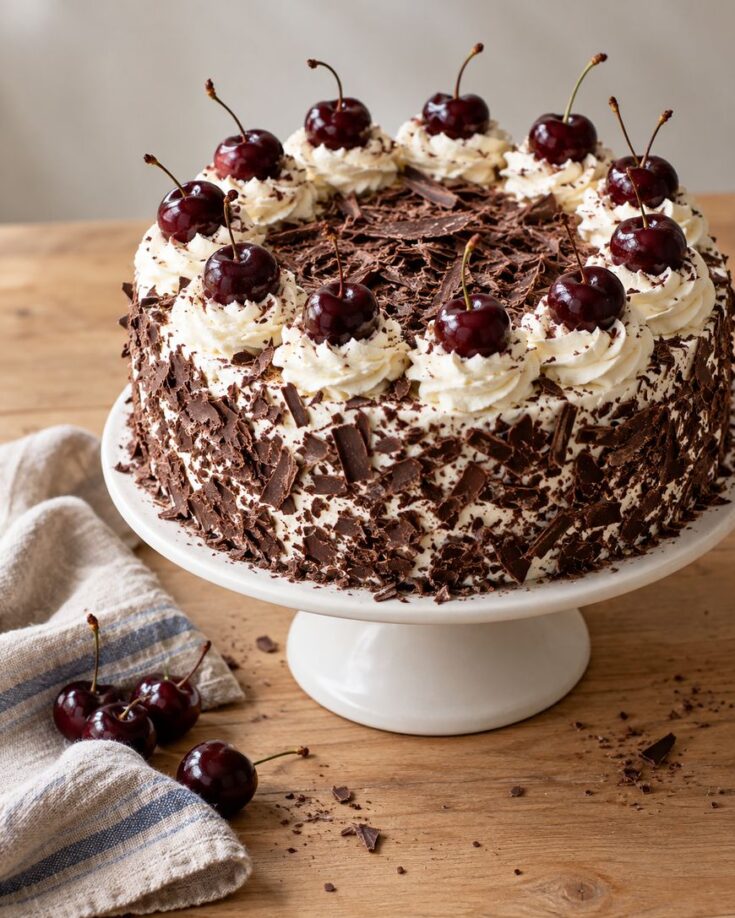
Top with the second layer, brush it with the remaining kirsch mixture, and cover the top and sides with whipped cream, saving about 1 cup for piping. Shave the chocolate with a vegetable peeler, press the shavings onto the sides and top, pipe 12 rosettes around the edge, and set a cherry on each one.
Chill the finished cake for at least 1 hour before slicing so the cream firms up and the slices stay clean. You will have about 1 cup of cherry filling left over, which is wonderful spooned over ice cream or stirred into yogurt.

Tips, Variations, and Substitutions for Black Forest Cake
The best black forest cake comes from small choices that keep each component at the right temperature and texture. These swaps work well if you need to adjust the recipe to what you have on hand.
Using Fresh or Frozen Cherries
The card uses canned tart cherries because they are consistent and available year-round. If you prefer fresh or frozen, use about 3 cups of pitted dark sweet cherries, swap the reserved liquid for 3/4 cup of water, and cut the sugar to 1/3 cup.
The card leaves this out, so treat it as an optional variation. You will still need liquid for the soak, so use 2 tablespoons of water or cherry juice in place of the reserved liquid.
Skipping the Kirsch
Kirsch is a clear cherry brandy that gives black forest cake its classic perfumed flavor. If you would rather skip it, brush the layers with 4 tablespoons of the reserved cherry liquid instead.
Easier Decorating
You do not need a piping bag to make this cake look great. Dollop the reserved cream around the edge with a spoon and swirl each one with the back of the spoon.

Chocolate shavings curl best from a bar at room temperature, so pull it out of the pantry rather than the fridge. If the shavings crumble instead of curling, warm the bar in your hands for 10 seconds.
How to Store and Make Ahead Black Forest Cake
Store the assembled black forest cake in the refrigerator, covered, for up to 3 days. The USDA advises that perishable foods like whipped cream should not sit out for more than 2 hours, or 1 hour when the temperature is above 90°F.
You can bake the cake layers a day ahead and keep them wrapped at room temperature. You can also freeze the unfrosted layers, wrapped tightly, for up to 2 months and thaw them at room temperature for about 2 hours before assembling.
The cherry filling keeps in a covered container in the fridge for up to 3 days, so it is easy to make early. We do not recommend freezing the assembled cake, because the cream and filling lose their texture.
When you serve the cake for a party, slice only what you need and return the rest to the refrigerator. This keeps the cream cold and the cherries from weeping onto the plate.
What to Serve With Black Forest Cake
Black forest cake tastes best when it sits out for about 15 minutes before serving, because the chocolate layers soften and the flavor opens up. Use a sharp knife and wipe the blade clean between slices for tidy cuts.
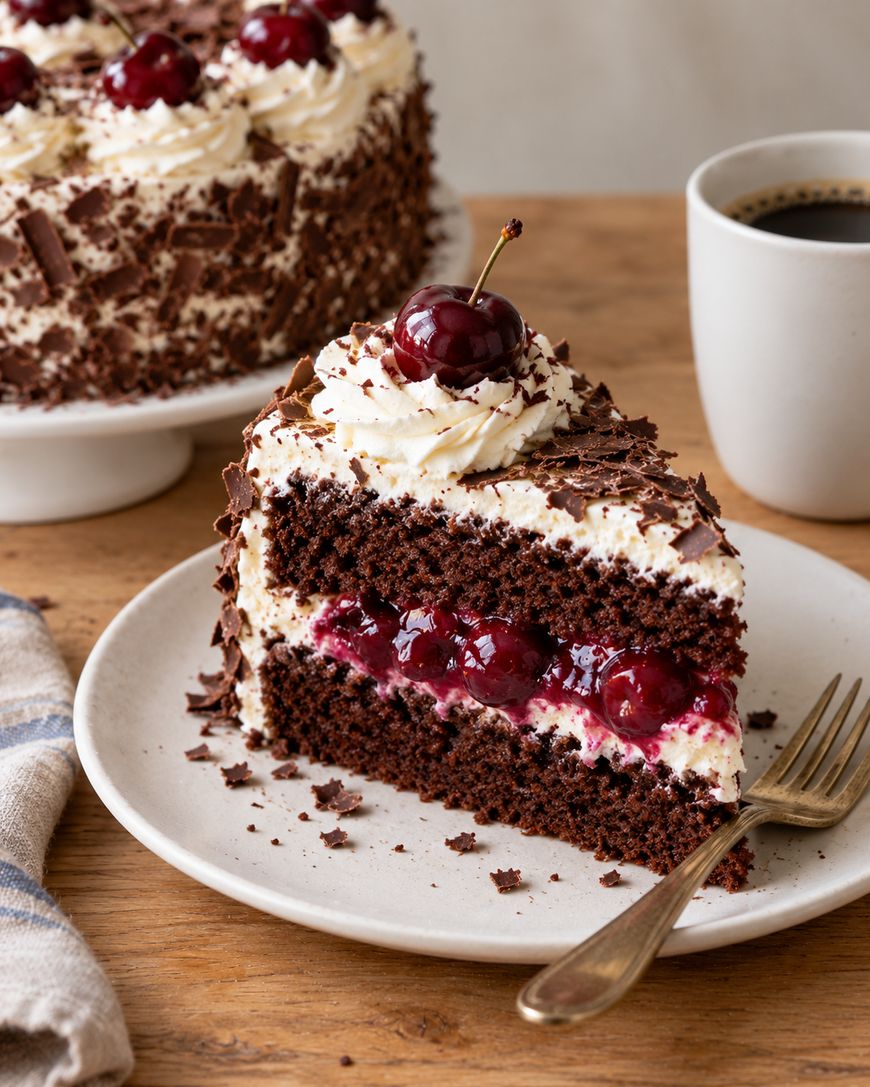
A cup of hot coffee or black tea balances the sweetness well. A small scoop of vanilla ice cream and a spoonful of the leftover cherry filling turns a slice into a full dessert.
For a holiday table or birthday, black forest cake pairs nicely with a simple fruit platter and a glass of sparkling wine or cherry spritzer. Because the cake is rich, thin slices go a long way, and 12 servings stretch easily if you serve it after a big meal.
If you are taking the cake to a gathering, carry it in a cake carrier with a cold pack tucked beside it. Add the chocolate shavings and fresh cherries just before serving so they look their best.
The History of Black Forest Cake
Black forest cake comes from Germany, where it is called Schwarzwälder Kirschtorte. The name points to the Black Forest region in the southwest, which is famous for its sour cherries and for kirschwasser, the clear cherry brandy made there.
Food historians still debate exactly who made the first one and when, but most agree the cake took its modern shape in the early 1900s. Traditional German versions use kirschwasser, whipped cream, cherries, and chocolate, with the chocolate shavings on top said to echo the dark forest.
The cake traveled to the United States in the middle of the twentieth century and became a bakery favorite. American versions often use canned cherries, which is why this recipe does too.
Today the cake shows up at birthdays, holidays, and bakery counters around the world. The combination of bitter chocolate, tart cherries, and soft cream is a classic that never feels dated.
Ready to bake? Use the recipe card below for the full ingredient list, steps, and nutrition details.
Black Forest Cake
A classic black forest cake with two moist chocolate layers, a thick cherry filling, and stabilized whipped cream, finished with chocolate shavings and fresh cherries.
Ingredients
- 1 3/4 cups (220 g) all-purpose flour
- 2 cups (400 g) granulated sugar
- 3/4 cup (65 g) unsweetened cocoa powder
- 1 1/2 teaspoons baking powder
- 1 1/2 teaspoons baking soda
- 1 teaspoon salt
- 2 large eggs
- 1 cup whole milk
- 1/2 cup vegetable oil
- 2 teaspoons vanilla extract
- 1 cup hot brewed coffee
- 2 cans (14.5 ounces each) pitted tart cherries in water
- 1/2 cup (100 g) granulated sugar, for the filling
- 3 tablespoons cornstarch
- 1 teaspoon lemon juice
- 2 1/2 cups (600 ml) cold heavy cream
- 1/2 cup (115 g) cold mascarpone
- 1/2 cup (60 g) powdered sugar
- 2 teaspoons vanilla extract, for the cream
- 2 tablespoons kirsch, optional
- 4 ounces (115 g) bittersweet chocolate bar, for shaving
- 12 cherries with stems, for the top
Instructions
- Heat the oven to 350°F (175°C). Grease two 9-inch round cake pans and line the bottoms with parchment.
- Whisk the flour, sugar, cocoa, baking powder, baking soda, and salt together in a large bowl.
- Add the eggs, milk, oil, and vanilla, then beat on medium speed for 2 minutes until smooth.
- Stir in the hot coffee. The batter will be very thin.
- Divide the batter between the pans and bake for 30 to 35 minutes, until a toothpick in the center comes out clean.
- Cool the layers in the pans for 10 minutes, then turn them out onto a wire rack and cool completely, about 1 hour.
- Drain the cherries and save the liquid. Stir the cherries, 3/4 cup of the reserved liquid, 1/2 cup sugar, cornstarch, and lemon juice together in a medium saucepan.
- Cook over medium heat, stirring often, for 4 to 5 minutes until thick and glossy, then let it bubble for 1 more minute. Cool completely, about 45 minutes.
- Chill a mixing bowl and beaters for 15 minutes. Beat the cream, mascarpone, powdered sugar, and vanilla on medium-high speed for 3 to 4 minutes until stiff peaks form.
- Trim any domes from the layers. Set one layer on a serving plate. Stir the kirsch with 2 tablespoons of the reserved cherry liquid and brush half of it over the layer.
- Pipe or spread a ring of whipped cream about 1 inch tall around the edge. Spoon about 1 1/2 cups of the cooled cherry filling inside the ring, then spread a thin layer of cream over the filling.
- Top with the second layer and brush with the remaining kirsch mixture. Cover the top and sides with whipped cream, saving about 1 cup for piping.
- Shave the chocolate with a vegetable peeler and press the shavings onto the sides and top. Pipe 12 rosettes around the edge and top each with a cherry.
- Chill for at least 1 hour before slicing. Use a sharp knife and wipe the blade clean between slices.
Notes
Store covered in the refrigerator for up to 3 days. Bake the layers up to 1 day ahead and keep them wrapped at room temperature, or freeze the unfrosted layers for up to 2 months. The cherry filling keeps in the fridge for up to 3 days. About 1 cup of filling is left over for serving. If you skip the kirsch, brush the layers with 4 tablespoons of the reserved cherry liquid. Fresh or frozen cherries are an optional swap: use about 3 cups pitted dark sweet cherries, 3/4 cup water in place of the reserved liquid, and 1/3 cup sugar, then use 2 tablespoons of water or cherry juice for the soak. Do not leave the finished cake out for more than 2 hours (1 hour above 90°F).
Nutrition Information:
Yield:
12Serving Size:
1 sliceAmount Per Serving: Calories: 560Total Fat: 29gSaturated Fat: 15gSodium: 420mgCarbohydrates: 71gFiber: 3gSugar: 52gProtein: 7g
Black Forest Cake Questions Answered
Can you make black forest cake without alcohol?
Yes, you can leave out the kirsch completely. Brush the layers with 4 tablespoons of the reserved cherry liquid instead, and the cake will still taste rich and cherry-forward.
How far ahead can you make black forest cake?
You can assemble it up to 3 days ahead and keep it covered in the refrigerator. For the freshest texture, bake the layers a day early and assemble the cake on the day you plan to serve it.
Why did my whipped cream turn runny?
The most common causes are a warm bowl, warm cream, or stopping before stiff peaks form. Chill the bowl and beaters, use cold cream and cold mascarpone, and beat until the peaks stand up on their own.
Can you freeze black forest cake?
You can freeze the unfrosted chocolate layers for up to 2 months, wrapped tightly. We do not recommend freezing the finished cake, because the whipped cream and cherry filling change texture when they thaw.
Can you use 8-inch pans instead of 9-inch?
This recipe is written for two 9-inch pans, and that is the size we tested the timing and filling amounts around. Smaller pans make taller layers that bake longer and dome more, so we suggest sticking with 9-inch.
Why This Black Forest Cake Recipe Works
The chocolate layers are made with oil, hot coffee, and both baking powder and baking soda. Hot coffee blooms the cocoa for deeper flavor, and the oil keeps the crumb soft even after the cake has chilled in the refrigerator.
The batter comes together in one bowl and is beaten for just 2 minutes, which keeps the layers tender instead of tough. A thin batter is normal here and bakes into a moist, even layer.
The cherry filling is thickened with cornstarch and cooked until it bubbles, so it stays put between the layers instead of soaking into the cake. Cooling it completely before assembly protects the cream.
Mascarpone stabilizes the whipped cream so it holds its shape on the sides of the cake and in the piped rosettes. The ring of cream around the edge also keeps the filling from squeezing out when you add the top layer.
Make This Black Forest Cake This Weekend
This black forest cake looks impressive, but every step is simple and most of the work can be done ahead. Bake the layers, cook the filling, and whip the cream, and the cake nearly assembles itself.
If you are new to layer cakes, this is a forgiving place to start, because the thin batter, the cooked filling, and the stabilized cream are all designed to be reliable. Each step has a clear visual cue, from the toothpick test to the stiff peaks, so you always know when to move on.
Pick up your cherries and cocoa today and try black forest cake as your next showstopping dessert.
Strawberry Earthquake Cake With Gooey Cream Cheese Pockets and a Crunchy Pecan Coconut Base