Last updated: June 18, 2026
If you want a fall display that stops people in their tracks, a pumpkin arch is one of the most dramatic things you can create. These pumpkin arch tips will walk you through everything you need to know—from choosing the right pumpkins to keeping your arch sturdy all season long.
You do not need professional landscaping experience or an enormous budget to pull this off. With the right approach, you can build a beautiful, full arch that looks like it belongs on the cover of a fall magazine.
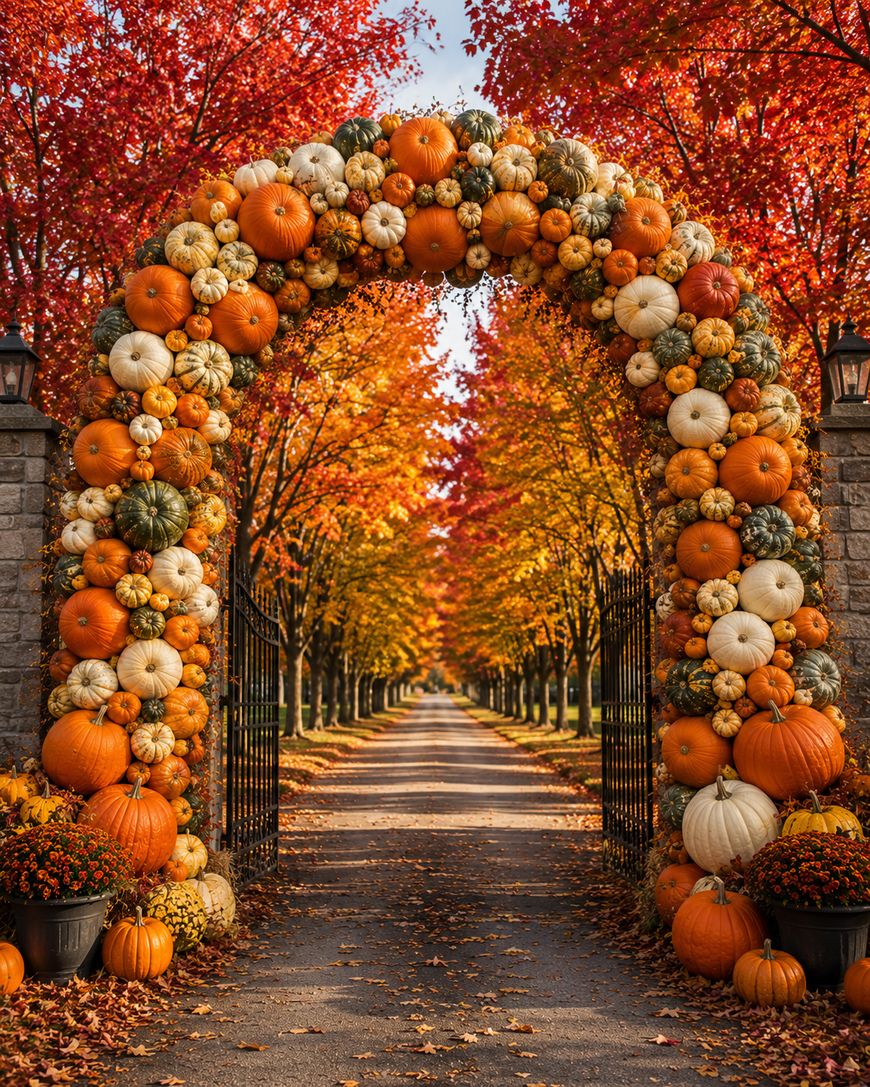
What Is a Pumpkin Arch and Why You Should Make One
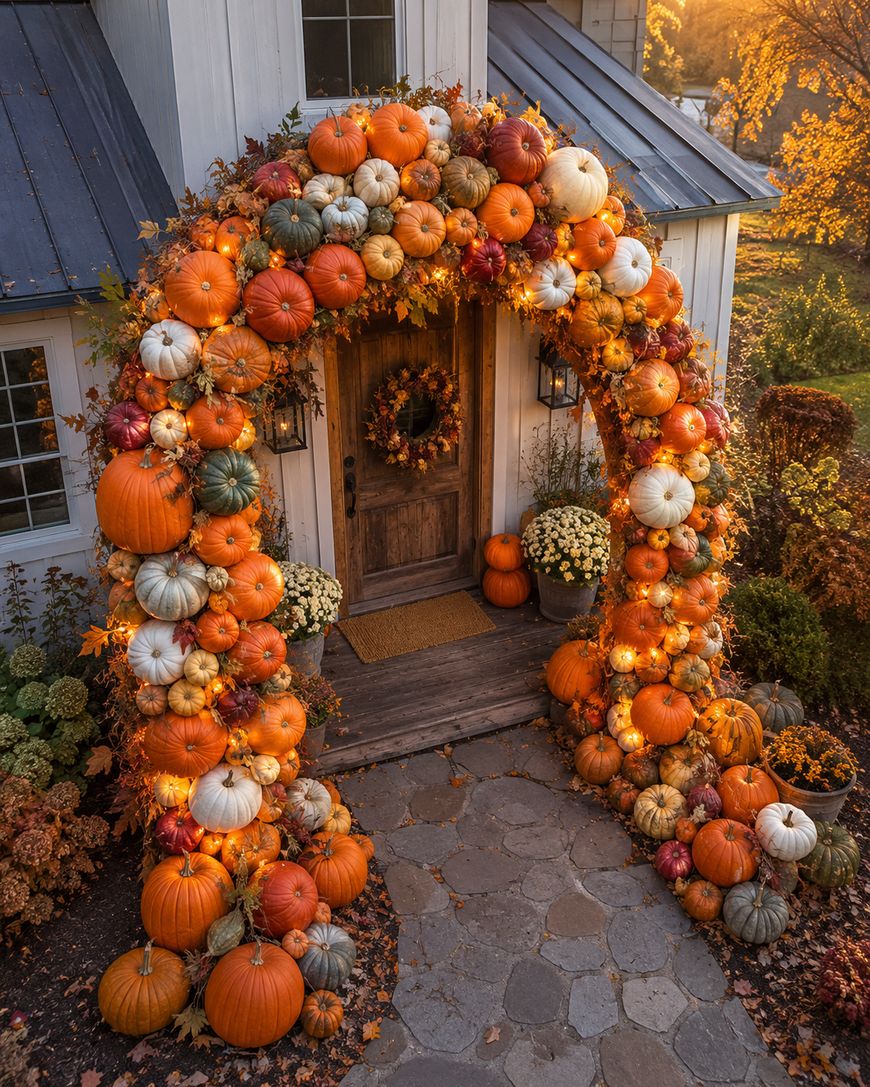
A pumpkin arch is exactly what it sounds like: pumpkins and gourds stacked and arranged in the shape of an arch, usually framing a doorway, garden gate, driveway entrance, or pathway. The visual impact is huge, and it works equally well for a cozy farmhouse porch or a Halloween party setup.
The reason pumpkin arches have taken over fall decor feeds is simple—they photograph beautifully and transform an ordinary exterior into something truly special. A well-built arch creates a natural focal point that draws the eye and invites people to walk through.
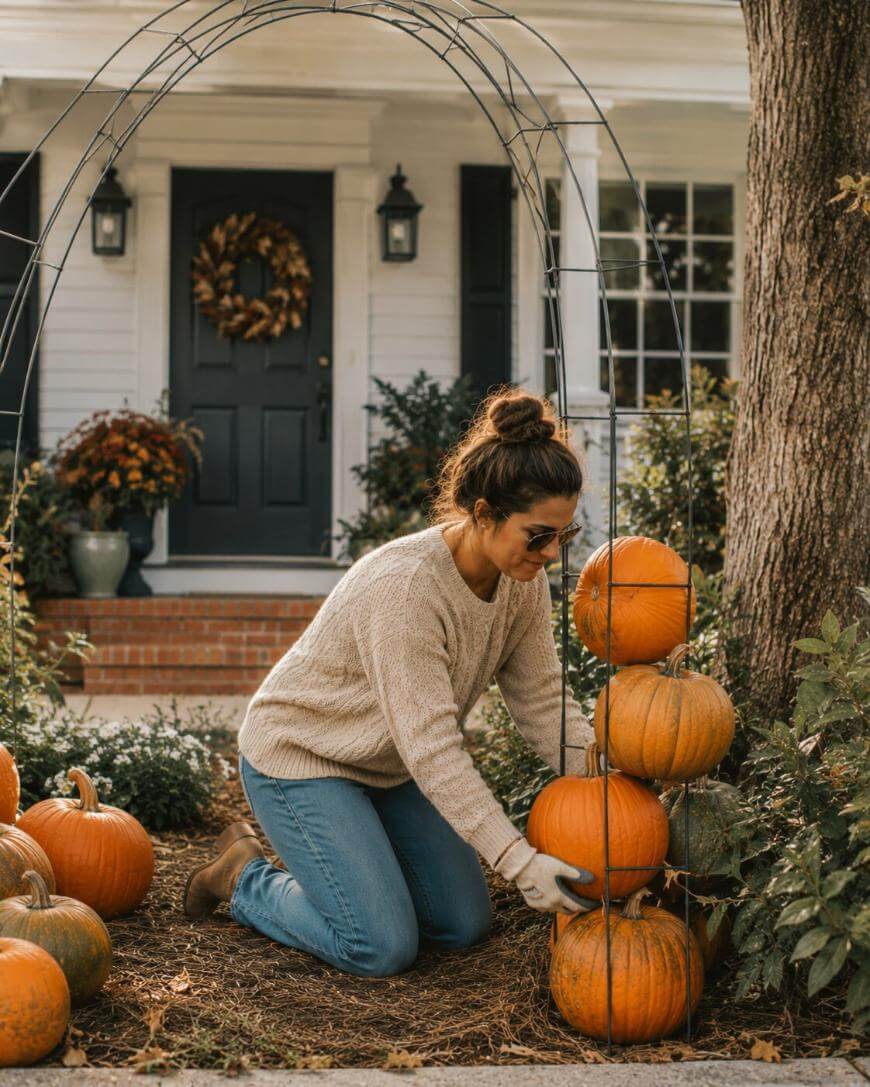
Beyond aesthetics, pumpkin arches are actually more achievable than they look. Most people assume you need some kind of professional structure, but the reality is that you can build one with materials from a hardware store and a trip to the pumpkin patch. The key is having a solid plan and following the right pumpkin arch tips before you start stacking.
Choosing the Right Pumpkins for Your Arch
The pumpkins you choose will make or break your arch, so this step deserves real attention. You want a variety of sizes—large pumpkins for the base, medium ones for the middle sections, and small pumpkins and gourds for the top and fill-in spots.
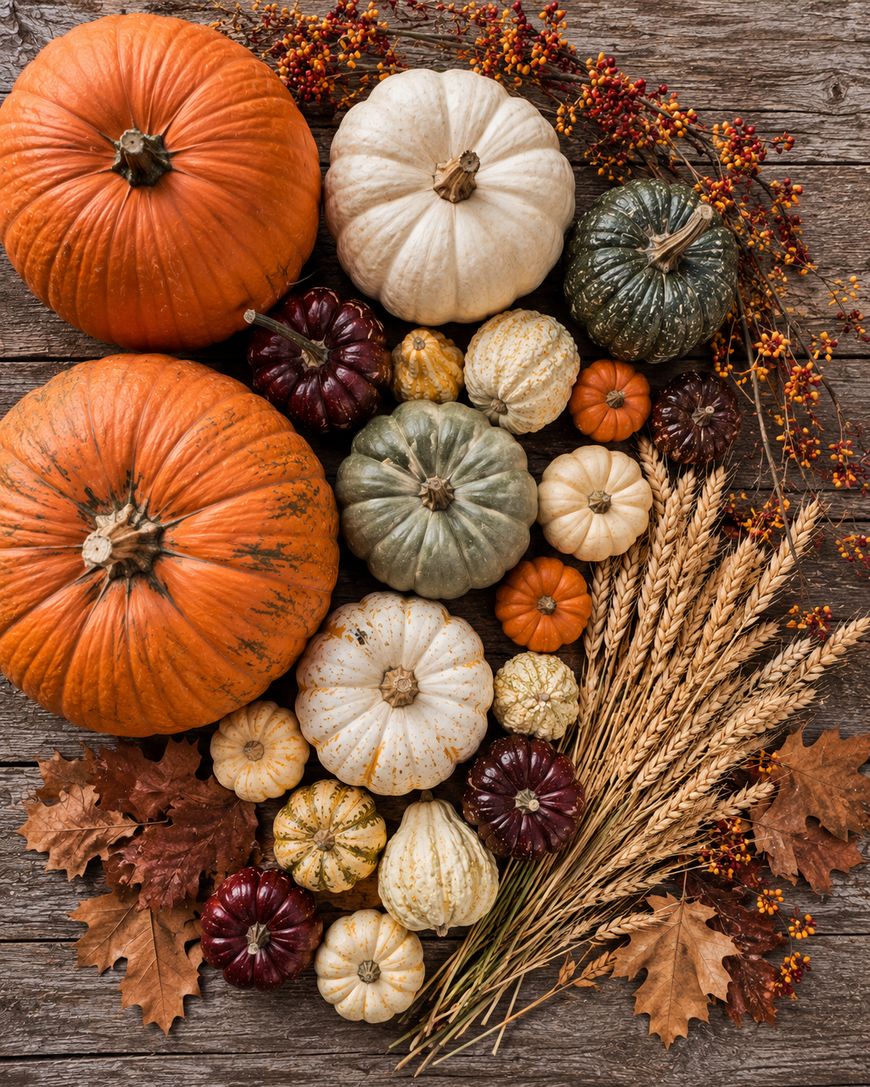
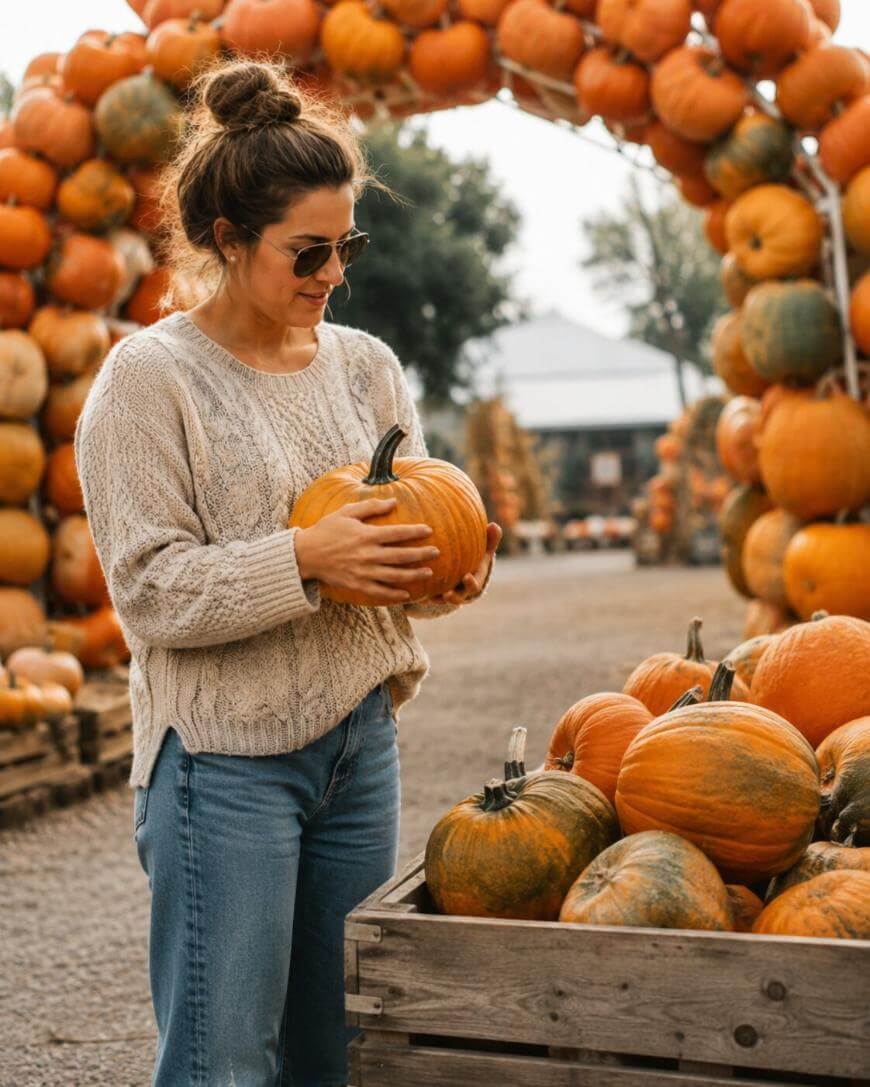
Look for pumpkins with flat, stable bases. Round-bottomed pumpkins roll and shift, which creates instability over time. When you are at the patch or store, set each pumpkin down on a flat surface and check that it sits without wobbling before you add it to your cart.
Color variety adds depth to your arch. Classic orange is always a win, but mixing in white, green, and heirloom pumpkins in muted tones like gray and buff creates a more sophisticated, layered look. Small gourds in deep burgundy and cream can fill gaps and add visual texture that makes the whole arch look intentional rather than random.
Plan for more pumpkins than you think you will need. A standard doorway arch typically uses between 30 and 50 pumpkins depending on size, and you will almost always want extras to fill in gaps or replace any that deteriorate early in the season.
Building the Frame: The Most Important Pumpkin Arch Tip
The single most important thing you can do for a successful pumpkin arch is build a solid frame first. Do not attempt to stack pumpkins without structural support—they will shift, lean, and eventually collapse.
The most popular frame option is a cattle panel, which is a rigid wire grid available at farm supply stores. These panels are flexible enough to bend into an arch shape but strong enough to support the weight of dozens of pumpkins. Drive two T-posts or sturdy stakes into the ground on either side of your doorway or path, then bend the cattle panel into an arch and secure it to the stakes with zip ties or wire.
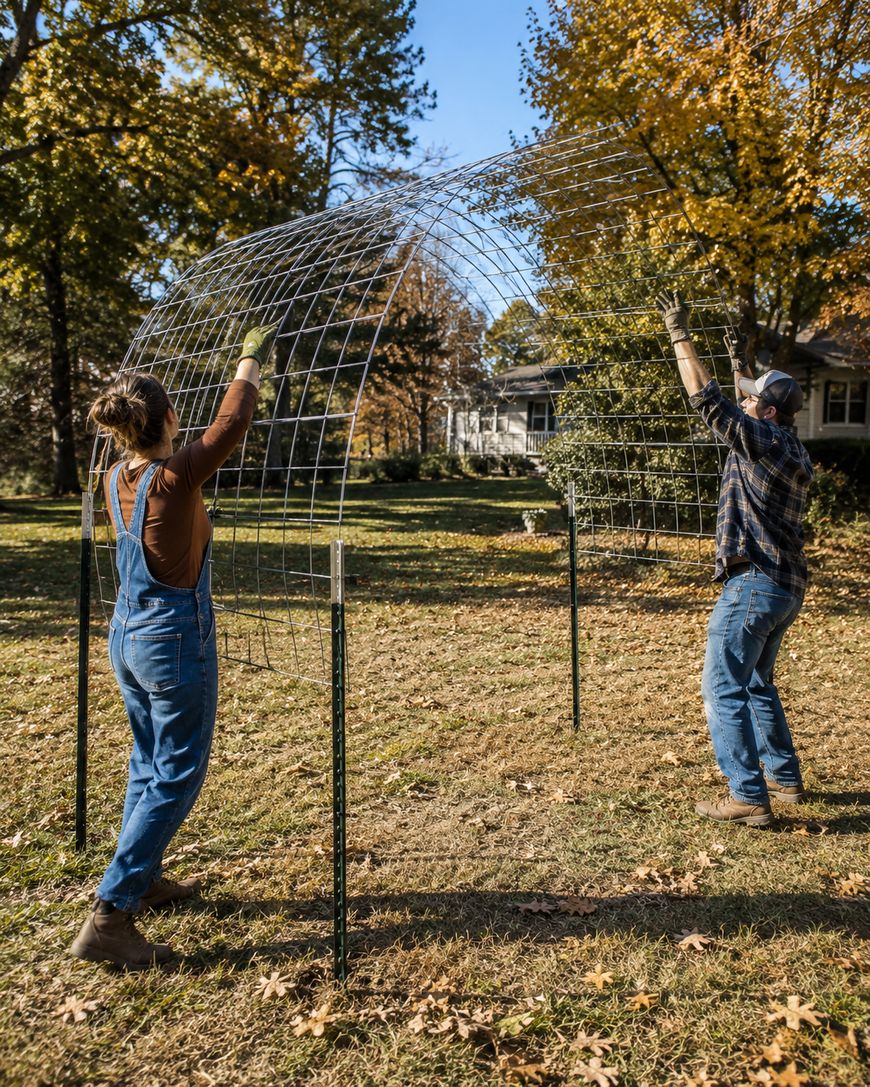
Another option is to build a wooden frame using PVC pipe or lumber. This takes more effort upfront but gives you a very stable and reusable base. Some people use a pair of tall tomato cages on each side with additional structure in between, which works well for smaller arches.
Once your frame is in place, cover it with chicken wire or hardware cloth. This gives the pumpkins something to nestle against and helps hold them in position. You can tuck small gourds directly into the gaps in the wire, which is one of the easiest ways to fill the arch quickly and securely.
How to Stack and Secure Pumpkins Safely
Start at the base and work your way up. Place your largest, most stable pumpkins at the very bottom on each side of the arch. These anchor pumpkins should sit directly on the ground or on a flat board, not on top of other pumpkins, so that they bear the weight of everything above without shifting.
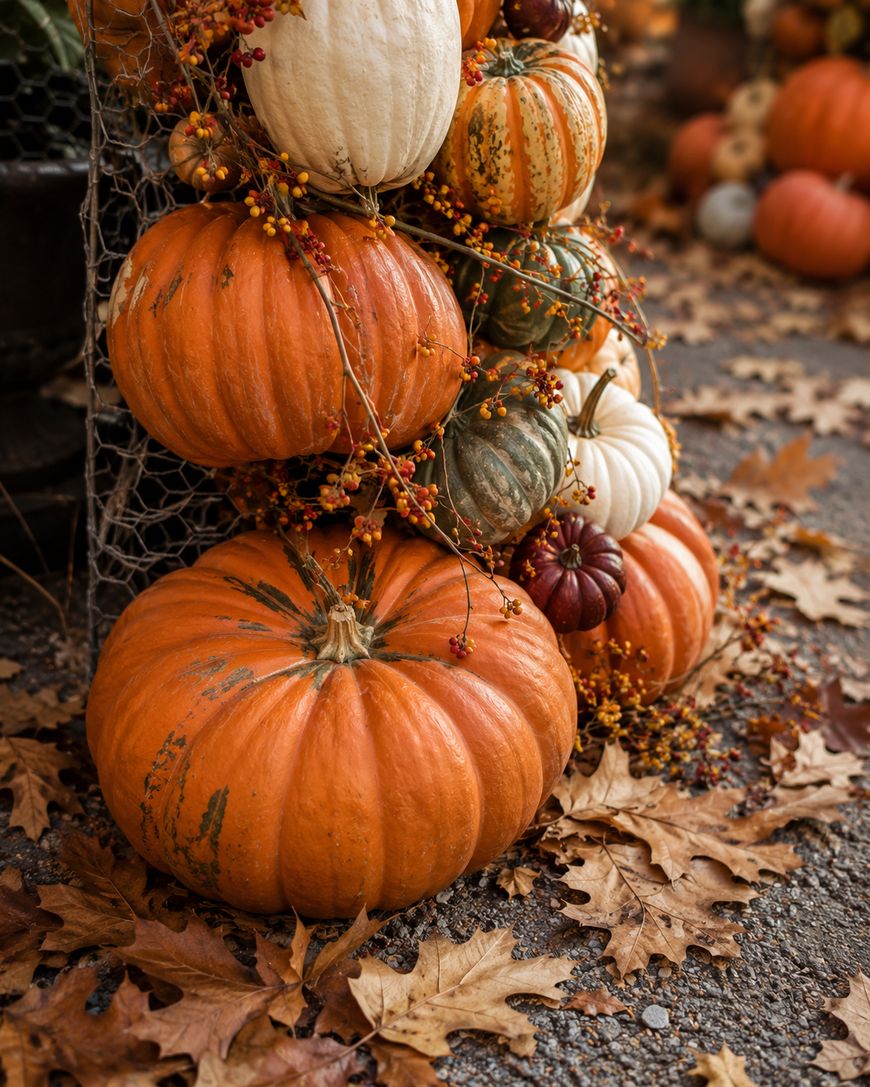
As you build upward, lean each pumpkin slightly into the frame rather than stacking them perfectly vertical. This inward lean uses the arch’s own weight distribution to add stability, similar to how stone arches in architecture work. The pumpkins press against each other and the frame, which keeps everything locked in place.
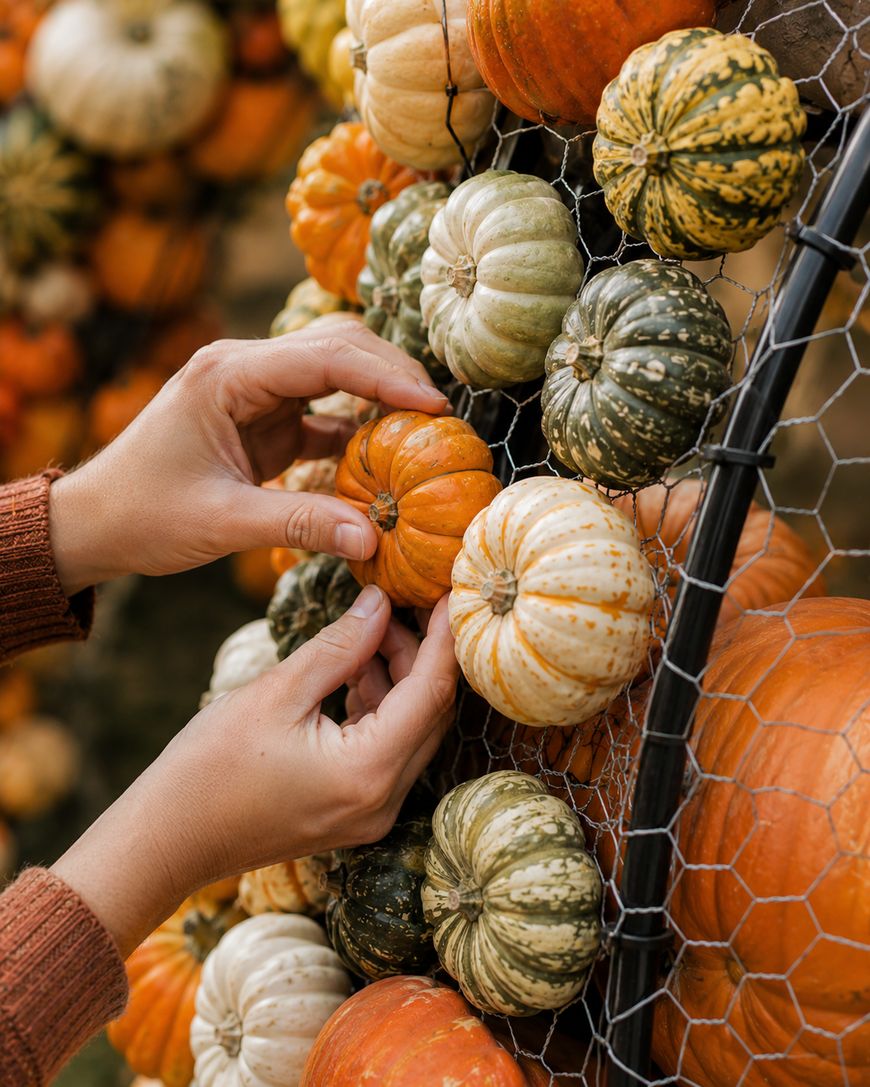
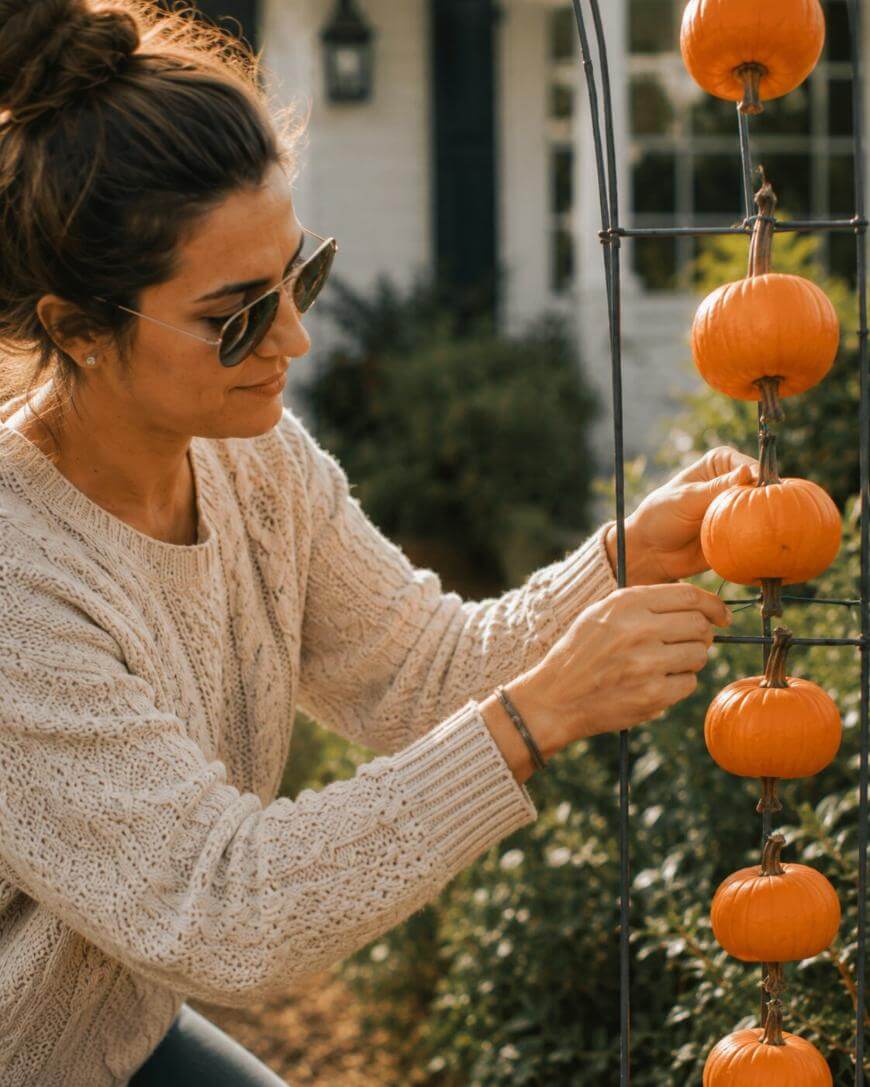
Use floral picks, wooden skewers, or landscape staples to pin smaller pumpkins to the chicken wire on your frame. For larger pumpkins, zip ties looped through the wire and around the pumpkin’s stem can hold things in place without damaging the pumpkin. Avoid using nails or anything that punctures the pumpkin skin early in the season, as this speeds up decay significantly.
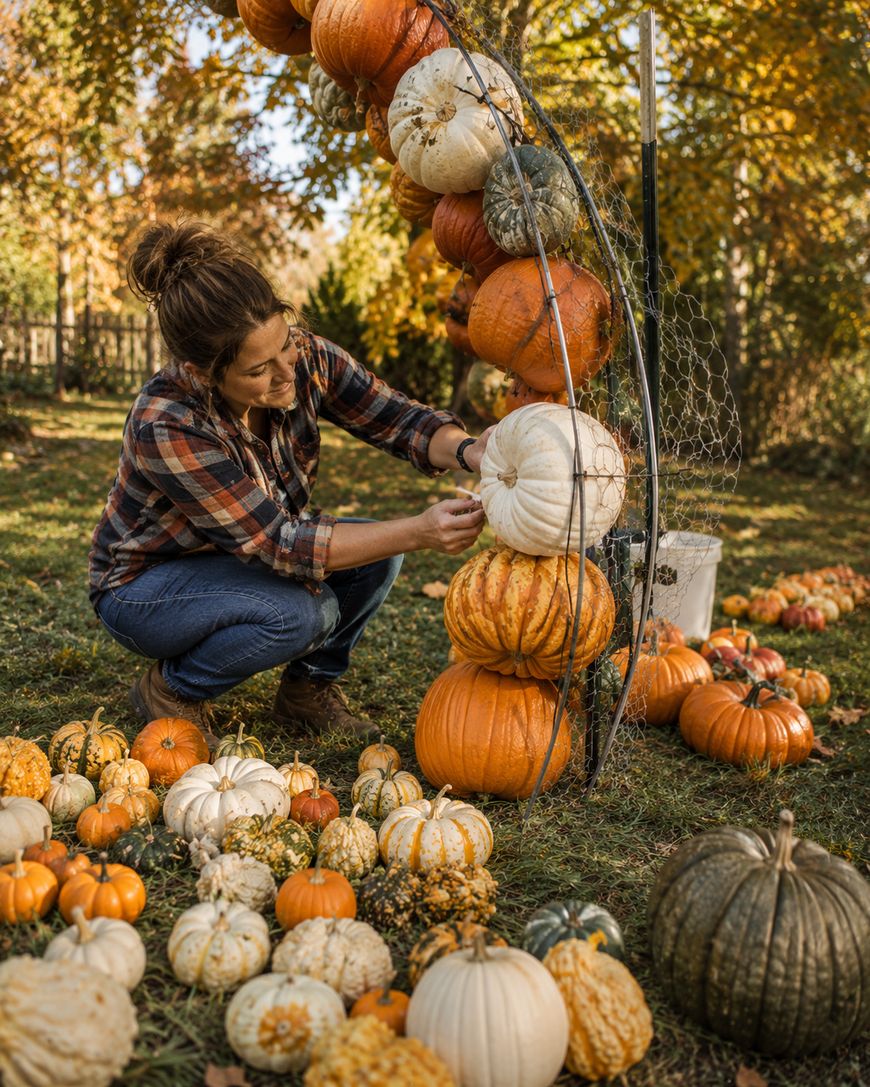
Gap-filling is part of the process, not a sign that something went wrong. Keep a stash of small gourds, mini pumpkins, and dried corn nearby to tuck into any holes as you work. These small additions also make the arch look lush and full rather than sparse.
Maintaining Your Pumpkin Arch Through the Season
One of the most overlooked pumpkin arch tips is maintenance. A pumpkin arch does not just sit there forever without attention—it needs regular checks to stay looking great.
Inspect your arch every few days for any pumpkins that are starting to soften or show mold spots. Remove them promptly before the decay spreads to neighboring pumpkins. If you have extras on hand, you can swap in a fresh pumpkin to fill the gap seamlessly.
Pumpkins last longer in cooler temperatures and dry conditions. If you live somewhere warm, misting the pumpkins lightly with a diluted bleach solution (one tablespoon per quart of water) can slow mold growth on the exterior. Keep them out of standing water and make sure your arch has some airflow, especially around the base pumpkins.
Direct sunlight speeds up deterioration, so a shaded location extends the life of your arch considerably. If your arch is in a spot that gets full afternoon sun, expect to refresh some pumpkins more frequently as the weeks go on. Plan to build your arch in early to mid-October if you want it to look its best through Halloween, rather than building it in early September when temperatures are still warm.
Creative Styling Ideas to Elevate Your Pumpkin Arch
Once the structure is solid, the fun part is styling. Weaving fall foliage—real or faux—through your pumpkin arch adds color and fills visual gaps beautifully. Bittersweet vine, eucalyptus, dried wheat bundles, and fall berry stems are all excellent choices that photograph well and add texture.
Lighting takes a pumpkin arch to another level, especially in the evening. Warm white string lights woven through the frame before you add pumpkins create a magical glow after dark. Battery-powered strands are easiest to manage since you do not have to worry about cords.
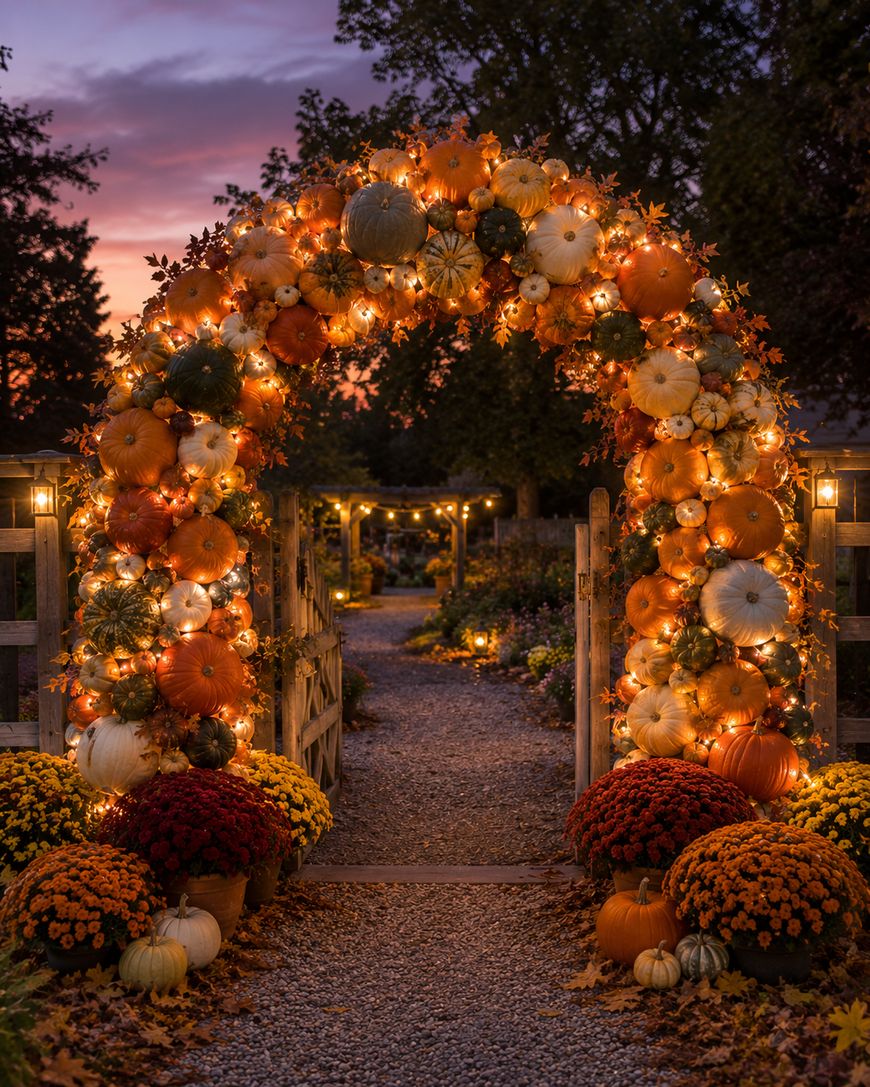
Consider your color palette before you start and stick to it. An arch that mixes every color can look chaotic rather than curated. A popular approach is to anchor with orange pumpkins and then layer in one or two complementary tones, like white and sage green, or warm burgundy and cream.
You can add seasonal touches like small hay bales at the base of the arch, potted mums flanking each side, or a carved lantern pumpkin at the very top of the peak. These finishing details make the whole display feel complete and intentional.
Pumpkin Arch Tips for Different Settings
A doorway arch frames your front entrance and creates an incredible first impression for trick-or-treaters and guests. Keep this one compact—you want people to walk through comfortably without feeling like the arch is collapsing above them.
A driveway or garden path arch can be larger and more dramatic since clearance is less of a concern. This is where you can really go big with size and height. Some people build double arches along a long path, which is breathtaking.
For indoor venues like barn weddings or harvest parties, you can build a lighter arch using artificial pumpkins so there is no weight concern and no mess. Real pumpkins are always more impressive, but foam or painted wood faux pumpkins hold up indefinitely and can be reused year after year.
If you are renting your home or cannot put stakes in the ground, a freestanding arch frame with weighted base plates is a great alternative. These are available online and at seasonal decor stores each fall, and they make the whole project much more accessible for apartment dwellers and renters.
Pumpkin Arch Tips Q&A
How many pumpkins do you need for an arch?
Most standard doorway arches use between 30 and 50 pumpkins of mixed sizes. Larger path or driveway arches can require 60 to 100 or more. Always buy 10 to 15 percent more than you think you need so you have replacements ready as pumpkins age.
How do you keep a pumpkin arch from falling over?
A sturdy frame is the key. Use a cattle panel, PVC pipe frame, or wooden structure secured to the ground with stakes, and attach pumpkins to chicken wire covering the frame. Leaning pumpkins inward toward the arch’s center also uses natural weight distribution to keep everything locked in.
How long will a pumpkin arch last?
In cool, dry weather a pumpkin arch can last three to four weeks. Warm temperatures and rain speed up decay, so expect to refresh individual pumpkins every week or two. Building your arch in early to mid-October gives you the best window for it to look great through Halloween.
Can you spray pumpkins to make them last longer?
Yes, misting the exterior with a diluted bleach solution or spraying with WD-40 can slow mold and dehydration. Keep pumpkins out of standing water and away from direct hot sun to extend their life. Uncarved pumpkins always last longer than carved ones.
Do you need any special tools to build a pumpkin arch?
You need basic tools—wire cutters, zip ties, and something to drive stakes into the ground. A pair of heavy-duty gloves is helpful when working with cattle panels since the wire ends are sharp. A level can help you get the frame symmetrical, but most people eyeball it successfully.
What size frame do you need for a pumpkin arch?
For a standard doorway arch, a 16-foot cattle panel bent into an arch gives you a height of roughly 6 to 7 feet, which is comfortable for most adults to walk through. For a wider or taller arch, use a longer panel or combine two panels. Measure your space first and add at least a foot of clearance on each side.
Conclusion: Your Best Pumpkin Arch Starts Here
There is nothing quite like stepping back and seeing a full pumpkin arch come together. With the right pumpkin arch tips in your toolkit, you can build something genuinely stunning that becomes the highlight of your fall decor every year.
Start with a solid frame, choose your pumpkins thoughtfully, and do not skip the maintenance checks. Add lighting and foliage to finish the look, and you will have an arch that looks incredible day and night.
Go grab your pumpkins and start building—your most impressive fall display yet is waiting.