Last updated: September 29, 2026
Sheet pan nachos are nachos baked on one rimmed sheet pan so you get a big, shareable layer of crispy chips with melted toppings. The simplest default approach is to use sturdy chips, add cheese plus fully cooked toppings, bake at 425°F for 6–10 minutes, then finish with cold toppings right after.
Make your base with the ingredients below, then use the numbered ideas to customize flavor, crunch, and portion size in a way that actually stays crisp.
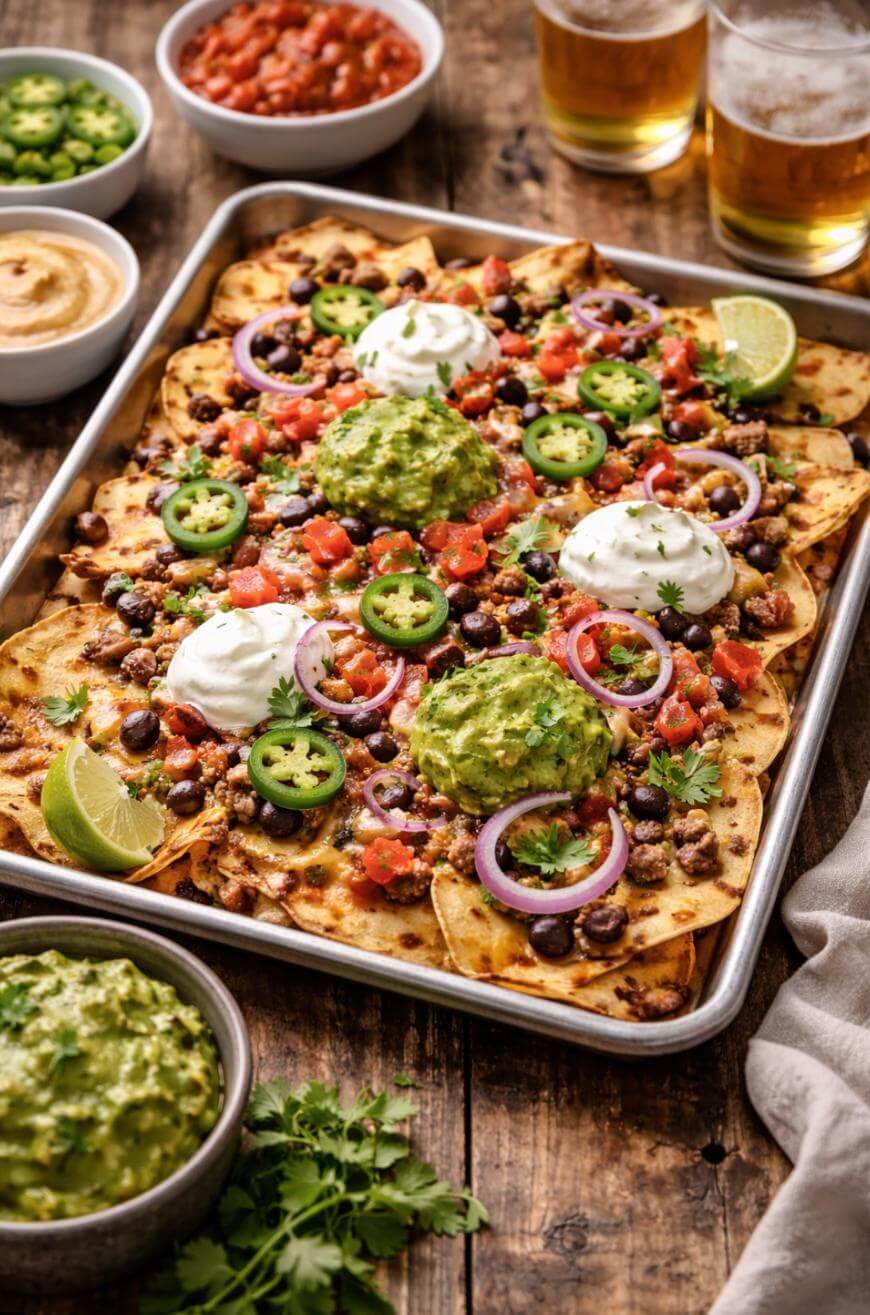
Ingredients For A Classic Tray
Chips: thick “restaurant-style” tortilla chips (about 10–12 oz)
Cheese: freshly shredded cheddar + Monterey Jack (about 3–4 cups total)
Protein: cooked ground beef, shredded chicken, chorizo, or beans (about 2–3 cups)
Beans (optional): refried beans or well-drained black beans (about 1–2 cups)
Fresh toppings: pico de gallo, sliced jalapeños, chopped cilantro, diced onion, diced tomatoes
Creamy toppings: sour cream, guacamole, crema, or plain Greek yogurt
Sauces: salsa, hot sauce, or a drizzle of queso
Extras: sliced black olives, corn, pickled onions, lime wedges
Best Sheet Pan Nachos Setup For Crispy Results
1. Choose A Rimmed Half-Sheet Pan For The Right Surface Area
A rimmed half-sheet pan (about 18 x 13 inches) gives chips room to crisp instead of steaming in a pile. You’ll get more “edge chips,” which are usually the best bites.
If your pan is smaller, split everything into two pans and bake them side by side. You’ll sacrifice height, but you’ll win on crunch.
2. Preheat The Oven And Keep The Bake Short
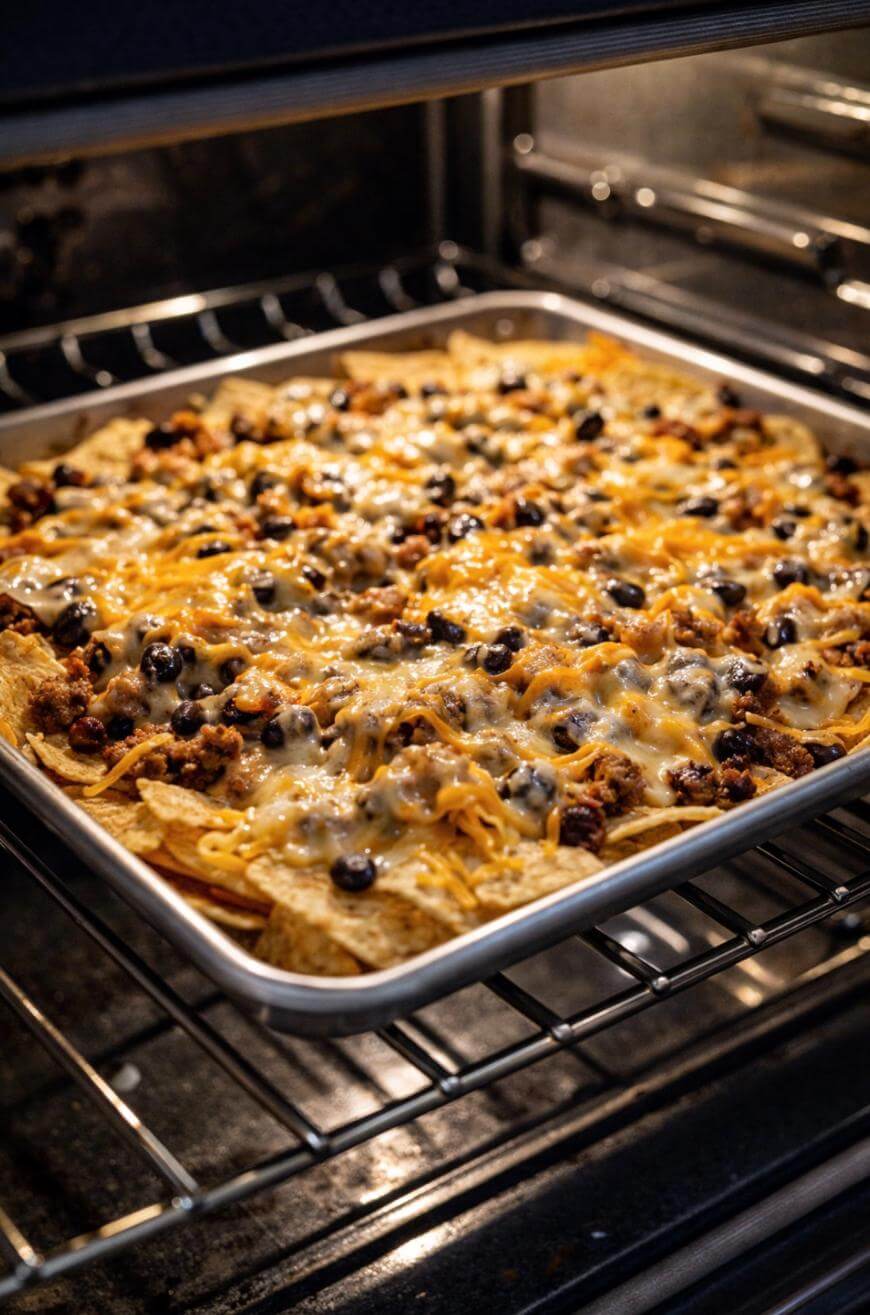
Set your oven to 425°F and aim for a quick melt, usually 6–10 minutes. The longer nachos sit in heat, the more the chips dry out and taste stale.
If you want extra color, use a brief broil at the end instead of extending the bake. A 30–90 second broil can give you golden cheese without ruining the chips.
3. Pick Thick Chips That Can Handle Heat And Weight
Thick tortilla chips hold up better under cheese and toppings, especially if you’re serving a crowd. Thin chips crack fast and turn the tray into crumbs.
A solid planning number is 4–6 oz of chips per person for dinner-style nachos. For a snack situation, 2–3 oz per person is usually enough.
4. Shred Your Own Cheese For Smooth, Even Melting
Freshly shredded cheese melts more smoothly than pre-shredded bags that often include anti-caking agents. You’ll get fewer dry patches and better “pull.”
A simple blend is 50% cheddar for flavor and 50% Monterey Jack for melt. If you like extra stretch, swap up to 25% of the blend for mozzarella or Oaxaca-style cheese.
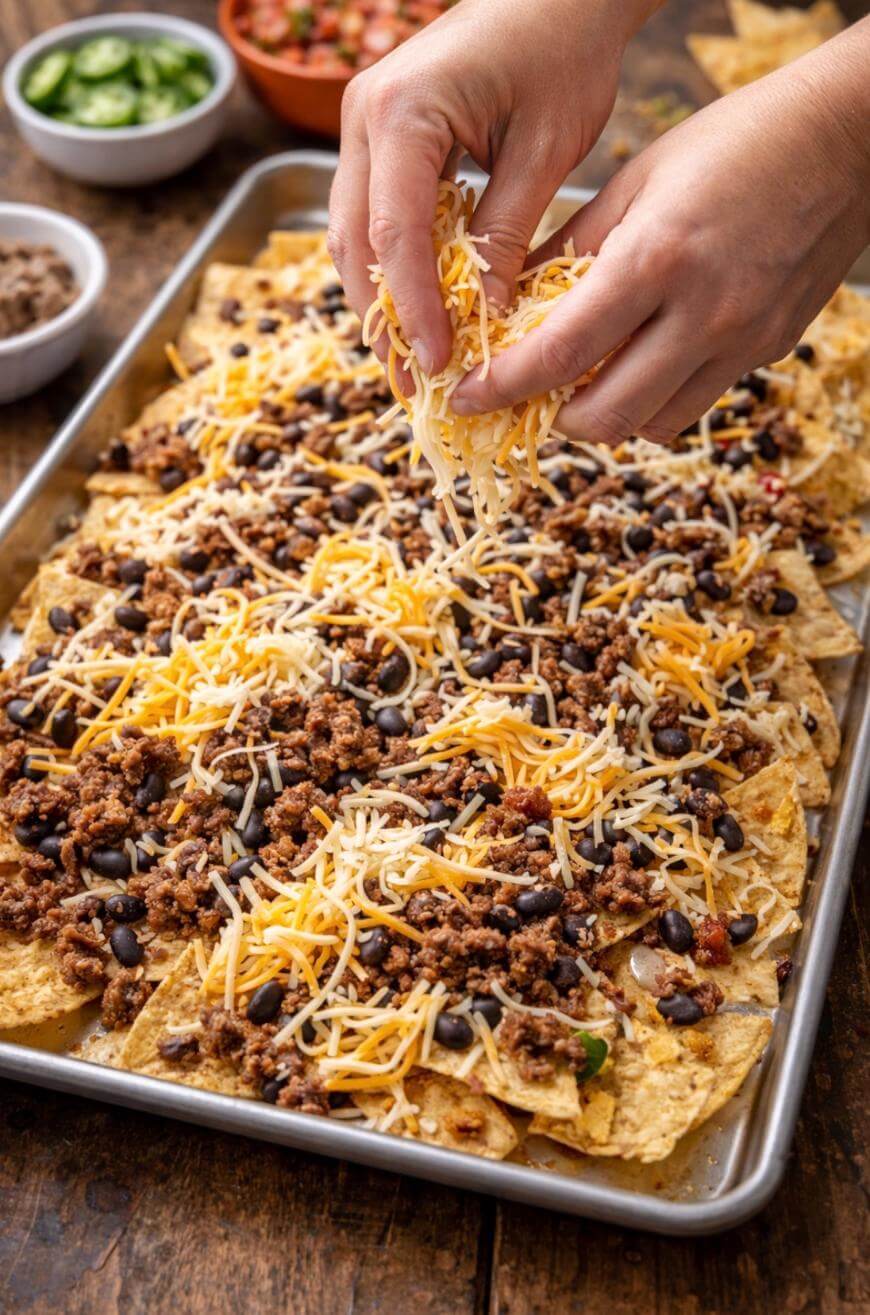
5. Use A Two-Cheese Strategy For Better Coverage
Add a light “glue layer” of cheese directly on the chips first, then add toppings, then finish with the rest of the cheese. That first layer helps toppings stick instead of sliding off.
If you only do one cheese layer on top, you’ll almost always end up with bare chips hiding underneath. Two rounds fixes that without adding more total cheese.
6. Keep Wet Ingredients Off The Hot Tray Until After Baking
Salsa, pico, and juicy tomatoes are amazing, but baking them is a fast track to sogginess. Add those right after the tray comes out so the chips stay crisp.
If you want saucy flavor baked in, use something thicker like a small drizzle of warm queso or a thin smear of refried beans. Think “light coating,” not “soak.”
7. Build Sheet Pan Nachos In Two Light Layers
A thin base layer of chips plus a second lighter layer gives you more cheesy contact and fewer buried chips. It also makes the tray feel evenly loaded instead of top-heavy.
A good check is visual: you should still see plenty of chip edges after topping. If the tray looks like a casserole, it’s going to eat like one.
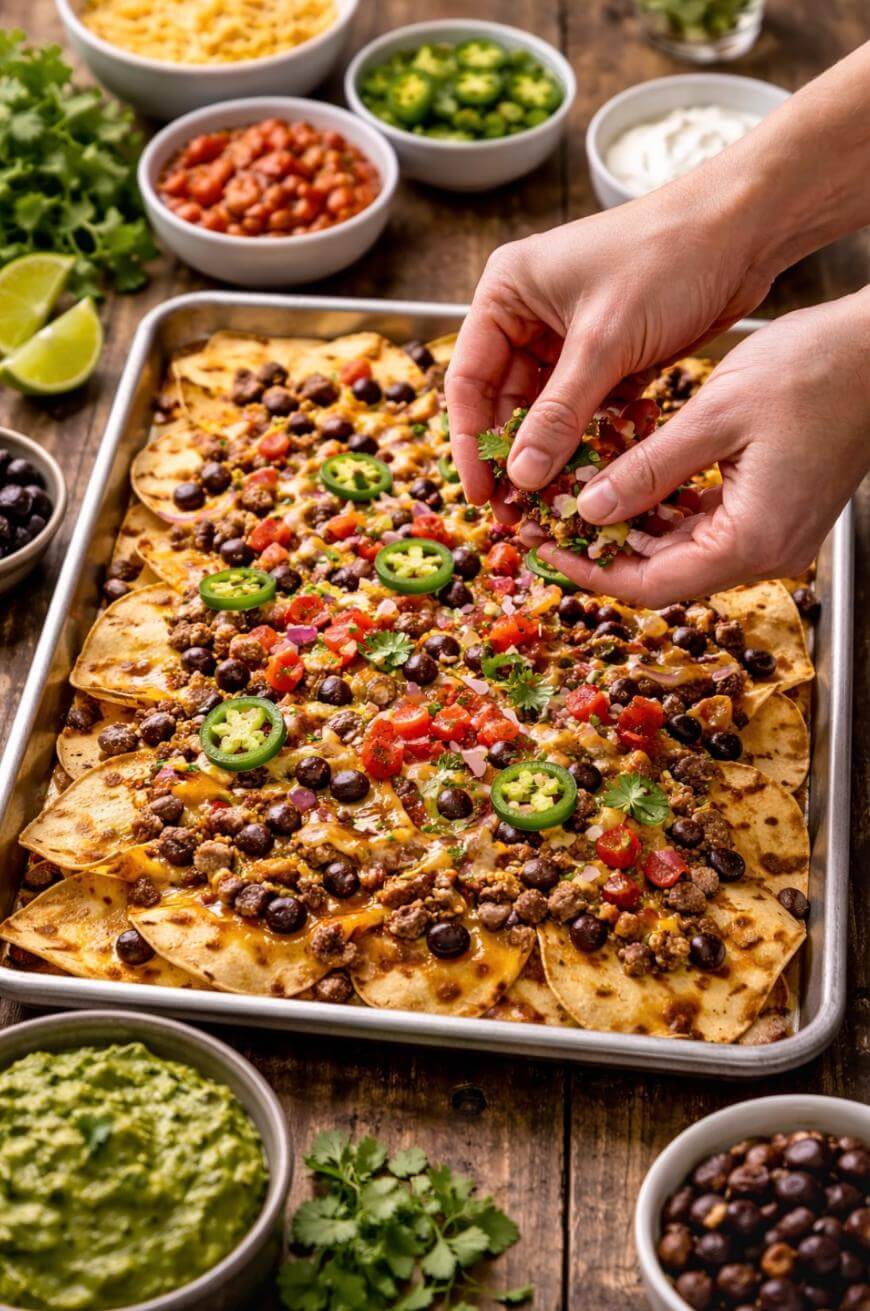
8. Warm Your Protein Before It Goes On The Pan
Nachos bake quickly, so your protein should be fully cooked and hot before it hits the tray. Cold toppings lower the tray temperature and slow melting.
If you’re using leftover chicken or pork, warm it in a skillet with 1–2 tablespoons of water or broth. That keeps it juicy without flooding the chips.
9. Season The Protein Like It’s The Main Character
Your chips and cheese are salty, so your meat needs real flavor to stand up. Use taco seasoning, cumin, smoked paprika, garlic powder, and a squeeze of lime.
If you want a simple numeric target, aim for about 1 tablespoon of seasoning blend per pound of meat. Taste it before it goes on the tray, because you won’t fix it later.
10. Use Beans That Add Creaminess Without Extra Liquid
Refried beans are a crisp-friendly choice because they stay put and add body. They also help you stretch a smaller amount of meat.
If you prefer black beans, drain them well and pat them dry. Warm them with cumin and a pinch of salt so they taste intentional, not like an afterthought.
11. Add A “Heat Layer” That Bakes Well
Pick toppings that improve when warmed, like sautéed peppers, onions, corn, or roasted jalapeños. These add flavor without releasing a ton of water.
If you’re using fresh bell peppers, sauté them for 3–5 minutes first. That quick step softens them and reduces the chance of watery puddles.
12. Scatter Toppings, Don’t Stack Them
Even distribution is what makes every bite feel fair. You want little pockets of protein and beans across the tray, not one mountain in the center.
A simple habit is to sprinkle toppings from higher up so they fall across the pan. It naturally spreads ingredients more evenly than “placing” them.

13. Create Crunch With One Toasty Add-On
A small amount of something crunchy on top can make the whole tray feel fresher. Think crushed tortilla strips, toasted pepitas, or lightly crushed corn chips.
Add crunch after baking so it stays crisp. If you bake it under melted cheese, it disappears.
14. Use Pickled Elements To Balance Richness
Pickled jalapeños, pickled onions, or a quick squeeze of lime cuts through cheese and meat. That bright acid keeps your bites from feeling heavy.
If you want an easy quick-pickle, toss sliced onions with lime juice and a pinch of salt for 10 minutes. You’ll get the vibe without needing a jar.
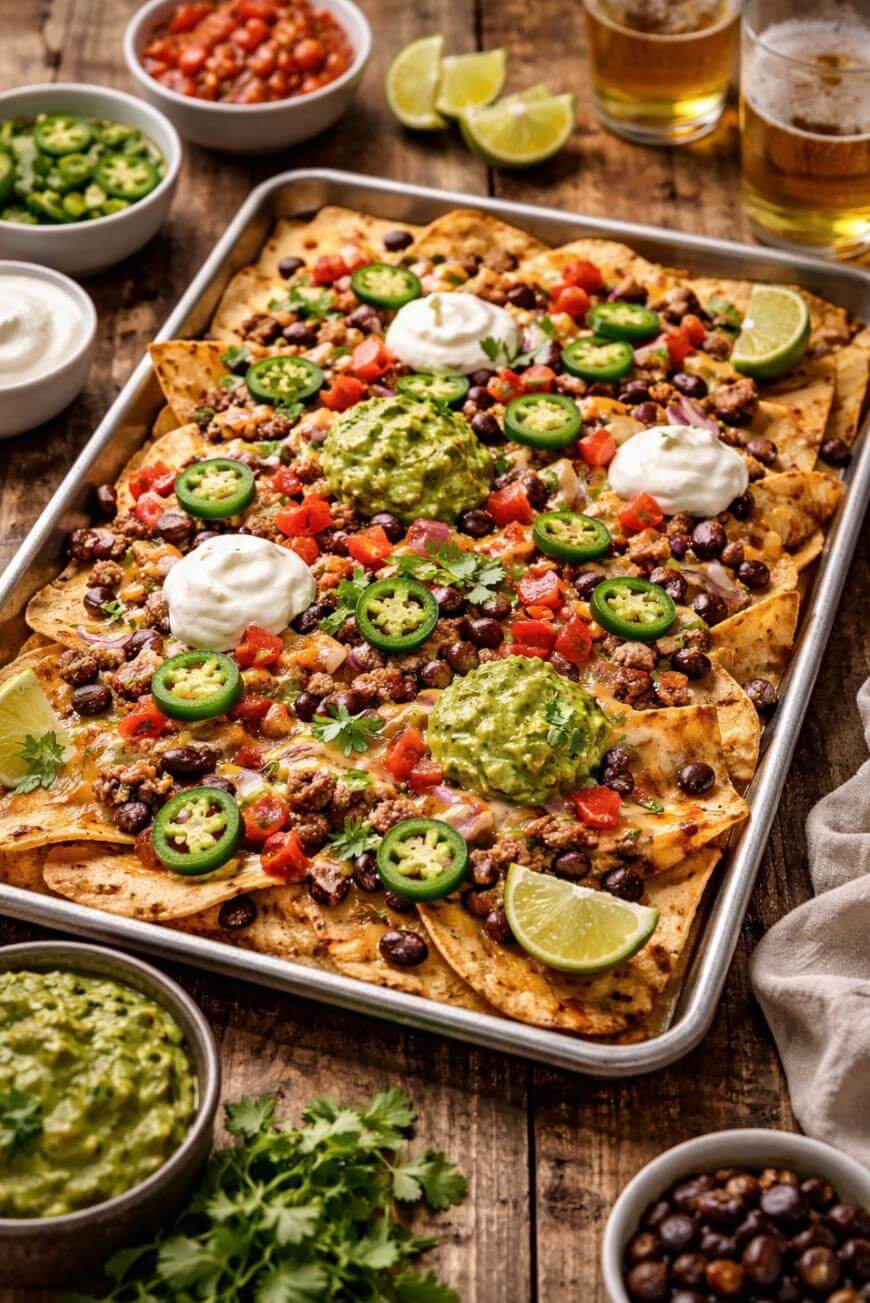
15. Add Cold Toppings In A “Finish Window” While Cheese Is Hot
The best timing is right after baking, when cheese is molten but chips are still crisp. Add pico, cilantro, and onions quickly so they slightly warm without turning wet.
Then dollop sour cream or guac in small spots instead of spreading it. Dollops keep chips crisp longer and make the tray easier to share.
16. Keep Creamy Sauces On The Side If You Want Maximum Crisp
If you know you’ll be grazing for a while, serve sour cream, salsa, and guacamole on the side. That slows sogginess and lets people customize.
This is especially helpful for parties, because the tray stays good longer. You still get bold flavor, just with better texture.
17. Make A Queso Drizzle Instead Of A Queso Flood
Queso is amazing, but too much liquid is the enemy of crunch. Drizzle lightly in ribbons so you get flavor without turning the bottom layer soft.
A practical number is 1/4 to 1/2 cup of warm queso per half-sheet pan. You can always add more at the table.
18. Use A “Cheese Barrier” For Delicate Toppings
If you love ingredients that release moisture, like tomatoes or pineapple, put them on top of a thick cheese layer. The cheese acts as a buffer between wet toppings and chips.
You’ll still want to keep the wettest elements for after baking. The barrier is helpful, but it’s not magic.
19. Make It Vegetarian Without Making It Boring
Use a mix of refried beans plus seasoned black beans for body and flavor. Add sautéed mushrooms or roasted sweet potato cubes for a satisfying bite.
For seasoning, treat vegetables the same way you treat meat. You’ll get better results if you cook and season them in a skillet before they hit the tray.
20. Turn It Into A “Fajita Tray” With Peppers And Steak
Slice cooked steak thin and toss it with sautéed peppers and onions. Then scatter it lightly so it doesn’t crush the chips.
If you’re budgeting, you can use 8–10 oz of steak and still make a full tray feel generous. The trick is slicing thin and distributing widely.
21. Build A Breakfast Version That Still Bakes Fast
Use breakfast sausage or crumbled bacon, then add cheese and bake. Finish with sliced avocado, salsa, and a few dollops of sour cream.
If you want eggs, scramble them separately and add them after baking. Eggs can overcook fast in the oven and make the tray feel dry.
22. Make A “Buffalo Chicken” Variation With Less Moisture
Use shredded chicken tossed with a small amount of buffalo sauce, then add cheese and bake. Finish with ranch or blue cheese in dollops, plus green onions.
Keep the sauce amount modest, because buffalo sauce is thin. A good starting point is 2–3 tablespoons of sauce per cup of chicken.
23. Fix Soggy Nachos With A Simple Re-Crisp Move
If the tray sits too long, you can re-crisp it in a 400°F oven for 3–5 minutes. It won’t be perfect, but it can recover texture.
Pull off very wet toppings first, like pico or guac, then re-add them after reheating. That single move prevents a steam cycle.
24. Portion Like A Pro So Everyone Gets The Good Bites
For sharing, cut the tray into sections in your mind and top each zone evenly. That prevents the “one loaded corner” problem.
If you’re feeding 4 people, aim for 4 clear zones of protein and toppings across the pan. People naturally take from the section closest to them, so even coverage matters.
What To Buy And How Much It Typically Costs
A basic tray is one of the easiest dinner shortcuts when you want something big and satisfying without spending much. For many households, a full half-sheet pan can land around $12–$25 total depending on your protein choice and whether you already have toppings.
If you want a clear shopping target, plan roughly $3–$6 for chips and cheese, then $6–$15 for protein and fresh toppings. Going heavier on beans and veggies can keep the tray closer to the lower end.
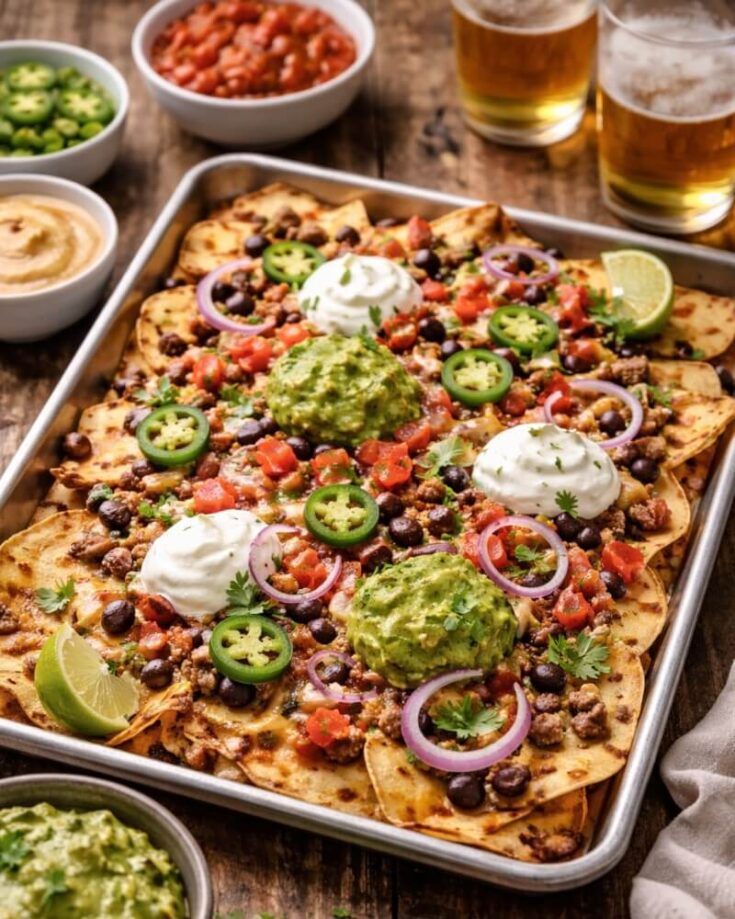
Sheet Pan Nachos That Stay Crispy
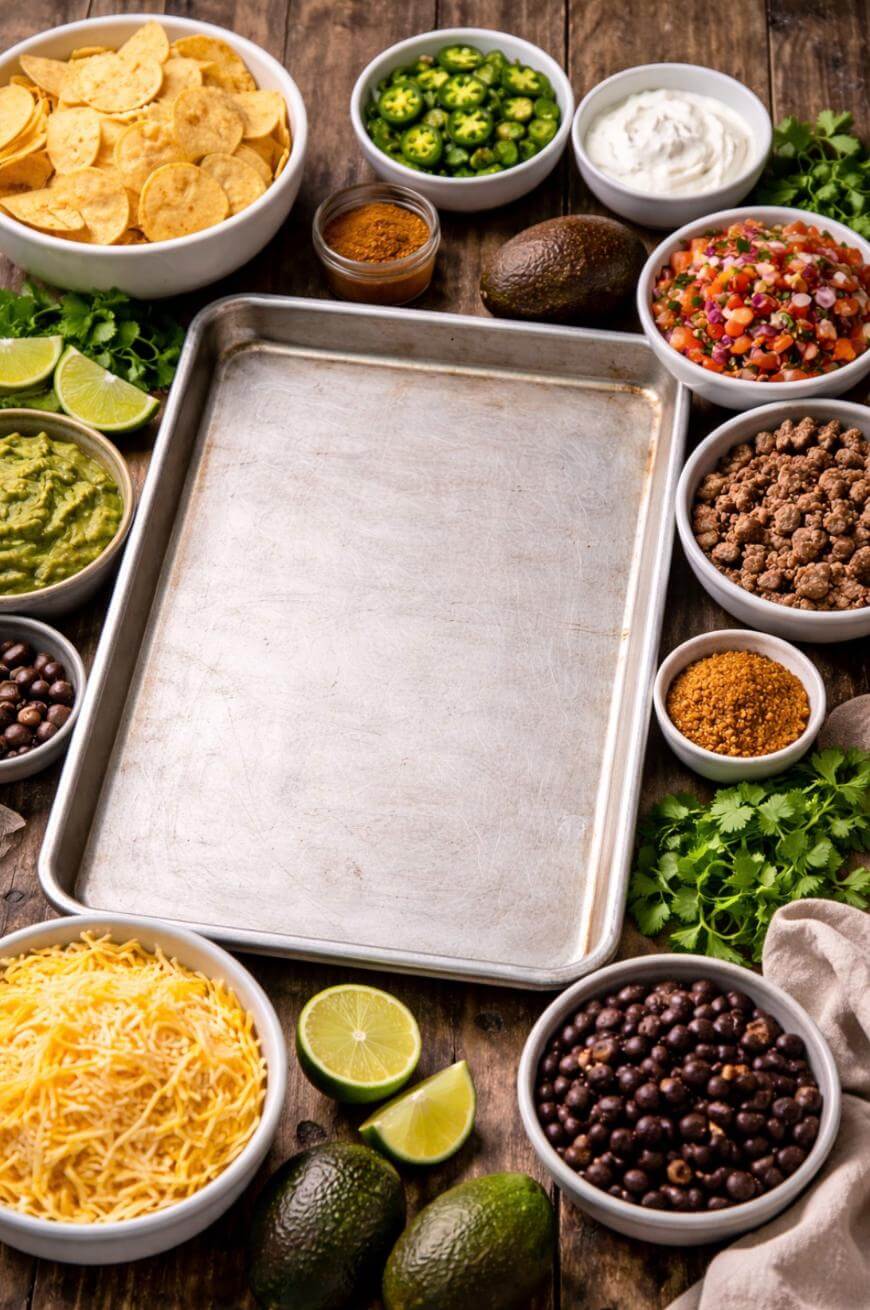
A big, shareable tray of sheet pan nachos with layered chips, melted cheese, and your favorite toppings, baked hot and fast so every chip stays crispy.
Ingredients
- 10 to 12 oz thick restaurant-style tortilla chips
- 3 to 4 cups freshly shredded cheddar and Monterey Jack cheese
- 2 to 3 cups cooked ground beef, shredded chicken, chorizo, or beans
- 1 to 2 cups refried beans or drained black beans (optional)
- 1/2 cup pico de gallo
- 1 jalapeño, sliced
- 1/4 cup chopped cilantro
- 1/4 cup diced onion
- 1/2 cup diced tomatoes
- 1/2 cup sour cream or guacamole
- Salsa or hot sauce, for serving
- Lime wedges, for serving
Instructions
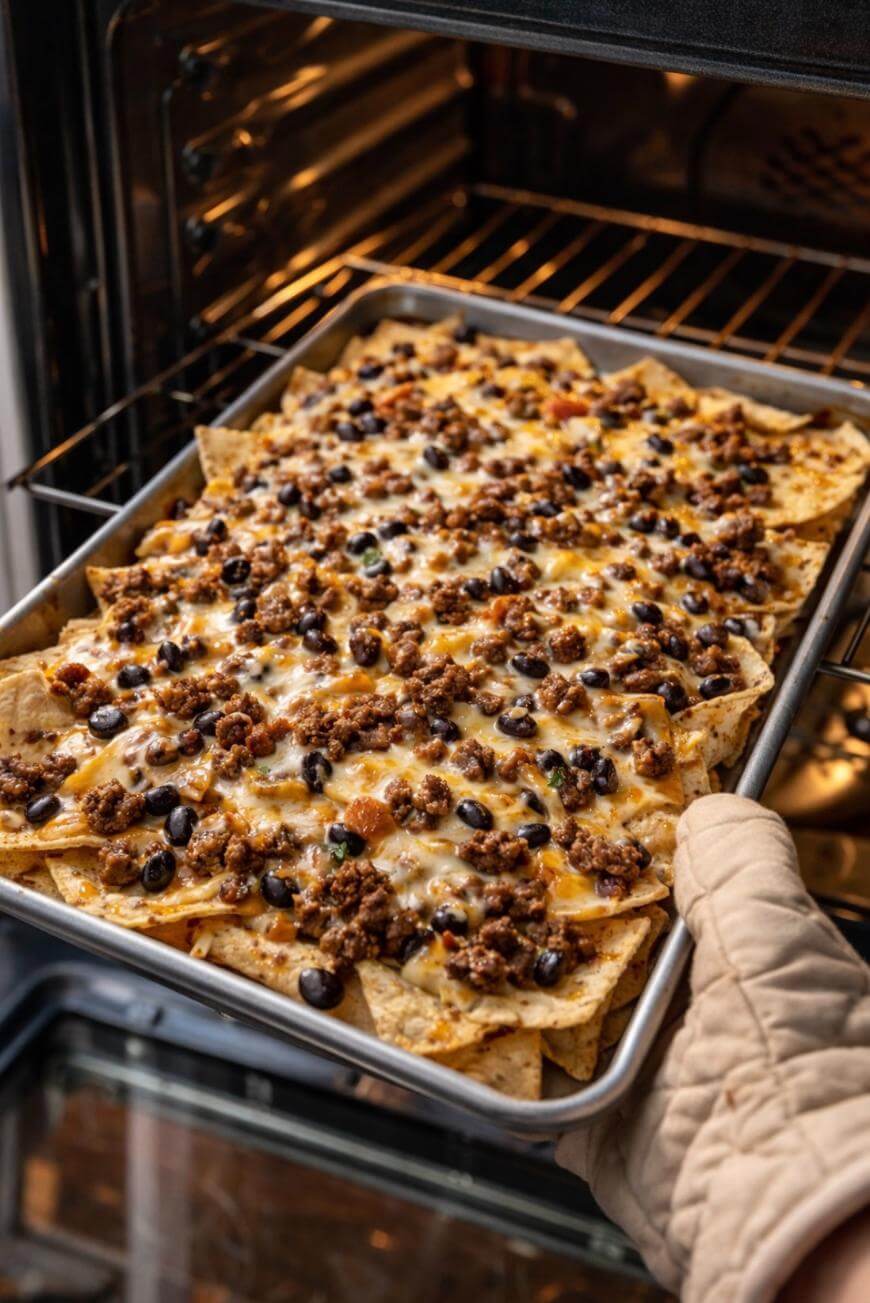
- Preheat the oven to 425°F and line a rimmed half-sheet pan with parchment or foil.
- Spread the tortilla chips in a single, slightly overlapping layer across the pan.
- Sprinkle the shredded cheese evenly over the chips, followed by the cooked protein and beans, if using.
- Bake for 6 to 10 minutes, until the cheese is fully melted.
- For extra color, broil for 30 to 90 seconds at the end, watching closely so the chips don't burn.
- Remove from the oven and immediately top with pico de gallo, jalapeño, cilantro, onion, and tomatoes.
- Finish with dollops of sour cream or guacamole, a drizzle of salsa or hot sauce, and lime wedges. Serve immediately.
Notes
Swap in different proteins or go vegetarian with extra beans and veggies. Add fresh toppings only after baking so they stay cold and crisp.
Nutrition Information:
Yield:
8Serving Size:
1 servingAmount Per Serving: Calories: 420Total Fat: 26gSaturated Fat: 11gTrans Fat: 1gUnsaturated Fat: 8gCholesterol: 65mgSodium: 780mgCarbohydrates: 30gFiber: 3gSugar: 3gProtein: 22g
This site provides estimated nutritional information. This information comes from online calculators. Although we try to provide accurate nutritional information, these figures are only estimates.
Key Takeaways
Use thick chips and a roomy pan for crunch.
Bake hot and fast at 425°F for 6–10 minutes.
Add wet toppings after baking to avoid sogginess.
Layer cheese twice so more chips get coverage.
Keep sauces as dollops or on the side for longer-lasting texture.
Season your protein boldly so the tray tastes intentional.
FAQ
Can You Make The Tray Ahead Of Time?
Yes, but you should prep components instead of assembling early. You’ll get the best results by pre-cooking protein, shredding cheese, and chopping toppings, then assembling right before baking.
What If You Only Have Pre-Shredded Cheese?
You can use it, but expect a slightly less smooth melt. You’ll improve results by mixing in at least 25% freshly shredded cheese if you can.
How Do You Keep Leftovers From Getting Sad?
Store chips and cold toppings separately if possible. If it’s already assembled, reheat at 400°F for 3–5 minutes and add fresh toppings after.
What’s The Best Protein If You’re On A Budget?
Beans plus a smaller amount of seasoned meat is usually the cheapest way to keep it filling. You can also use shredded rotisserie chicken and stretch it with refried beans.
Why This Method Works
You’re managing moisture and heat so chips stay crisp while cheese melts quickly. When you keep wet toppings for the end and bake hot and fast, you get the classic contrast of crunchy chips, gooey cheese, and fresh, cold finishes.