Last updated: October 23, 2026
This graham cracker crust recipe takes three pantry ingredients and about 20 minutes of hands-on time, and it bakes up crisp, buttery, and sturdy enough to hold any pie or cheesecake filling.

Scroll down for the full walkthrough, or jump to the recipe card below for the exact measurements.
Graham Cracker Crust Recipe Ingredients
The classic graham cracker crust recipe needs only three ingredients: 1 1/2 cups of graham cracker crumbs, 1/4 cup of granulated sugar, and 6 tablespoons of melted unsalted butter.
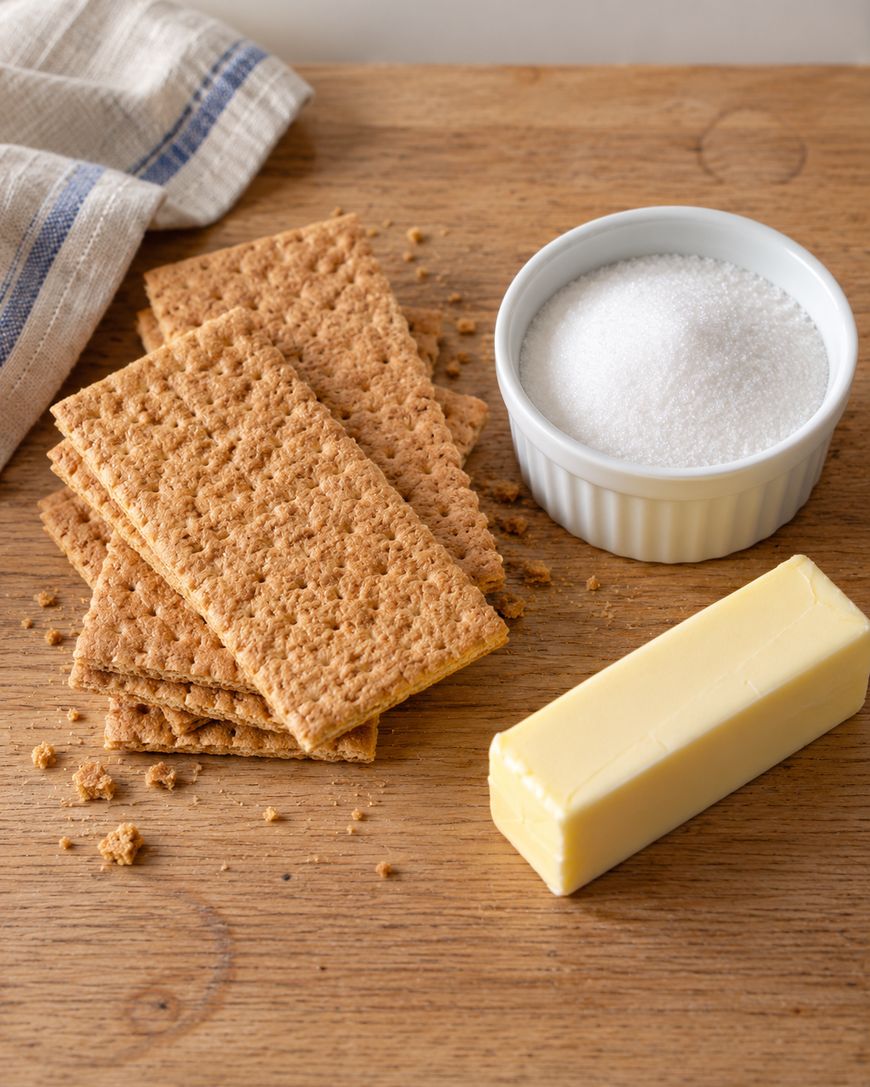
That ratio fills one 9-inch pie plate and gives you a crust that is firm without turning hard.
Each ingredient has a specific job, so it helps to know what to buy and how to measure it.
Graham Cracker Crumbs
You need about 10 full sheets of graham crackers, which is roughly 150 grams, to make 1 1/2 cups of fine crumbs.
Honey Maid is the most common brand in US grocery stores, and any plain or honey graham cracker works the same way.
Measure the crumbs after crushing rather than counting sheets, since brands and sheet sizes vary. Pack them lightly into the measuring cup and level the top with a knife.
Butter
Six tablespoons of melted unsalted butter is the amount that binds the crumbs without making the crust greasy. Unsalted butter lets you control the salt, because graham crackers already contain some.
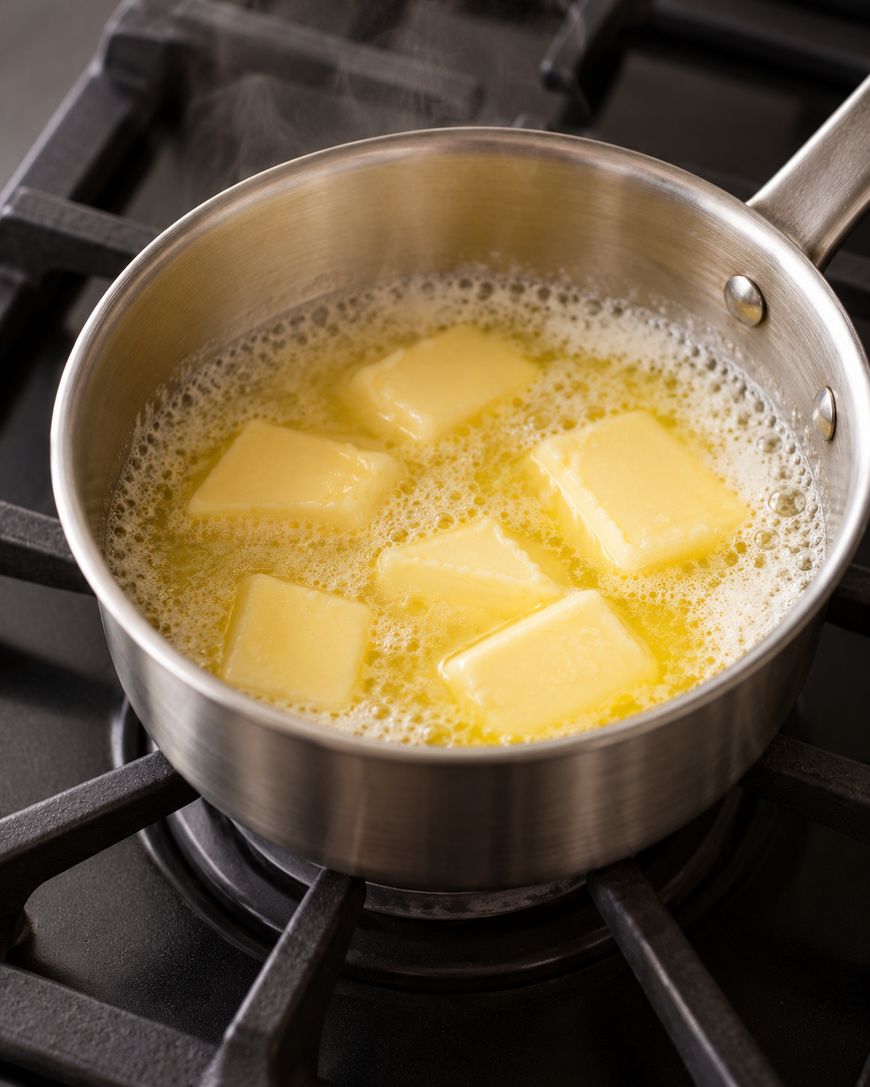
Let the melted butter cool for a minute so it is warm rather than hot, which helps it coat the crumbs evenly.
Sugar
A quarter cup of granulated sugar sweetens the crust and helps the crumbs set into a firm shell as they bake. Light brown sugar works as a one to one swap if you want a slightly deeper, molasses flavor.
This crust uses no added salt, since the crackers already carry some.
How to Make a Graham Cracker Crust Step by Step
To make a graham cracker crust, crush the crackers into fine crumbs, stir them with the sugar and melted butter, press the mixture into a 9-inch pie plate, and bake at 350°F for 8 to 10 minutes.

Heat the oven to 350°F before you start, then let the crust cool completely before you add any filling.
Each stage is simple, but small details decide whether the crust slices cleanly or crumbles.
Crush the Crackers into Fine Crumbs
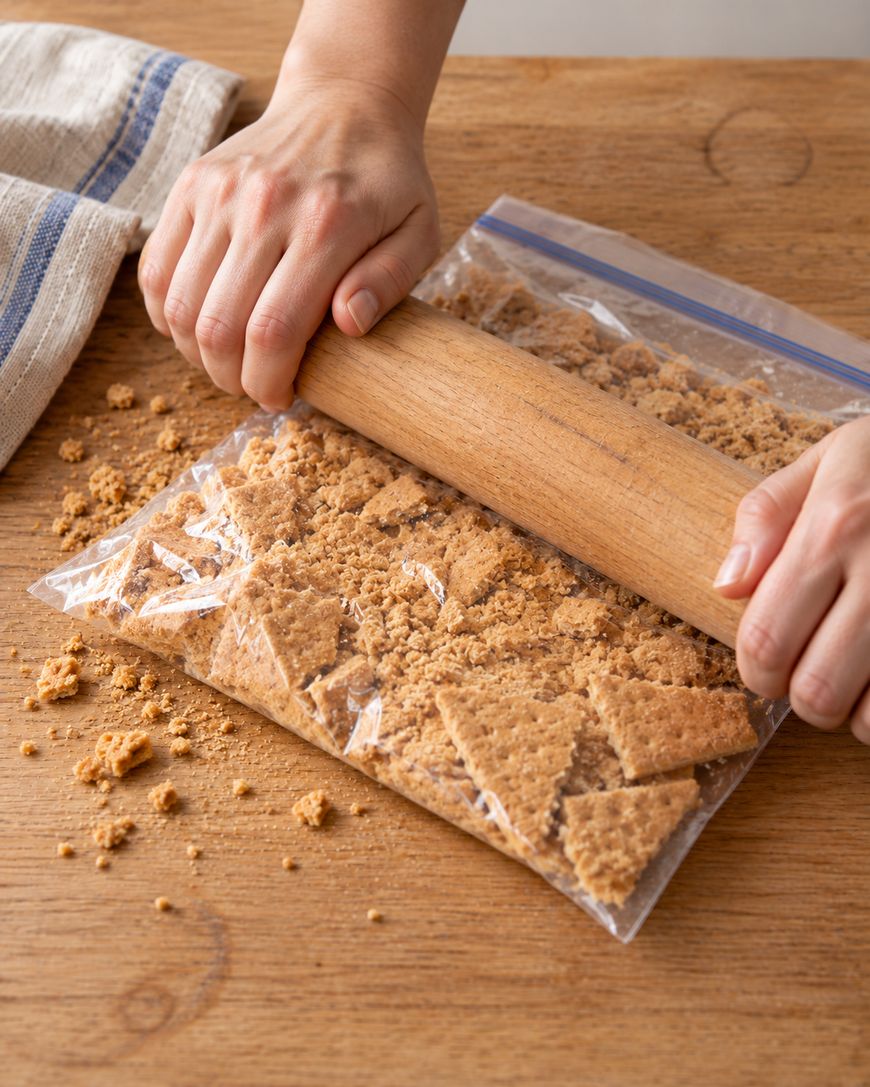
Break the sheets into pieces and pulse them in a food processor for about 15 seconds, until the crumbs look like fine sand. If you do not own a food processor, seal the crackers in a zip-top bag and crush them with a rolling pin.
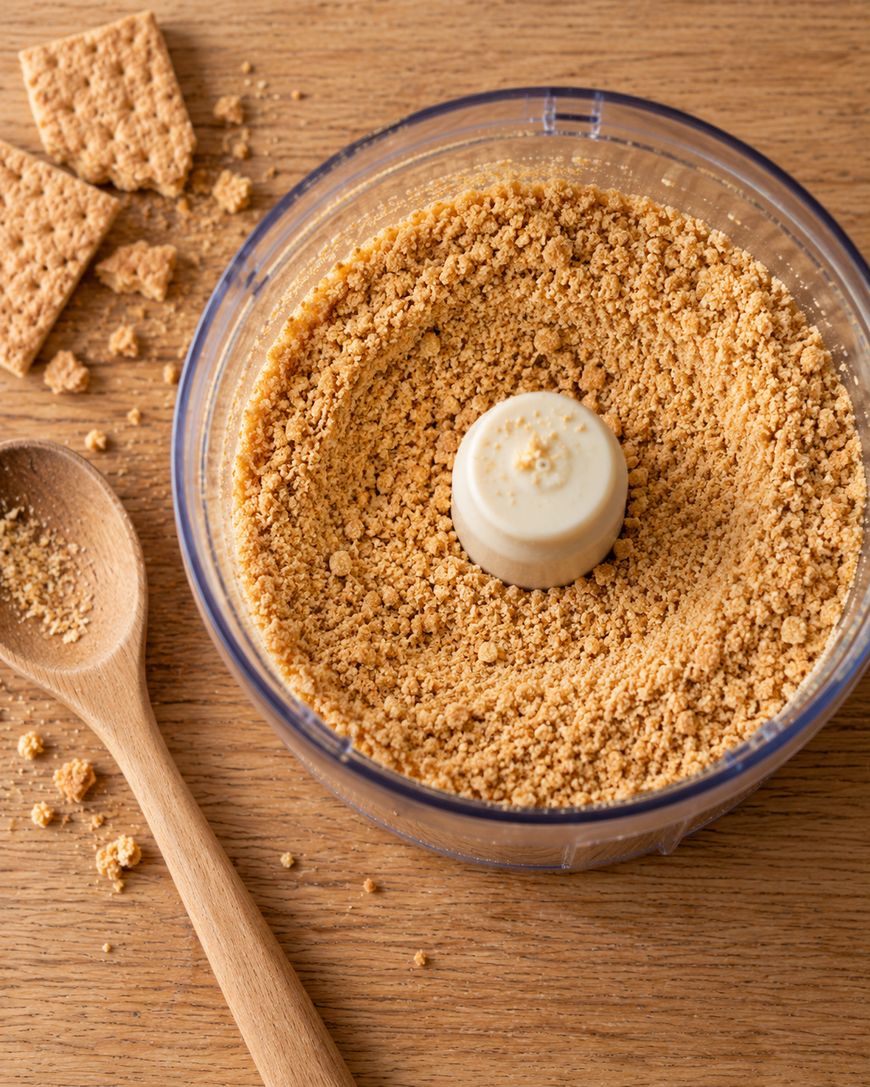
Fine crumbs matter because large chunks leave gaps, and gaps are where a crust breaks apart when you cut it. Re-crush any big pieces before you measure.
Mix the Crumbs with Butter and Sugar
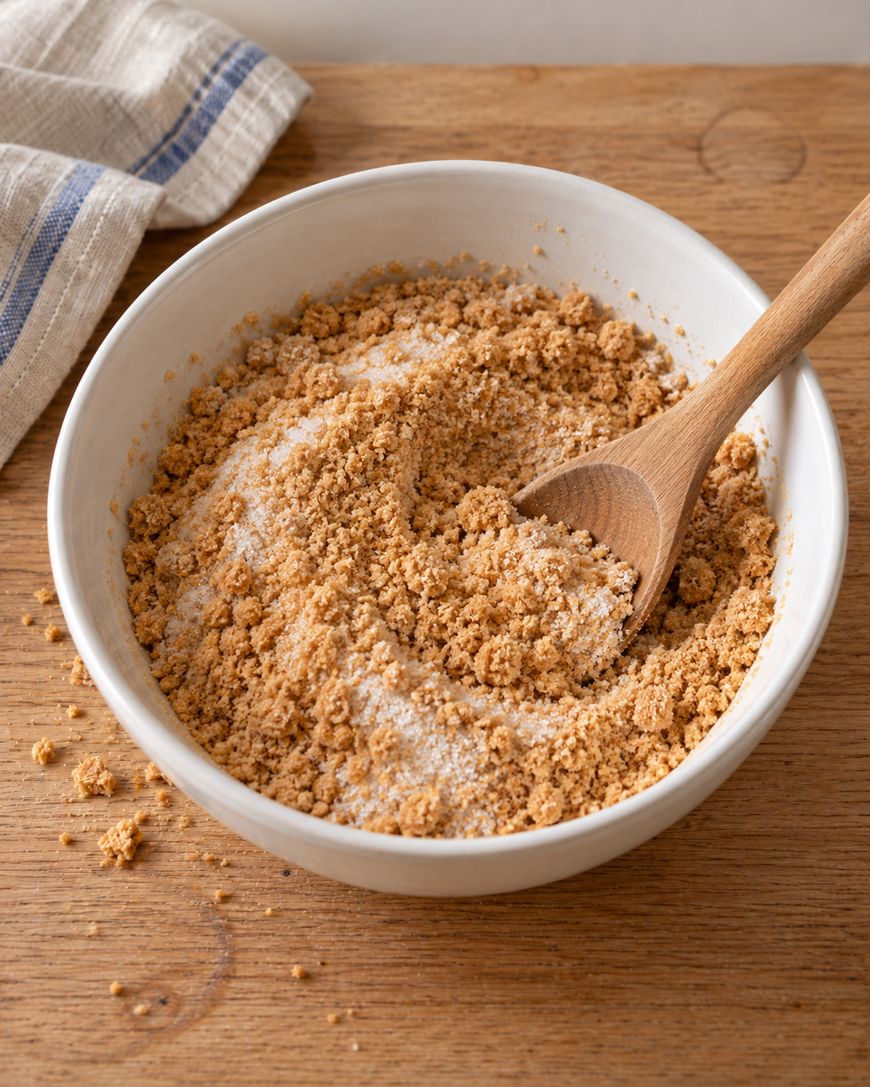
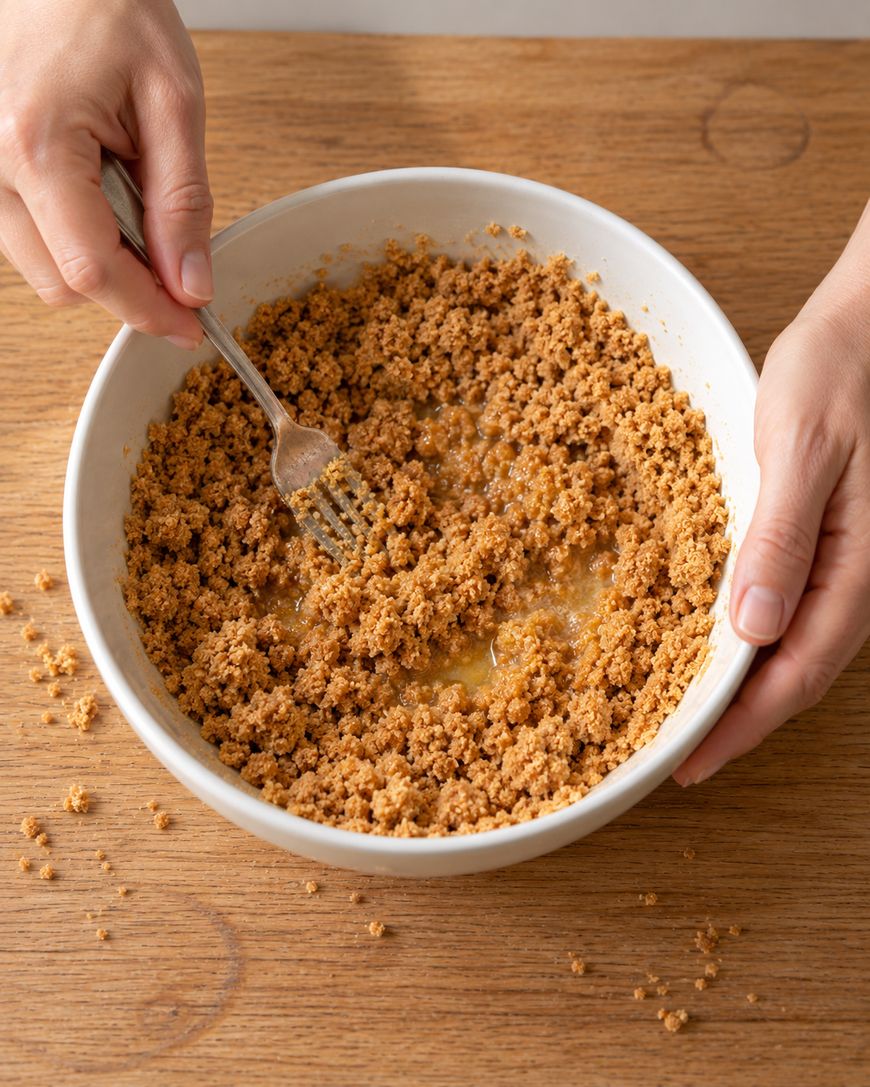
Stir the 1 1/2 cups of crumbs and the 1/4 cup of sugar together in a medium bowl. Pour in the 6 tablespoons of warm melted butter and stir with a fork until every crumb looks damp.
The mixture should feel like wet sand and hold together when you squeeze a handful. If it falls apart, stir a little longer, since the butter needs time to spread.
Press the Crust into the Pan
Tip the crumbs into a 9-inch pie plate and spread them evenly across the bottom and up the sides. Press down firmly with the flat bottom of a dry measuring cup, then use the edge of the cup to pack the corner where the bottom meets the side.
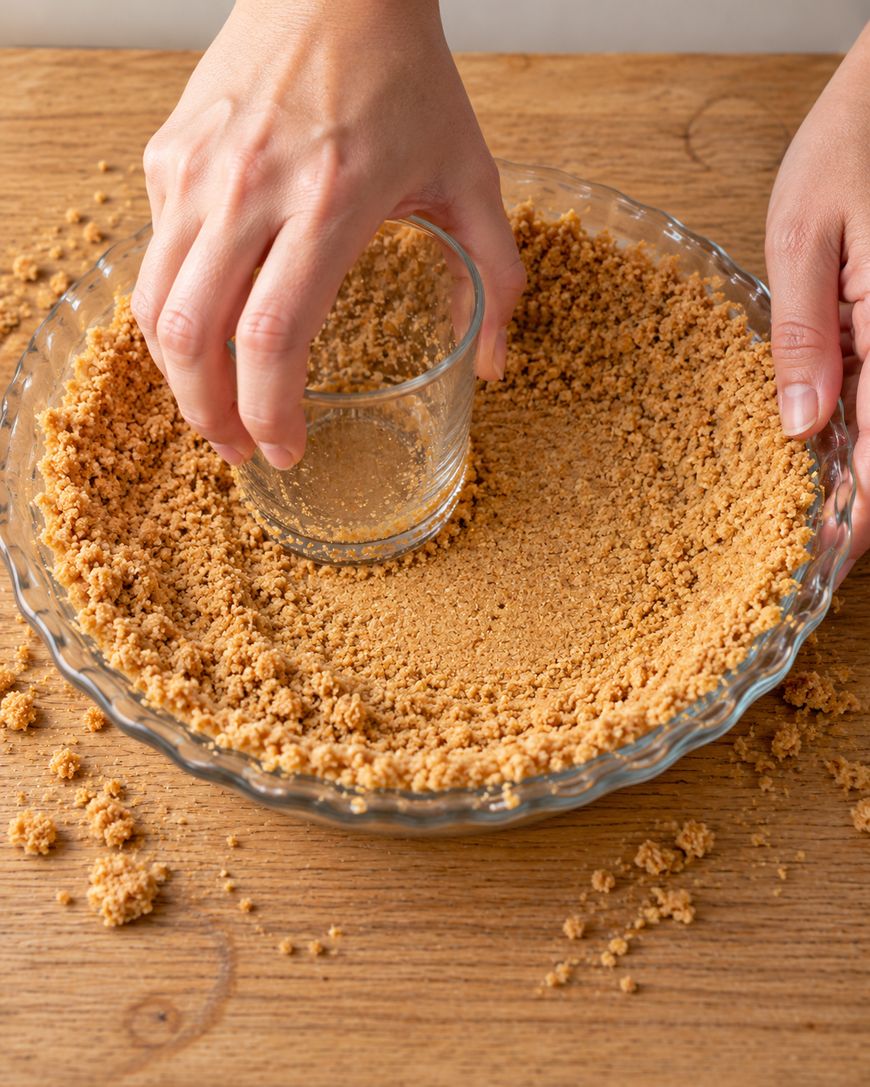
Aim for an even layer about 1/4 inch thick, with the top edge level with the rim of the plate. Thin spots crack, and thick spots turn hard.
Bake and Cool the Crust
Bake the crust at 350°F for 8 to 10 minutes, until it smells toasty and the edges look a shade darker. Set the pie plate on a wire rack as soon as it comes out of the oven.
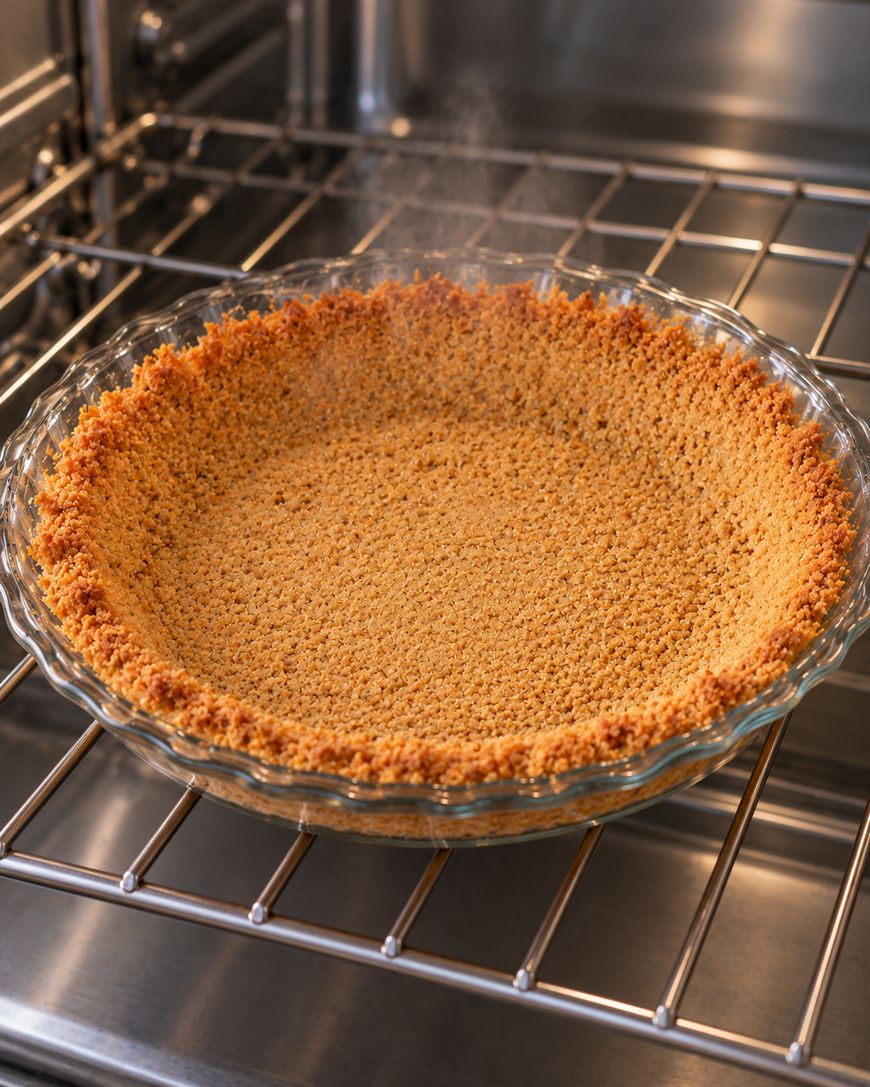
Let the crust cool for at least 30 minutes before filling. A warm crust is soft, and it will not hold its shape until the butter firms back up.
How to Make a No Bake Graham Cracker Crust
For a no bake graham cracker crust, follow the same steps through pressing, then chill the crust in the refrigerator for at least 1 hour until the butter is firm.
Skip the oven entirely when you are making a chilled filling like a no bake cheesecake or an icebox pie.
A no bake crust is a little softer and more crumbly than a baked one. Baking sets the sugar and butter together, so choose the baked version for sturdy wedges or for fillings that go into the oven.
A no bake crust works best with fillings that set firm in the refrigerator, such as cream cheese and whipped topping mixtures. Skip it for fillings that bake, since a chilled crust has less structure once the oven heats the butter.
The no bake route also saves time in summer, when you would rather not turn on the oven.
Press the crumbs a little harder than usual to make up for the lack of baking, and give the crust the full hour in the refrigerator before you fill it.
Pan Sizes and How to Scale This Graham Cracker Crust Recipe
The card makes one crust for a standard 9-inch pie plate. Glass, metal, and ceramic plates all work, though glass lets you check the bottom for browning.
For a 9-inch springform pan or a deep dish pie plate, use 2 cups of crumbs, 1/3 cup of sugar, and 8 tablespoons of melted butter. Press the mixture across the bottom and about 1 1/2 inches up the sides of a springform pan.
That is one and a third times the pie crust amounts, which gives the taller sides of a cheesecake the support they need. Bake it for 8 to 10 minutes at 350°F, then cool it completely before filling.
Whichever pan you choose, press the crumbs until the layer is even and the top edge sits level with the rim. An uneven edge is the first place a crust cracks.
To make two pie crusts at once, simply double every ingredient and press each crust into its own plate. Bake them side by side on the same oven rack.
Tips for a Graham Cracker Crust That Slices Clean
Most crust problems come down to three things: how tightly the crumbs are packed, whether the crust was baked, and how long it cooled. Get those right and the crust releases from the pan in tidy wedges.
Pack the Crumbs Tightly
Pressing firmly with a flat-bottomed measuring cup compacts the crumbs so the butter can bind them. Loose crumbs fall away from the slice, so spend a full minute pressing and smoothing.
Cool It Completely
A crust that goes into the fridge or gets filled while still warm turns soft and slumps against the pan. Thirty minutes on a wire rack is the minimum.

Cut with a Warm Knife
Once the pie has chilled and set, dip a sharp knife in hot water and wipe it dry before each cut. The warm blade glides through the crust instead of crushing it.
Graham Cracker Crust Recipe Variations
Each variation below is optional, and the card leaves them out so the base recipe stays simple.
For a cinnamon graham cracker crust, stir 1/2 teaspoon of ground cinnamon into the crumbs before adding the butter. It pairs especially well with apple and pumpkin fillings.
For a chocolate crust, swap chocolate graham crackers for the plain ones in the same amount. Gingersnaps and Biscoff cookies also work in equal amounts, though you can cut the sugar to 2 tablespoons because those cookies are sweeter.
If you want a spiced fall crust, combine the cinnamon with a pinch of ground nutmeg. It tastes wonderful under pumpkin chiffon and apple cheesecake.
Gluten free graham style crackers swap in one to one as well. Weigh them or pack the crumbs well, since gluten free brands can crush a little lighter.
Whatever you choose, keep the butter at 6 tablespoons for every 1 1/2 cups of crumbs so the crust still binds.
What to Fill Your Graham Cracker Crust With
A graham cracker crust is the classic base for Key lime pie, lemon icebox pie, banana cream pie, and no bake cheesecake. Chilled fillings like pudding, whipped cream pies, and icebox desserts go straight into the cooled crust.
For baked fillings such as cheesecake or pumpkin pie, pour the filling into the cooled, prebaked crust and bake it according to that recipe.
Key lime pie is the most famous example, with a tart, creamy filling of condensed milk and lime juice sitting in a buttery graham crust. Lemon icebox pie follows the same idea with a softer, sweeter lemon filling.
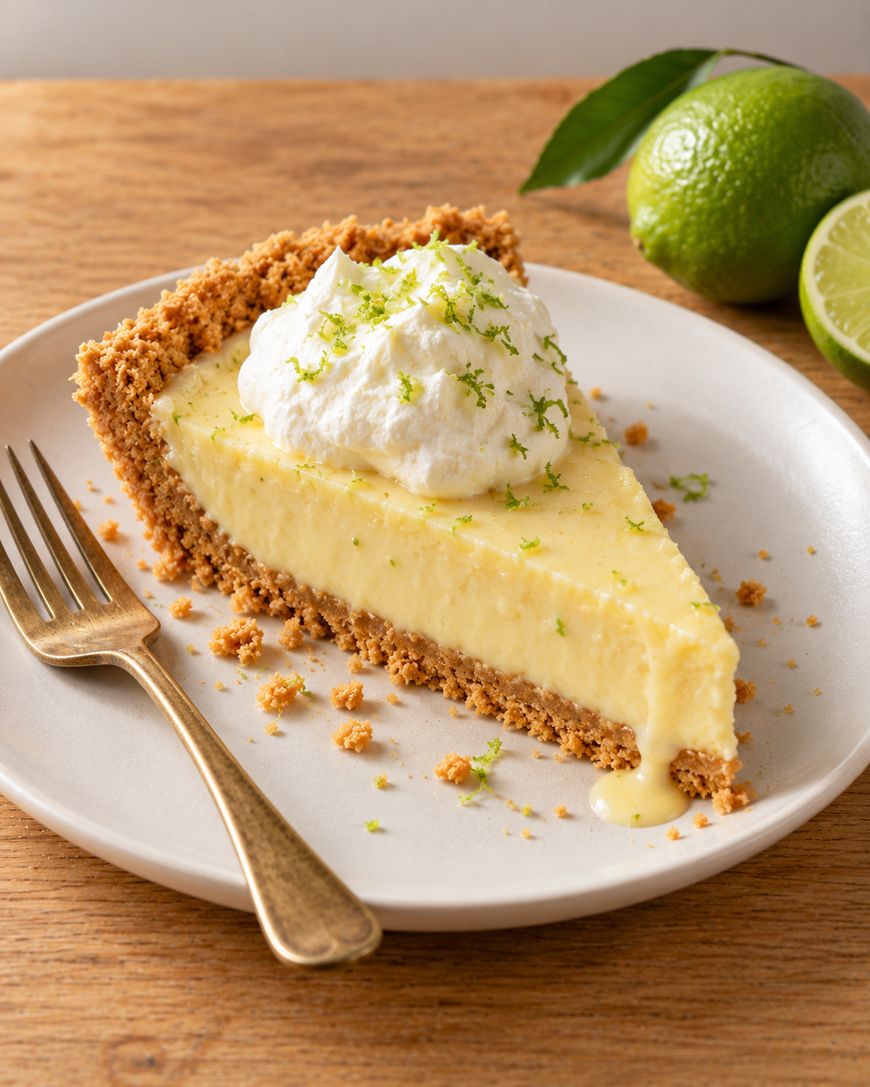
No bake cheesecake and layered pudding pies are the easiest place to start, since nothing needs to go in the oven after the crust.
The mild, honey-sweet flavor of the crust balances tart citrus and rich cream cheese especially well, which is why it shows up under so many classic desserts.
How to Store and Freeze Graham Cracker Crust
Store a baked and cooled crust, covered tightly in its pan, at room temperature for up to 2 days or in the refrigerator for up to 5 days. Making it a day ahead takes pressure off party day, and a fully cool crust is easier to fill without tearing the edges.
Keep the crust in the pan it was pressed into, and cover it with plastic wrap or foil so it does not pick up refrigerator odors. A crust that smells like last night’s leftovers is a sad base for a pie.
To freeze, wrap the baked and cooled crust tightly in plastic wrap and foil and freeze it for up to 3 months. Thaw it on the counter for about 1 hour before filling.
Never fill a frozen crust, since the filling will weep as the crumbs thaw.
Where Graham Cracker Crust Comes From
Graham crackers take their name from Sylvester Graham, a 19th century Presbyterian minister and diet reformer who promoted whole wheat flour. The cracker is generally traced back to the 1820s and 1830s.
The crumb crust is a much later American home kitchen shortcut, and it became a fixture of icebox pies and cheesecakes in the 20th century.
It stuck around because it needs no rolling pin, no chilled dough, and no pastry skill. That makes it one of the friendliest ways for a beginner baker to make a dessert look finished.
The same technique of crushing a dry cookie or cracker and binding it with butter now covers everything from Oreo crusts to Biscoff bases. That flexibility is why a single reliable ratio is worth memorizing.
Ready to bake? Use the recipe card below for the exact measurements and the full list of steps.
Graham Cracker Crust
A three ingredient graham cracker crust that bakes up crisp, buttery, and sturdy enough for any pie or cheesecake.
Ingredients
- 1 1/2 cups graham cracker crumbs (about 10 full sheets, 150 g)
- 1/4 cup granulated sugar
- 6 tablespoons unsalted butter, melted
Instructions
- Heat the oven to 350°F.
- Crush the graham crackers into fine crumbs in a food processor, or in a zip-top bag with a rolling pin, until you have 1 1/2 cups.
- Stir the crumbs and sugar together in a medium bowl.
- Pour in the warm melted butter and stir with a fork until the crumbs look like wet sand and hold together when squeezed.
- Tip the crumbs into a 9-inch pie plate and press firmly across the bottom and up the sides with the flat bottom of a dry measuring cup, making an even layer about 1/4 inch thick.
- Bake for 8 to 10 minutes, until fragrant and the edges look slightly darker.
- Cool completely on a wire rack, at least 30 minutes, before filling.
Notes
For a no bake crust, skip the oven and chill the pressed crust for at least 1 hour. For a 9-inch springform pan or deep dish pie plate, use 2 cups crumbs, 1/3 cup sugar, and 8 tablespoons melted butter. A baked and cooled crust keeps covered for up to 2 days at room temperature or up to 5 days in the refrigerator. Freeze the baked and cooled crust wrapped tightly for up to 3 months and thaw about 1 hour before filling.
Nutrition Information:
Yield:
8Serving Size:
1 sliceAmount Per Serving: Calories: 180Total Fat: 10gSaturated Fat: 6gSodium: 130mgCarbohydrates: 21gFiber: 1gSugar: 11gProtein: 1g
Graham Cracker Crust Recipe FAQs
Why Is My Graham Cracker Crust Crumbly?
A crumbly crust usually means the crumbs were too coarse, the butter was under-measured, or the crust was not pressed firmly enough. Use exactly 6 tablespoons of melted butter and press hard with a flat-bottomed measuring cup.
Do You Have to Bake a Graham Cracker Crust?
No, you can chill it for at least 1 hour instead. Baking for 8 to 10 minutes at 350°F makes a sturdier crust that slices more cleanly, so bake it when you can.
Can You Use Store-Bought Graham Cracker Crumbs?
Yes, measure 1 1/2 cups of packaged crumbs and use them exactly like freshly crushed ones. Check that they are fine and dry, since stale or coarse crumbs bind less well.
How Do You Get the Crust Out of the Pan in One Piece?
Most pies are served right from the pie plate, so the crust never needs to come out. For a springform cheesecake, run a thin knife around the edge after chilling and release the ring.
How Far Ahead Can You Make a Graham Cracker Crust?
A baked crust keeps covered for up to 2 days at room temperature or up to 5 days in the refrigerator. You can also freeze it for up to 3 months and thaw it for about 1 hour before filling.
Why This Graham Cracker Crust Recipe Works
The ratio of 1 1/2 cups of fine crumbs to 6 tablespoons of butter is the heart of this recipe. It is just enough fat to bind every crumb without leaving the crust greasy.
Using fine crumbs instead of coarse ones gives the butter more surface to cling to, which is why the crust holds together when you cut it. An evenly pressed layer about 1/4 inch thick also bakes at the same rate everywhere, so no part turns hard or stays soft.
The sugar does double duty. It sweetens the crust and, once baked, helps the crumbs set into a firm shell.
Pressing the crumbs firmly and baking at 350°F for 8 to 10 minutes locks everything together. Cooling the crust completely lets the butter firm up again, so the wedges hold their shape when you slice.
That is the difference between a crust that supports the filling and one that dissolves into it.
Make Your Next Pie with This Graham Cracker Crust Recipe
A good graham cracker crust recipe turns a handful of pantry staples into the foundation for nearly any dessert.
Make a batch today, chill your favorite filling, and let us know how it turned out in the comments.
Whether you are baking for a holiday table or a quiet weeknight treat, this crust takes the stress out of dessert. Keep a box of graham crackers in the pantry and you are always one step away from a pie.
Try the baked version first for the sturdiest slices, then experiment with the no bake and cinnamon variations once you feel comfortable. Each one starts with the same simple ratio of crumbs, sugar, and butter.