Last updated: September 6, 2026
Pressed flower crafts are one of the most rewarding ways to bring nature indoors and create something truly beautiful. In this guide, you will find everything you need to get started right away, from how to press flowers correctly to the most popular projects you can make with them. Whether you are a complete beginner or looking to expand your skills, we have you covered.
Framed Pressed Flower Art
One of the most popular pressed flower crafts is creating framed botanical art, and it is easy to see why. A well-arranged pressed flower frame looks like something you would find in an upscale boutique, yet it costs very little to make at home.
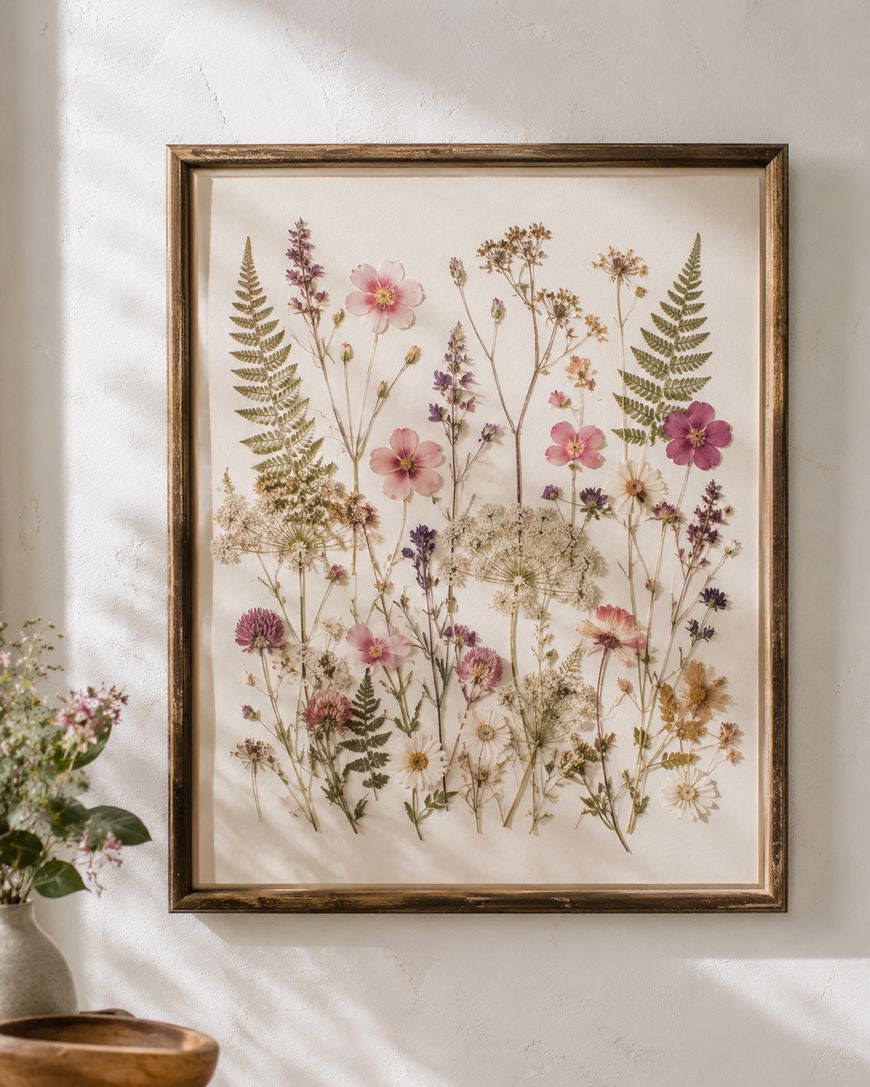
To get started, gather your pressed flowers and a simple frame with a glass front. Watercolor paper in white or cream makes an ideal background because it gives the finished piece a soft, artistic feel. Arrange your flowers on the paper before committing to any placement, as you want to achieve a composition that feels balanced and natural.
Once you are happy with your arrangement, use a tiny dot of craft glue or a specialized botanical adhesive to secure each flower. Work slowly and use tweezers for precision, especially with delicate petals. After everything is glued down and fully dry, place the paper behind the glass and secure the frame.
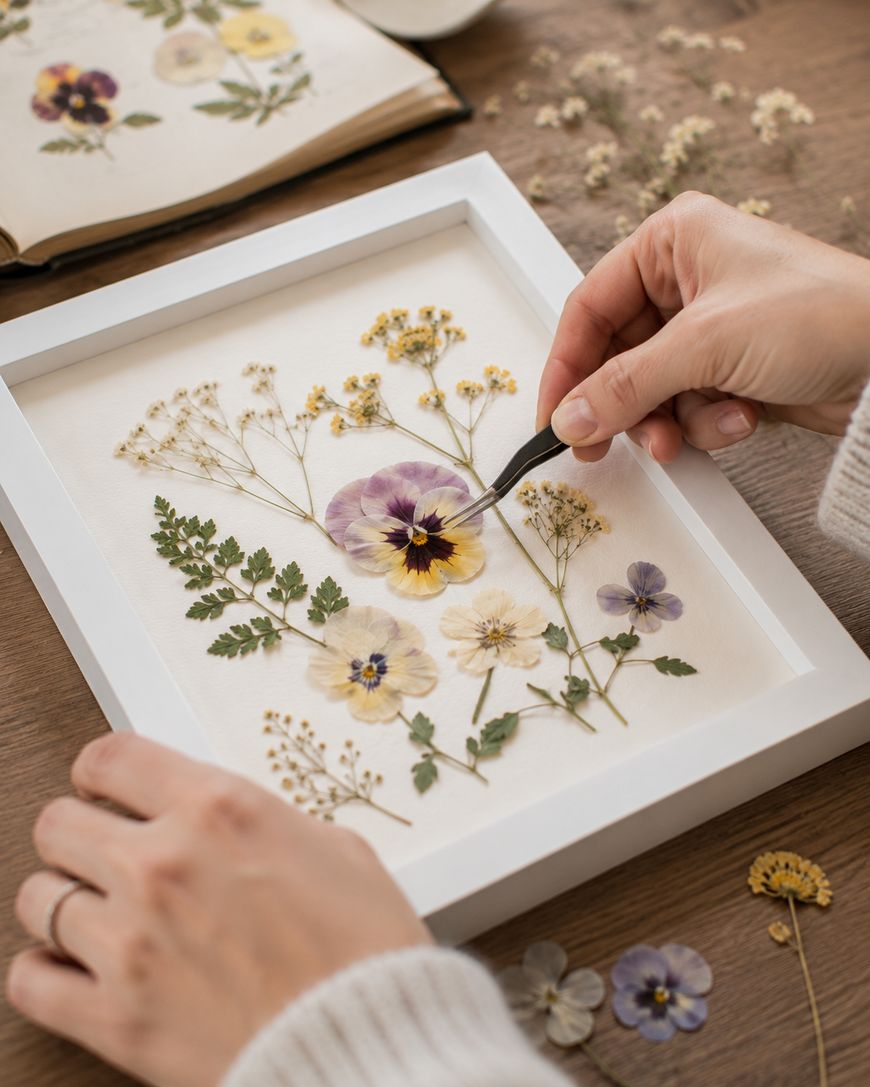
You can create a single bold statement piece or group several smaller frames together for a gallery wall effect. Mixing different flower types, colors, and fern fronds adds texture and visual interest. Some crafters like to add a handwritten botanical label beneath each specimen for an herbarium-inspired look that feels timeless and elegant.
The beauty of this pressed flower craft is how endlessly customizable it is. You can match your color palette to a specific room, create seasonal arrangements to swap out throughout the year, or make personalized gifts by pressing flowers from a wedding bouquet or garden.
Pressed Flower Resin Jewelry
Pressed flower resin jewelry has become one of the most sought-after pressed flower crafts in recent years, and the results can be absolutely stunning. Encasing delicate blooms in clear resin creates a glass-like finish that preserves the flowers’ colors and details for years to come.
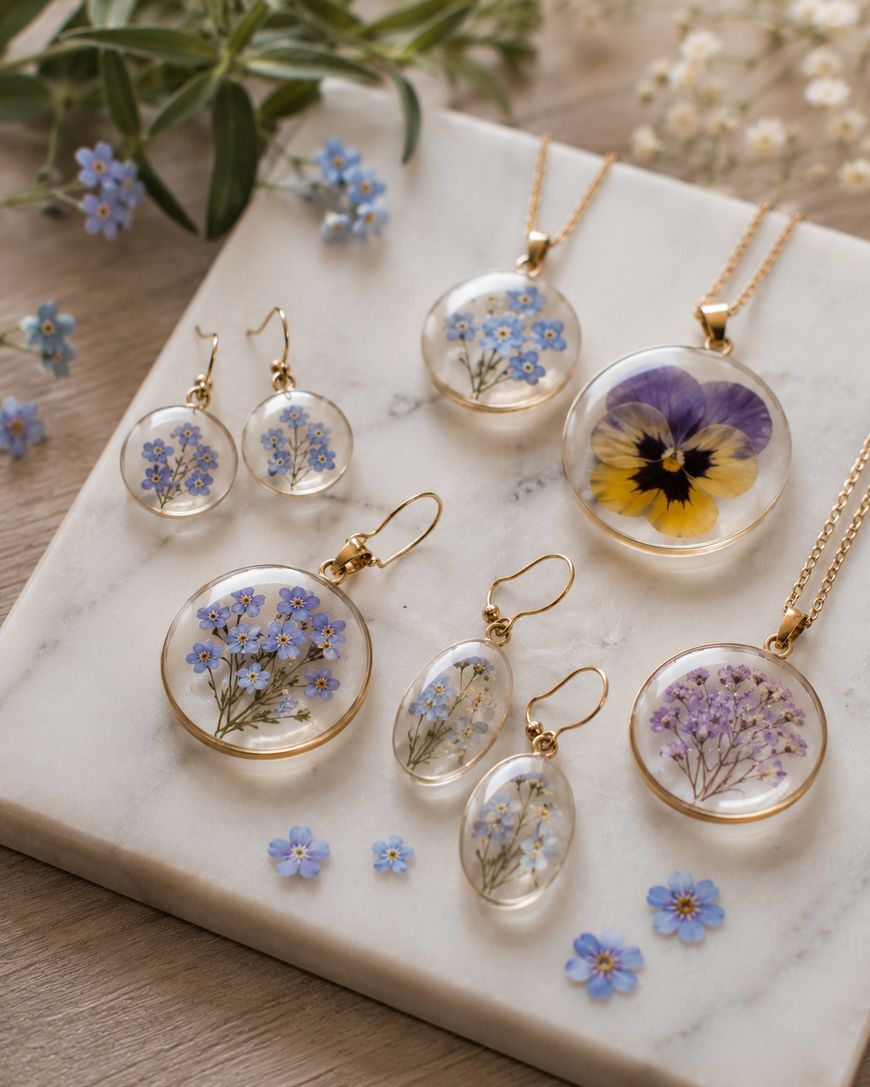
You will need UV resin or two-part epoxy resin, silicone molds in your desired jewelry shapes, and your pressed flowers. UV resin is especially beginner-friendly because it cures in minutes under a UV lamp rather than requiring a lengthy wait time. Two-part epoxy gives you slightly more working time if you prefer a slower pace.
To make a pendant, pour a thin layer of resin into your mold and let it partially cure. Place your pressed flower face-down onto the resin, then pour another layer on top to encapsulate it completely. Once fully cured, pop the piece out of the mold and add a jump ring and chain.
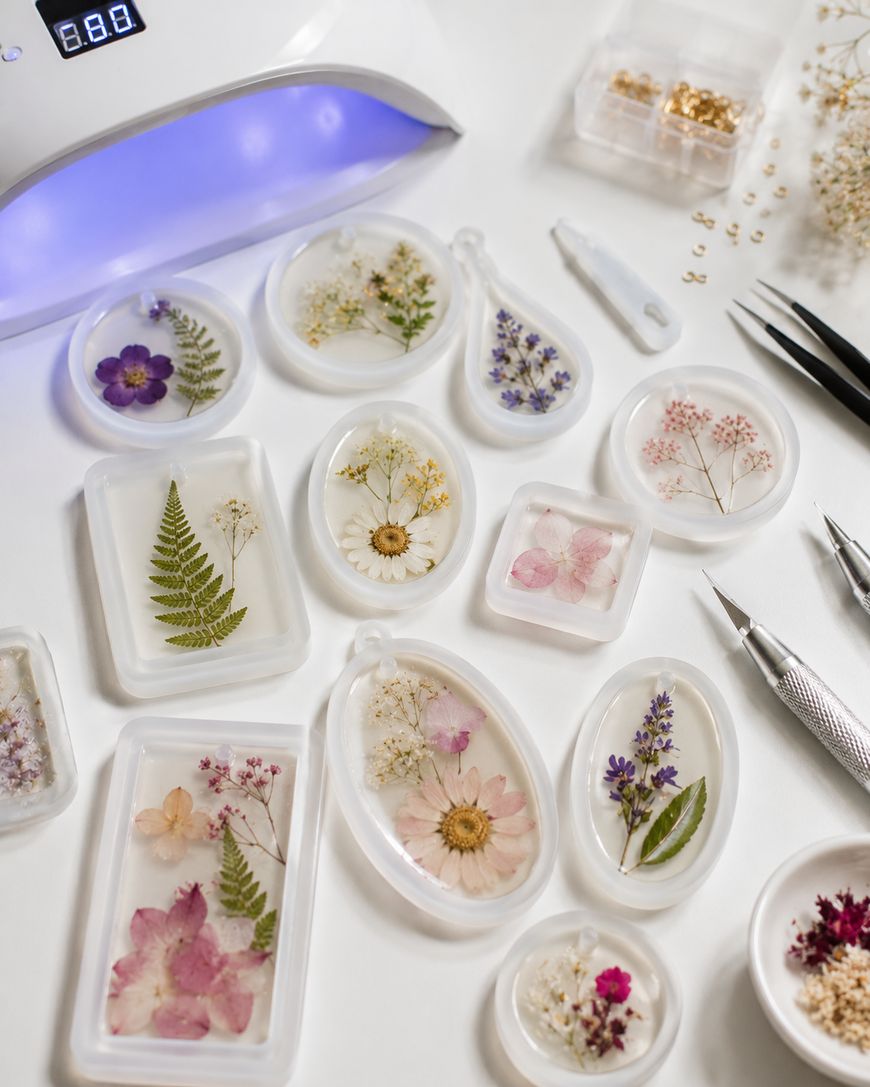
The key to beautiful resin jewelry is making sure your pressed flowers are completely dry before encasing them. Any residual moisture can cause cloudiness in the resin, which hides the beauty of the flower underneath. If you pressed your flowers recently, give them a few extra days of drying time before starting your jewelry project.
Smaller flowers and individual petals work wonderfully in jewelry pieces. Forget-me-nots, tiny daisies, and individual lavender buds create delicate, feminine pieces. For bolder statement jewelry, a full pansy or a sprig of Queen Anne’s lace centered in a large oval pendant makes a dramatic effect.
Pressed Flower Candles
Decorating candles with pressed flowers is one of those pressed flower crafts that looks incredibly professional but is actually quite accessible for beginners. The flowers get adhered to the outside of a pillar candle, then sealed with a thin layer of wax or mod podge to hold them in place and create a smooth finish.
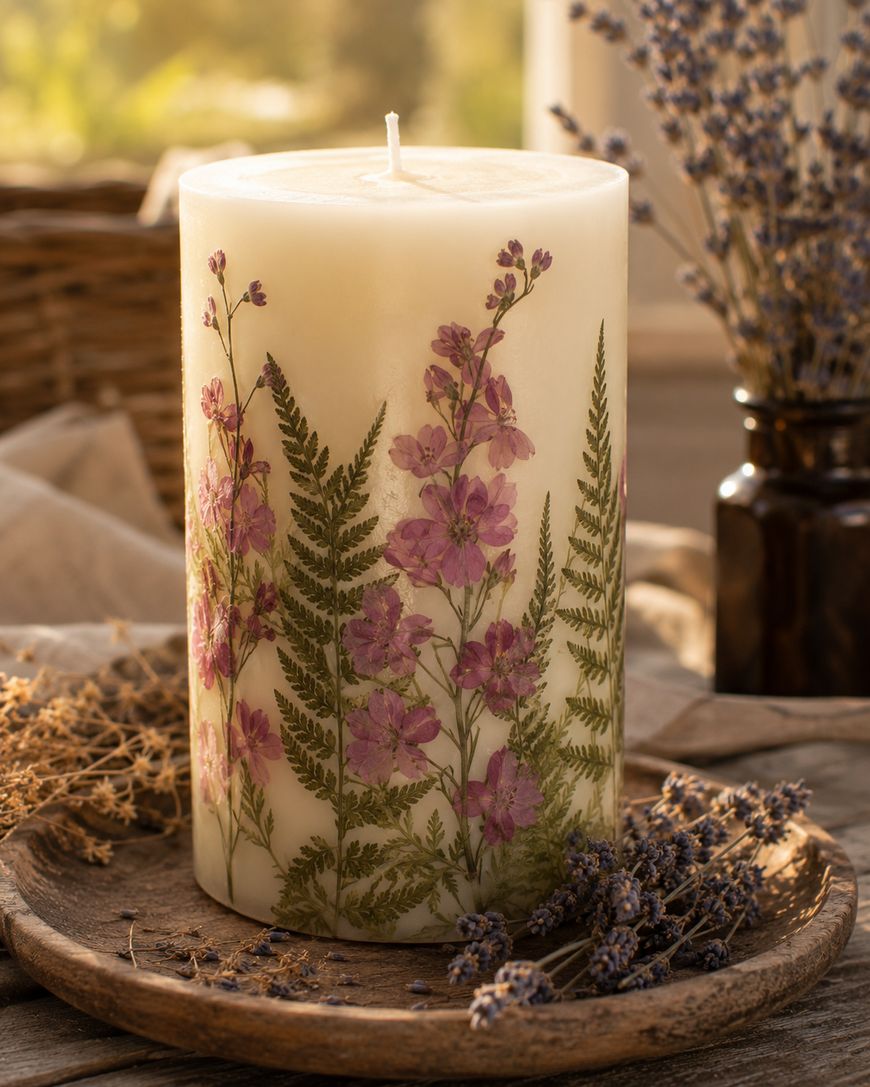
Start with a plain white or cream pillar candle and arrange your pressed flowers on the outside, planning your design before any gluing begins. Use a heat gun or a hairdryer on low to gently warm the candle surface, which softens the wax just enough to help the flowers adhere. Press each flower gently against the warm wax.
Once the flowers are set, you can use a candle coating spray or dip the candle briefly in melted wax to seal everything in place. The finished candles make wonderful gifts and look beautiful displayed on a shelf or as part of a table centerpiece.
Keep in mind that these candles are best used as decorative pieces rather than burned down completely. Burning them too low can cause the paper-thin flower petals to catch, so treat them primarily as home decor rather than functional candles.
Pressed Flower Bookmarks and Stationery
If you are looking for a quick and satisfying pressed flower craft, bookmarks and stationery pieces are perfect. These small projects use just a few flowers and can be completed in an afternoon, making them ideal for beginner crafters or for a fun activity with kids.
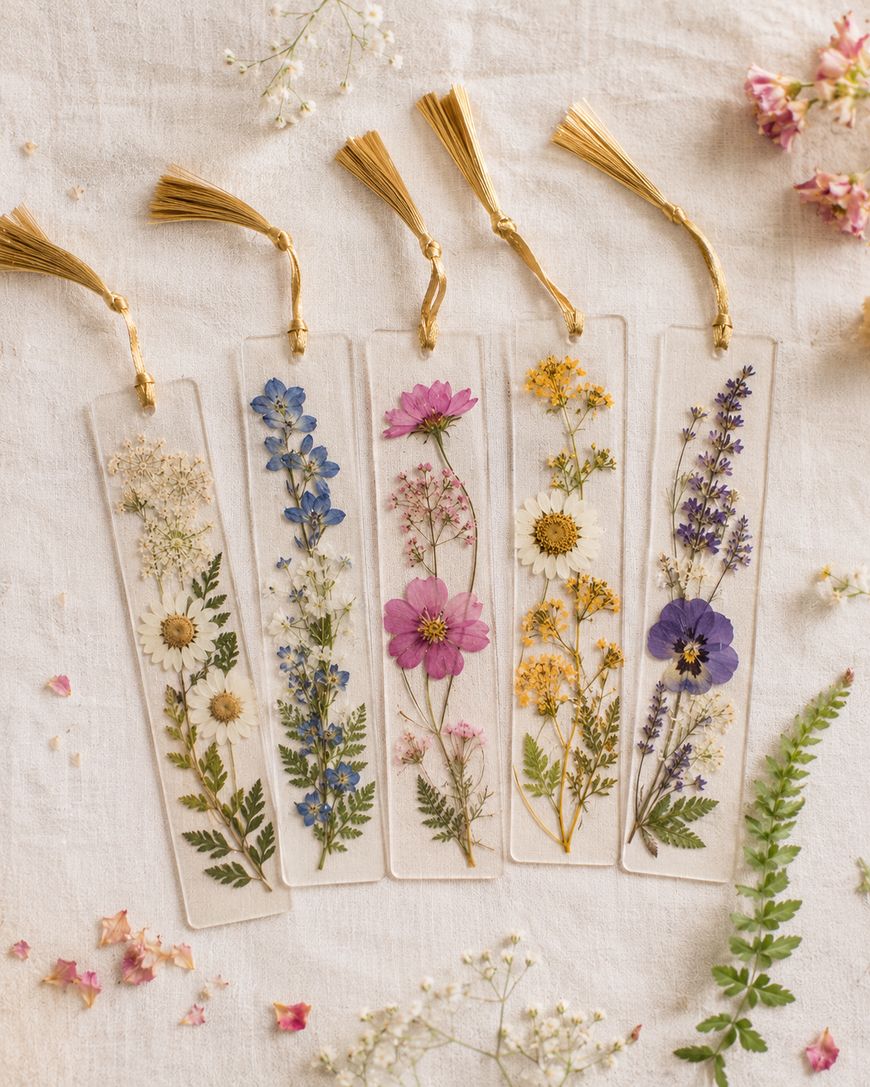
For bookmarks, cut a strip of thick watercolor paper or cardstock to your desired size, typically about two inches wide and eight inches long. Arrange a few small pressed flowers along the length, glue them in place, and let dry completely. Cover the entire surface with a self-adhesive laminating sheet or apply a few coats of Mod Podge to seal and protect the flowers. Punch a hole at the top and add a ribbon or tassel for a finishing touch.
Pressed flower stationery involves applying flowers to the corners or edges of notecards and envelopes before sealing them with a light coat of Mod Podge. The result is a set of notecards that feels truly special and handmade. These make wonderful gifts packaged in a simple box tied with twine.
Pressed Flower Resin Coasters
Resin coasters featuring pressed flowers are both functional and beautiful, making them one of the most practical pressed flower crafts you can add to your home. They protect surfaces while displaying your botanical designs under a glass-clear surface.
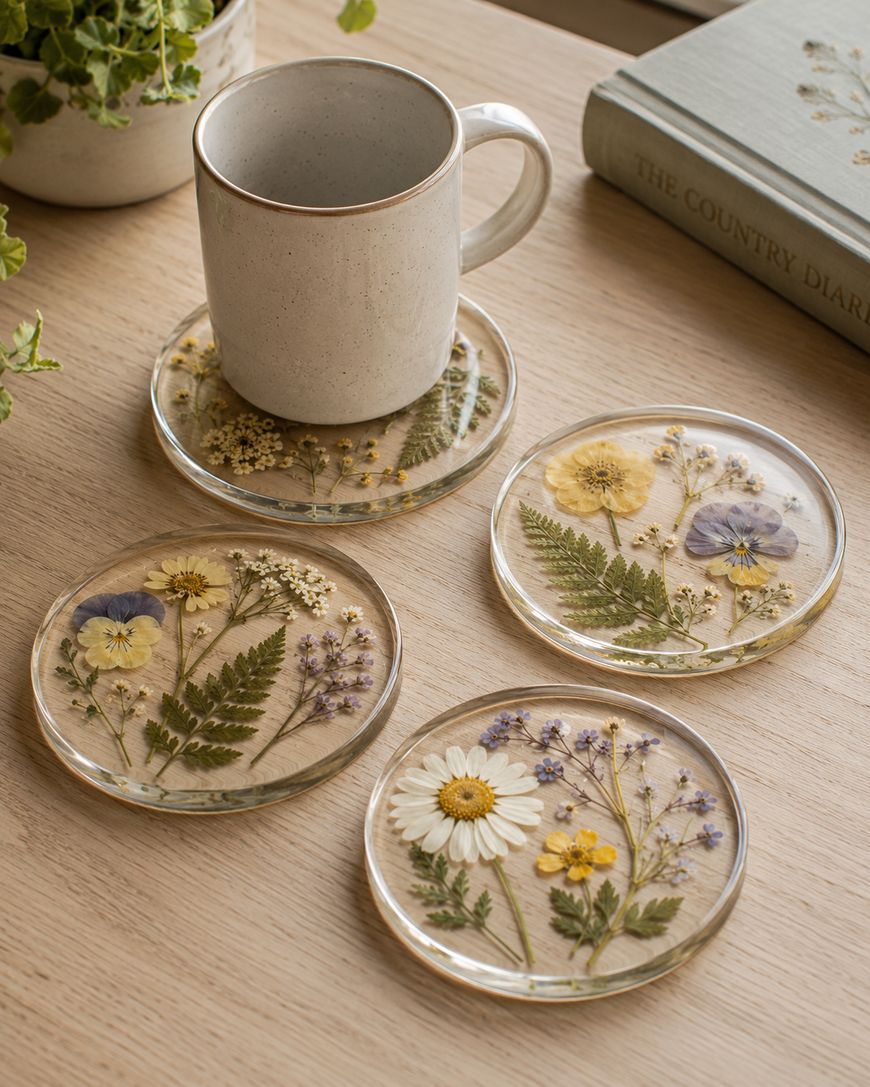
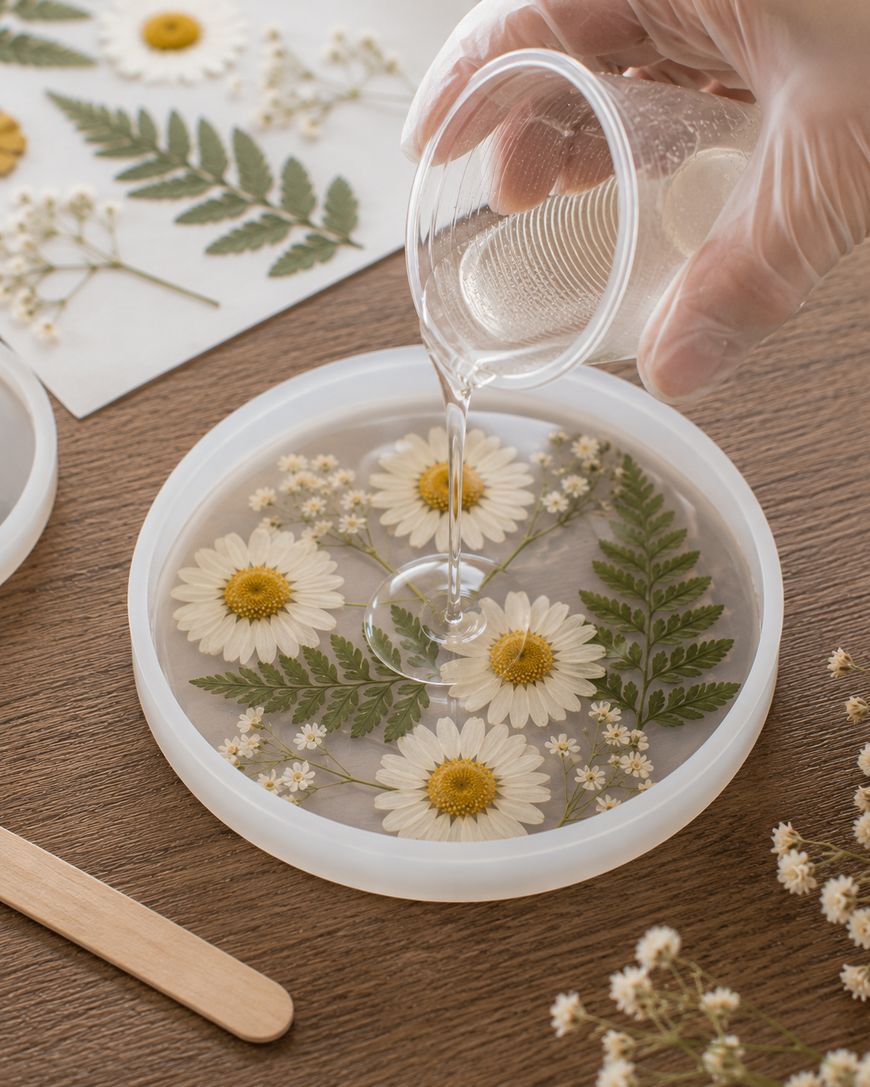
You will need circular silicone molds designed for coasters, two-part epoxy resin, and your pressed flowers. Pour your first layer of resin into the mold and allow it to reach a gel-like consistency before placing your flowers. This prevents the flowers from sinking to the bottom.
Arrange flowers face-down in the partially cured resin, then pour a final layer over the top to fill the mold completely. Allow the resin to cure fully according to the manufacturer’s instructions, typically 24 to 48 hours. Pop the finished coasters out of the molds and apply adhesive felt pads to the bottom to protect surfaces.
A set of four coasters with a coordinating botanical theme makes a truly impressive gift and is a wonderful way to use a larger collection of pressed flowers all at once.
How to Press Flowers the Right Way
Before you can dive into pressed flower crafts, you need beautifully flat, dry blooms to work with. The good news is that pressing flowers is surprisingly simple, and getting it right makes every project so much easier.
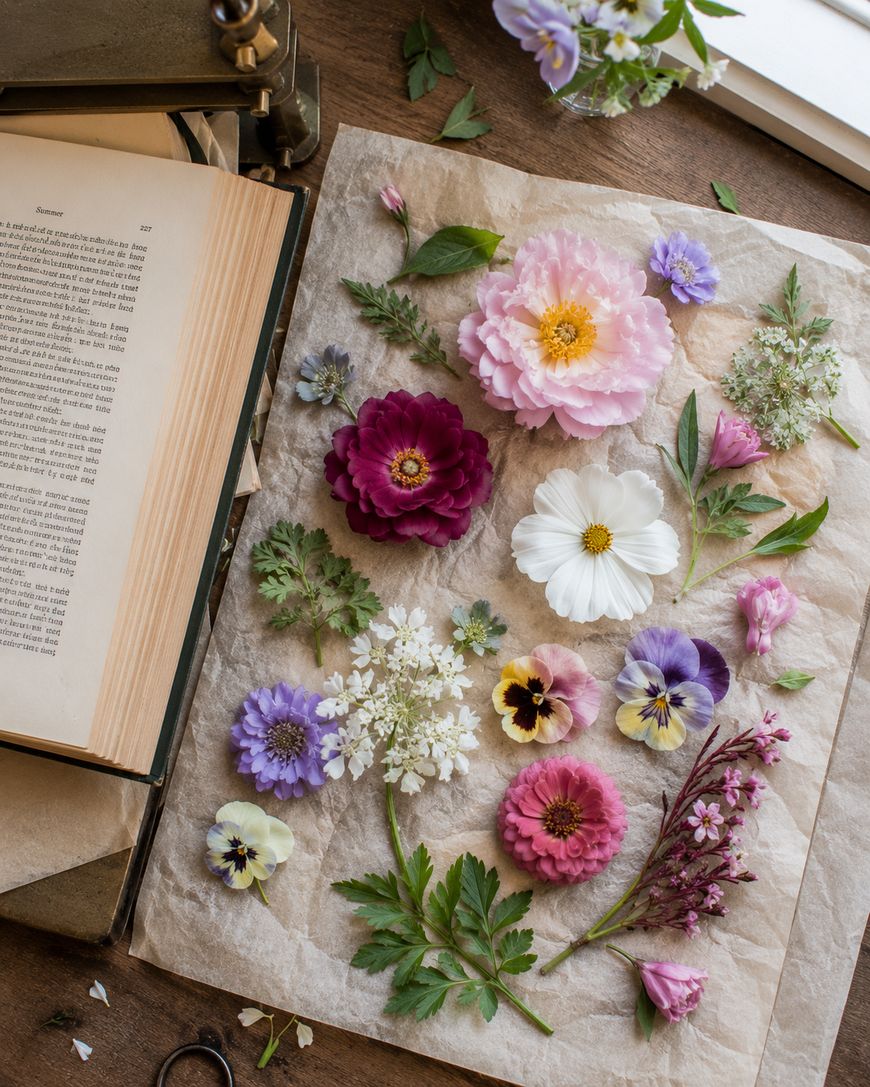
The most classic method is the book press technique. You place your flowers between two sheets of parchment paper, slide them inside a heavy book, and stack additional books on top. Leave them undisturbed for one to three weeks, checking at the two-week mark to see if they are fully dry. Thinner flowers like pansies, violets, and daisies press beautifully this way and often retain vibrant color.
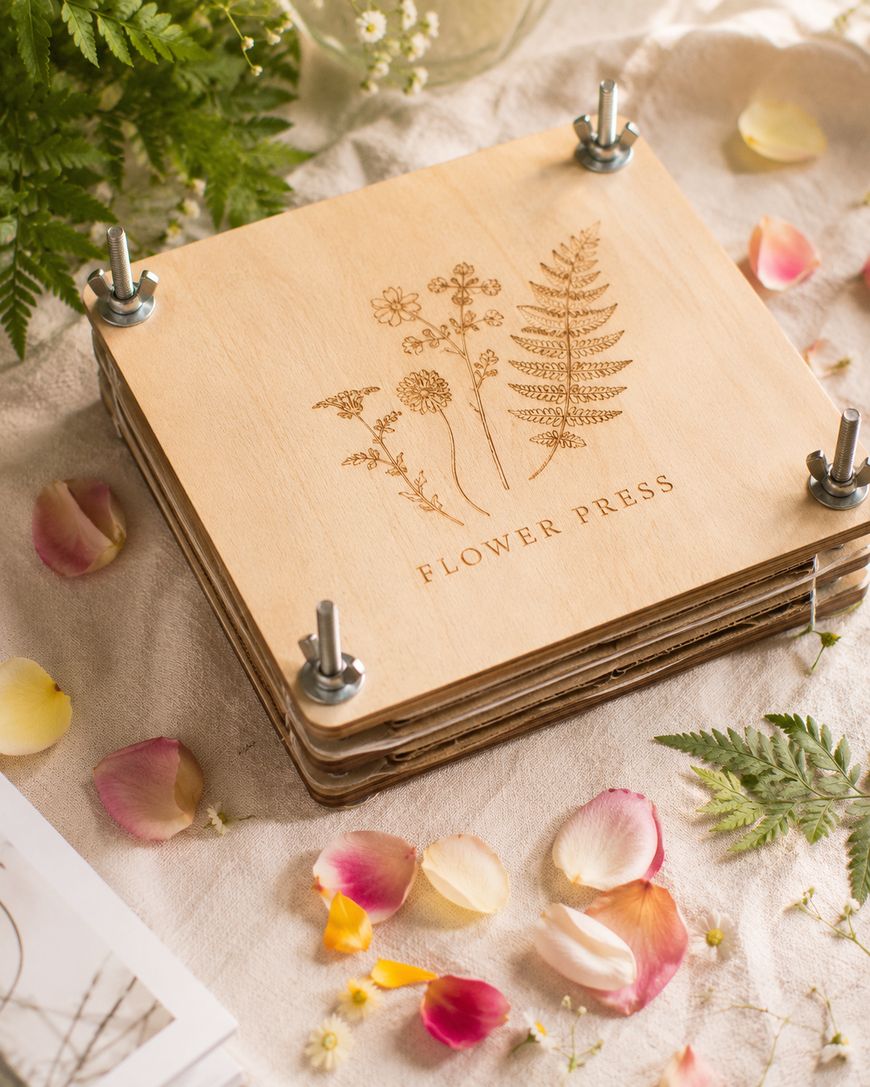
For faster results, a microwave flower press is a game-changer. These small wooden presses hold flowers between absorbent pads, and a few rounds of thirty-second microwave intervals (with cooling breaks between) can press flowers in under thirty minutes. This method works especially well when you want to preserve seasonal blooms quickly before they fade.
Choosing the right flowers makes a big difference in your pressed flower crafts. Flat or single-layer blooms work best because they press evenly without creating lumpy dried areas. Pansies, cosmos, larkspur, ferns, and Queen Anne’s lace are all excellent choices. Thick flowers like roses need to be sliced in half or have petals pressed individually for the best results.
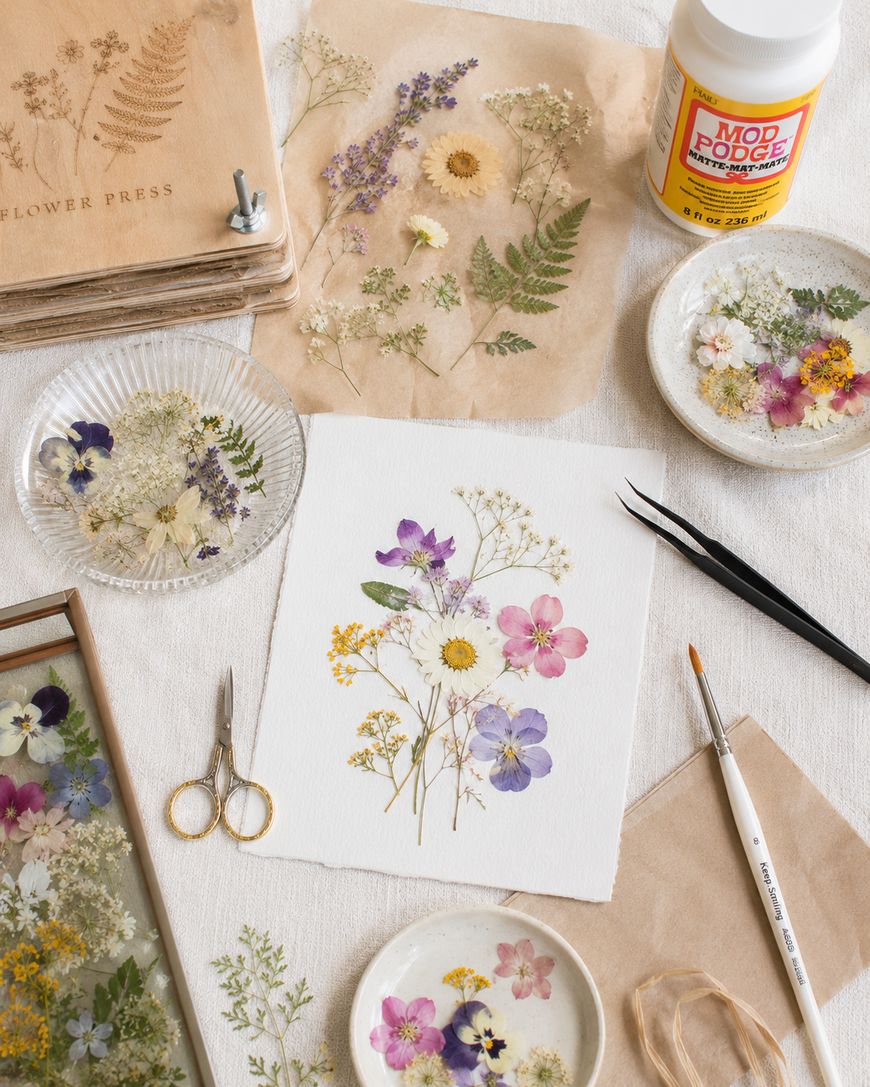
Always pick flowers at their peak bloom, ideally mid-morning after any dew has dried. Flowers that are slightly under-ripe rather than fully open tend to hold their shape and color better once pressed. Avoid flowers that are starting to wilt or show any browning, as these will not press cleanly.
Tips for Long-Lasting Pressed Flower Crafts
Getting beautiful results with your pressed flower crafts is about more than just the pressing technique. How you store, handle, and seal your finished projects determines how well they hold up over time.
UV exposure is the biggest threat to pressed flowers. Direct sunlight will fade even the most vibrant petals within a few months. Display your framed botanical art away from windows or use UV-protective glass to extend the life of your pieces significantly.
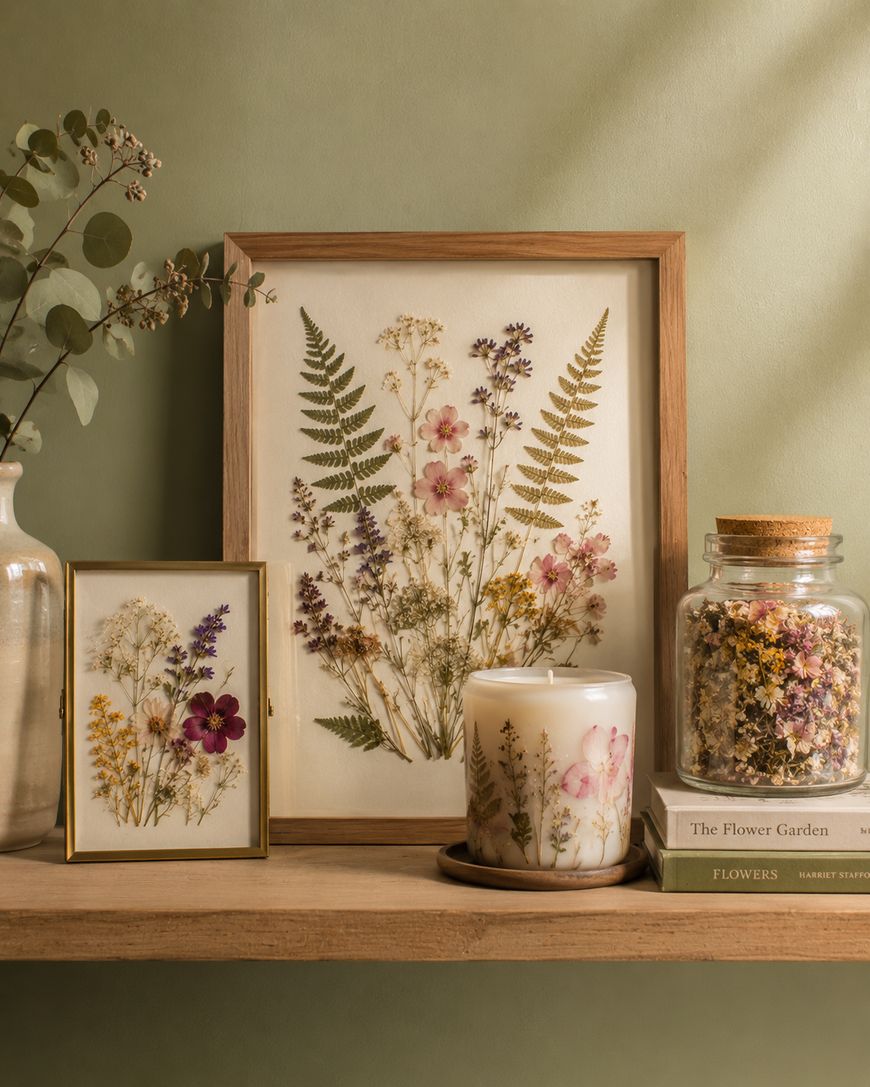
Sealing is essential for most pressed flower crafts. A light coat of Mod Podge, a decoupage medium, or a specialized botanical sealant protects the flowers from humidity and physical damage. Apply thin coats and allow full drying time between layers to avoid saturating delicate petals.
Store any extra pressed flowers flat in an airtight container with a small silica gel packet to absorb moisture. Pressed flowers stored this way can remain in excellent condition for months, giving you a ready supply for future projects.
Frequently Asked Questions About Pressed Flower Crafts
How long does it take to press flowers?
The time varies depending on your method and the thickness of the flower. Book pressing typically takes one to three weeks, while a microwave flower press can dry thin flowers in under an hour.
Do pressed flowers fade over time?
Yes, pressed flowers can fade, especially when exposed to direct sunlight. Keeping your pressed flower crafts away from UV light and using UV-protective glass or sealants helps preserve their color significantly longer.
What flowers press best?
Flat, single-layer flowers press most easily and look the most beautiful. Pansies, violets, larkspur, cosmos, daisies, and ferns are all excellent choices for pressed flower crafts.
Can you press flowers from a store-bought bouquet?
Yes, many flowers from florist bouquets press well. Carnations, baby’s breath, and individual rose petals all press nicely. Just be aware that commercially grown flowers are sometimes treated with preservatives that can affect how they dry.
Do I need special tools to start pressed flower crafts?
You can start with nothing more than a heavy book and parchment paper. As you get more into the hobby, a dedicated flower press or microwave press makes the process faster and more consistent.
What is the best way to seal pressed flower crafts?
Mod Podge in a matte or glossy finish is one of the most popular and accessible sealants for pressed flower crafts. Apply thin coats with a soft brush and allow each layer to dry fully before adding the next.
Start Your Pressed Flower Crafts Journey Today
Pressed flower crafts offer something for every skill level and every style. Whether you want a calming solo hobby, a creative project to share with your kids, or a source of handmade gifts that people will treasure, you will find it in the world of botanical crafting.
Start by pressing a few flowers from your garden or a local farmers market this week. Once you have a small collection of beautifully pressed blooms, the possibilities for what you can create are nearly endless. Your home, your friends, and your creative spirit will all be better for it.
This post contains affiliate links. A full disclosure is available from the main menu.