Last updated: August 23, 2026
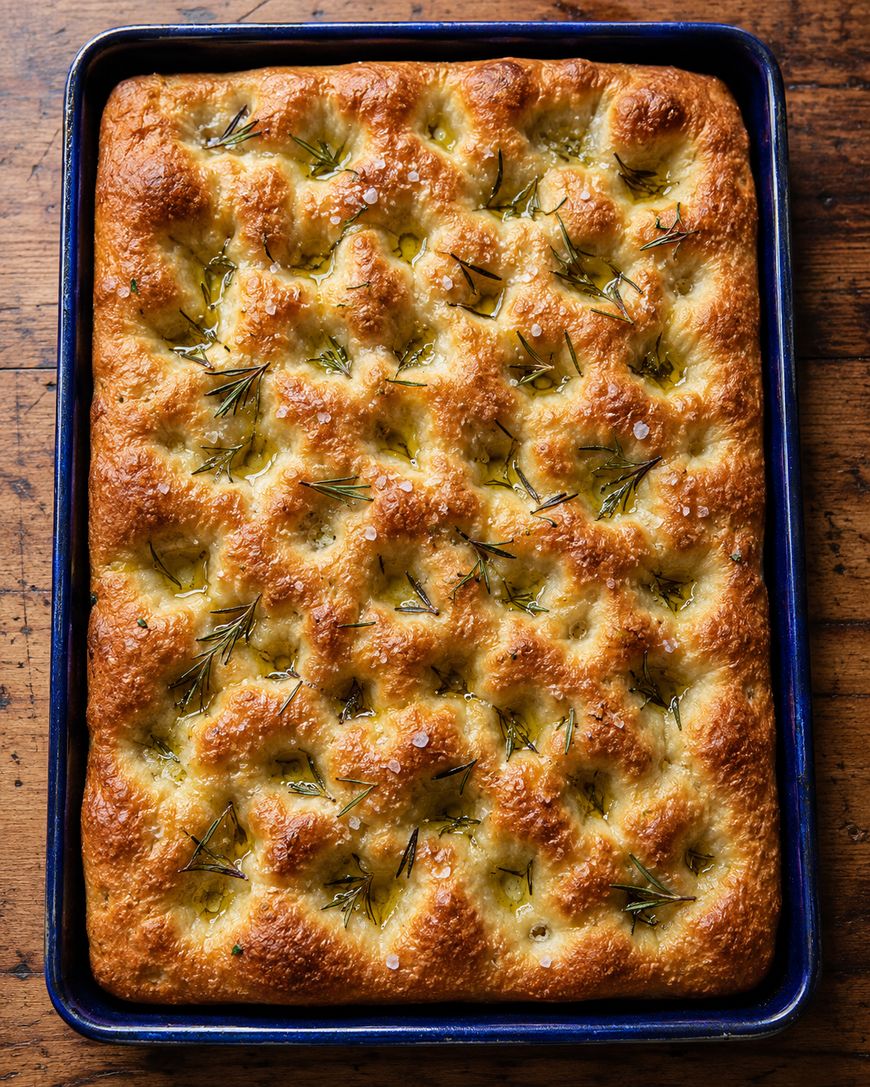
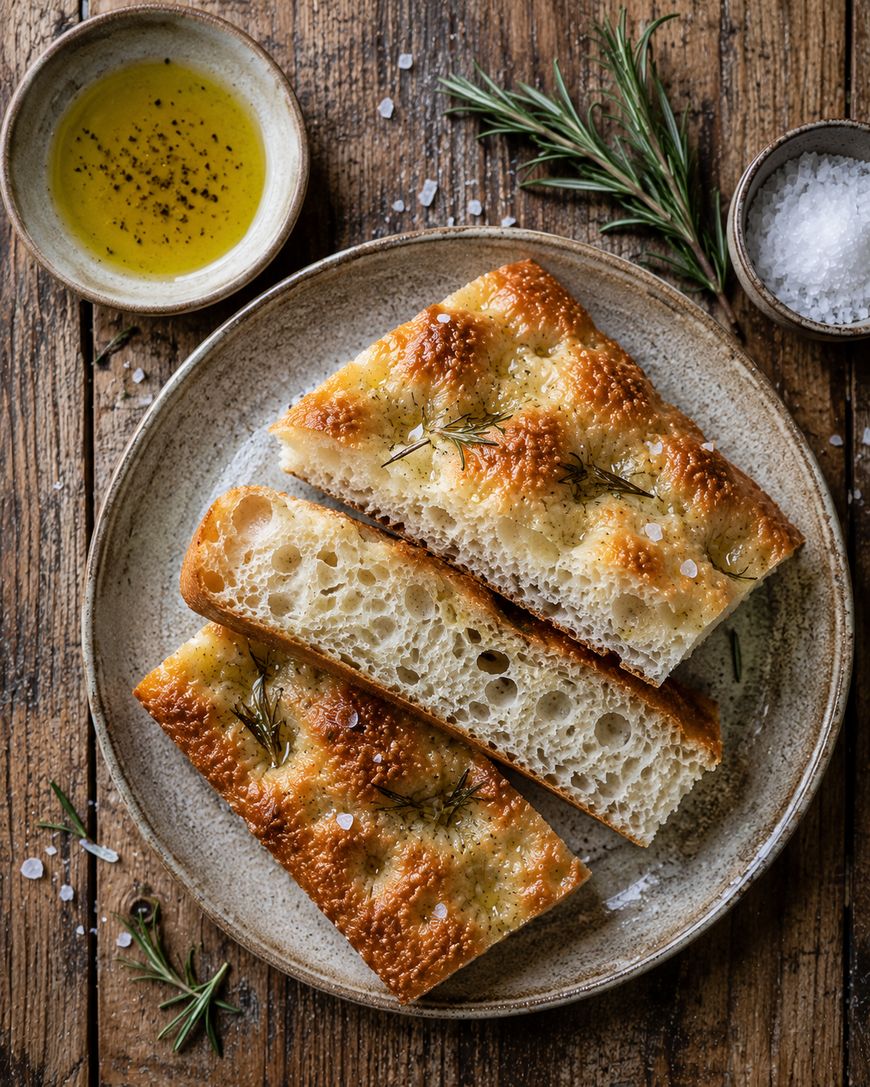
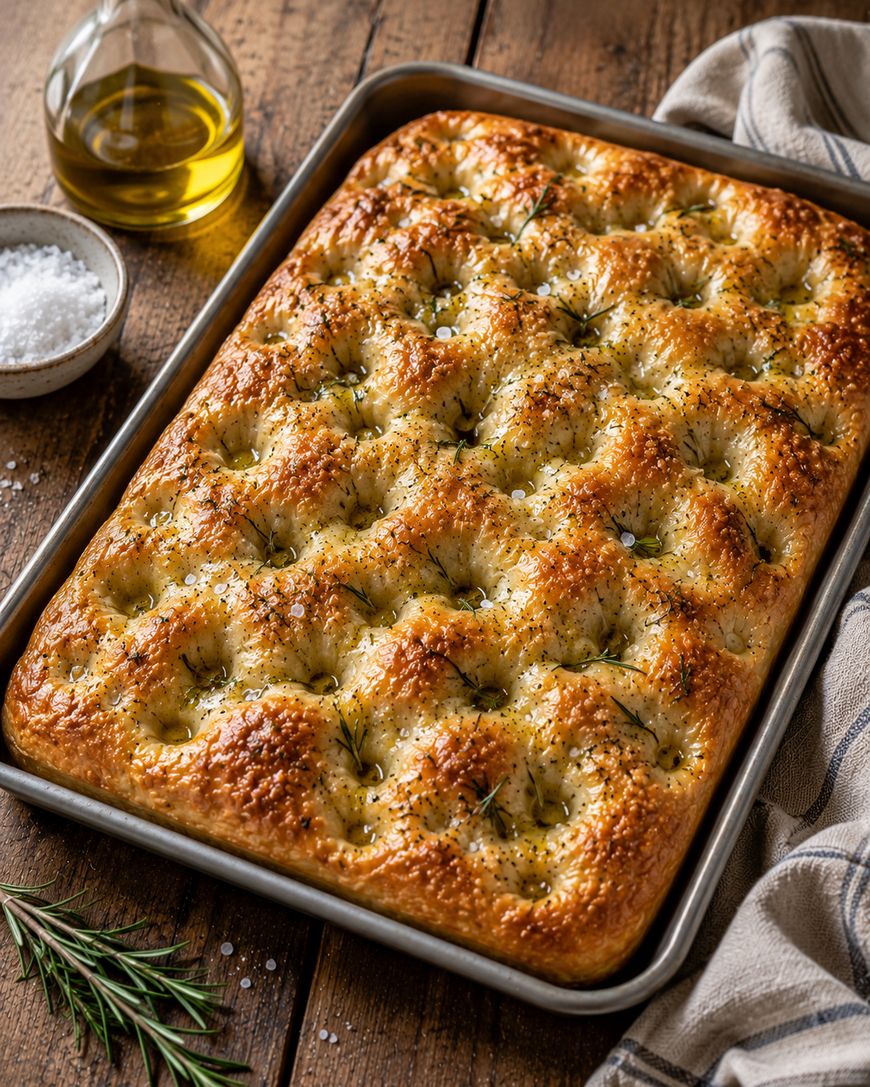
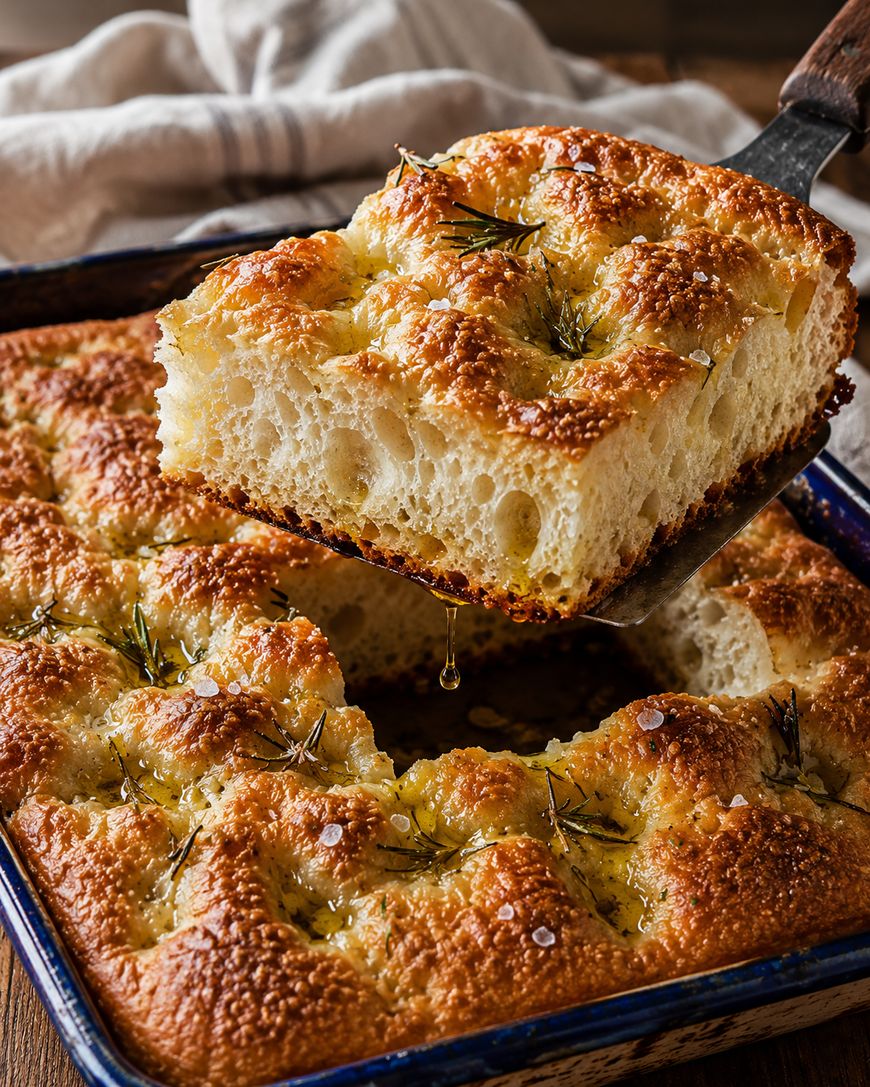
This focaccia bread recipe produces a golden, dimpled flatbread with a shatteringly crisp bottom, a tender open crumb, and enough olive oil to make every bite taste like a bakery in Liguria. The recipe card below walks through every measurement and timing detail.
The technique here draws from the Genovese tradition, where generous amounts of extra-virgin olive oil are used both in the dough and pooled in the pan before baking, creating that signature crisp, almost fried bottom crust that distinguishes true Italian focaccia from American flatbread cousins.
What You Need to Make Focaccia Bread
Flour and Hydration
Bread flour is the first choice here because its higher protein content, around 12 to 13 percent, builds a strong gluten network that traps gas from the yeast and creates the open, airy texture focaccia is known for.
All-purpose flour works as a substitute and produces a slightly softer, chewier result. Avoid cake flour entirely, as its low protein content cannot support the long fermentation this recipe requires.
The dough is deliberately wet, sitting at roughly 75 percent hydration, which means it will feel sticky and loose compared to pizza or sandwich bread dough. That stickiness is correct. Do not add extra flour.
Yeast and Salt
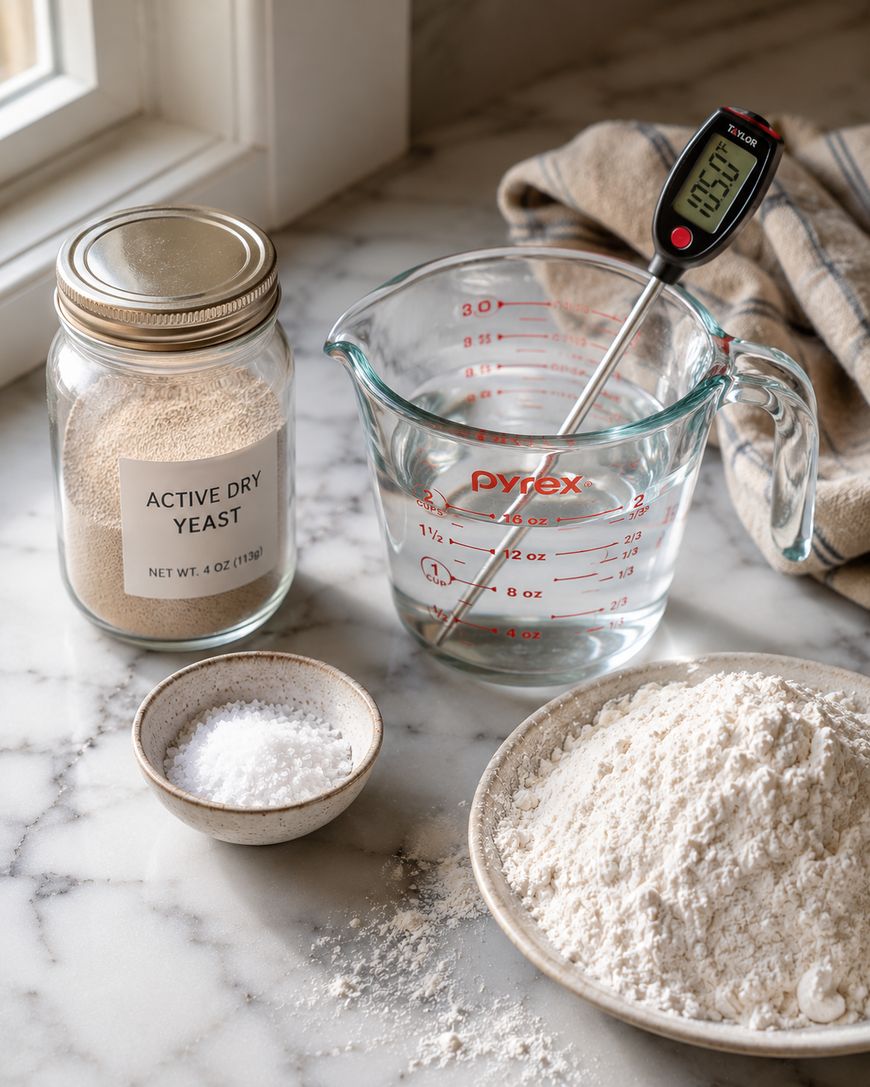
Active dry yeast or instant yeast both work in this recipe, though instant yeast can be added directly to the flour without blooming first.
If using active dry yeast, dissolve it in the warm water (between 100 and 110 degrees Fahrenheit) with a pinch of sugar and wait five minutes until foamy before proceeding.
Fine sea salt is added separately from the yeast in the mixing stage, because direct contact between salt and yeast before hydration can inhibit fermentation. Keep them on opposite sides of the bowl until mixing begins.
Olive Oil
Extra-virgin olive oil is non-negotiable for authentic focaccia. California Olive Ranch or any Ligurian DOP oil both work beautifully here.
The oil does three jobs: it coats the gluten strands during mixing to keep the crumb tender, it pools in the pan to fry the bottom crust during baking, and it fills the dimples during the final proof to crisp the surface as it bakes.
Use a total of about half a cup across the entire recipe. That amount sounds like a lot, and it is, and that is entirely the point.
How to Make Focaccia Bread Step by Step
Mixing the Dough
Combine the flour, instant yeast, and salt in a large bowl, keeping the salt and yeast on opposite sides initially. Add the warm water and two tablespoons of olive oil, then mix with a stiff spatula or your hands until a shaggy, sticky dough forms with no dry patches remaining.
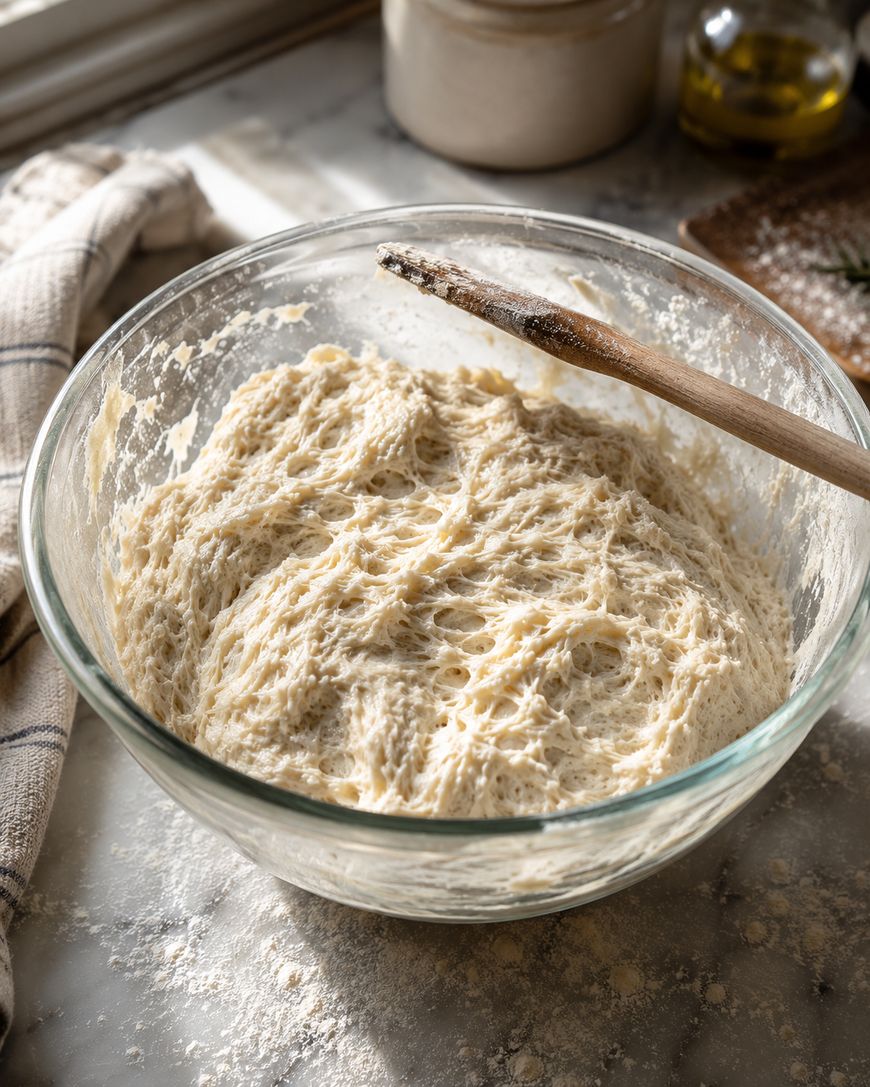
Cover the bowl and let the dough rest for 10 minutes. This rest period, called autolyse in professional baking, allows the flour to fully hydrate and kick-starts gluten development without any kneading.
Folding for Structure
Rather than kneading this wet dough on a board, use the stretch-and-fold method developed by Ken Forkish and popularized in books like “Flour Water Salt Yeast.” Wet your hand, reach under the dough, stretch it upward, and fold it over itself. Rotate the bowl 90 degrees and repeat four times for one set.
Perform four sets of folds spaced 30 minutes apart over the first two hours. Each set will feel more resistive than the last as the gluten develops. After the final fold, the dough should feel smooth, elastic, and hold its shape for several seconds before slowly spreading.
Bulk Fermentation
After the folding sets are complete, cover the bowl tightly and refrigerate overnight, or for a minimum of eight hours and up to 24 hours. Cold fermentation slows yeast activity while allowing enzymatic activity to continue, which develops complex flavor compounds that a same-day dough simply cannot achieve.
The dough is ready to pan when it has roughly doubled in volume and the surface looks domed and slightly bubbly.
Panning and the Second Proof
Pour three tablespoons of olive oil into a rimmed half-sheet pan (approximately 18 by 13 inches) or a 9 by 13-inch baking dish for a thicker focaccia. Tip the cold dough into the center of the oiled pan.
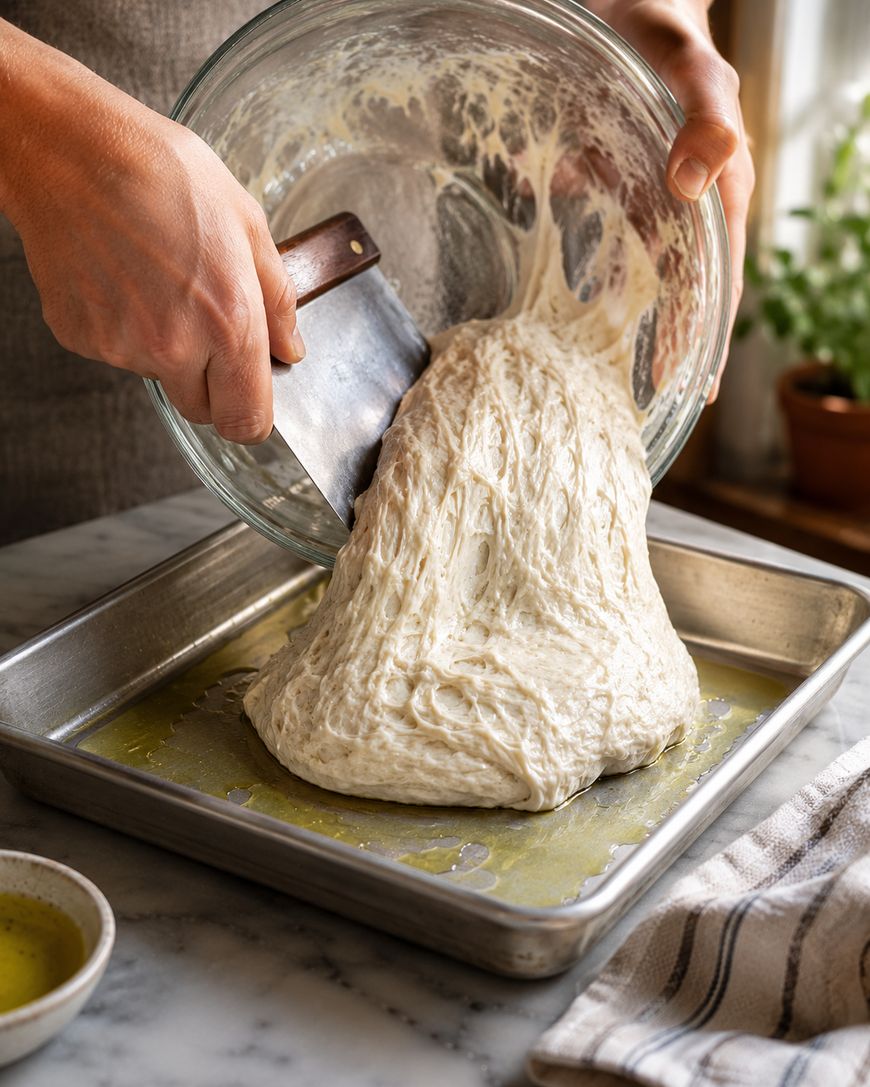
Gently stretch the dough toward the edges using your fingertips, working from the center outward. If the dough springs back and resists stretching, cover it and let it relax for 10 minutes before trying again. Forcing it tears the gluten structure.
Cover the pan loosely with plastic wrap and proof at room temperature for two to four hours, until the dough is puffy, fills the pan, and jiggles when shaken.
Dimpling and Topping
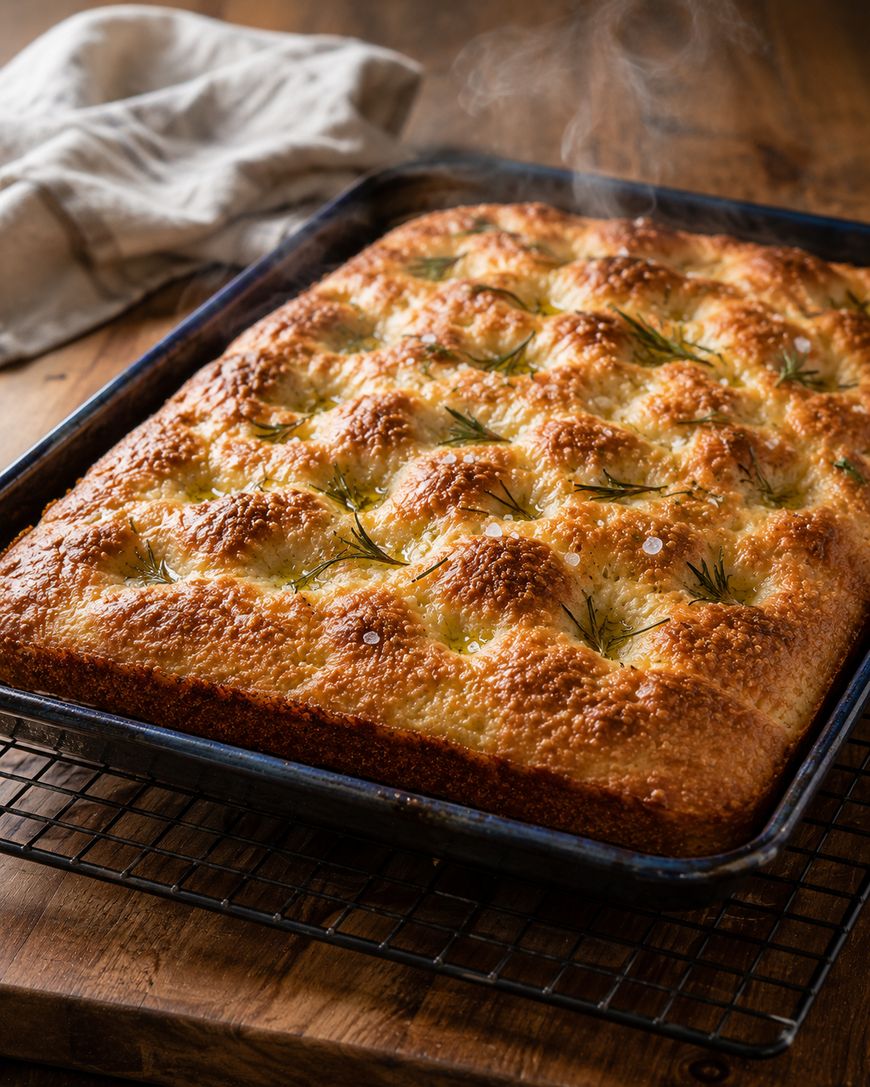
This is the most satisfying step. Drizzle two tablespoons of olive oil over the surface of the proofed dough, then press all ten fingertips firmly into the dough to create deep, even dimples across the entire surface.
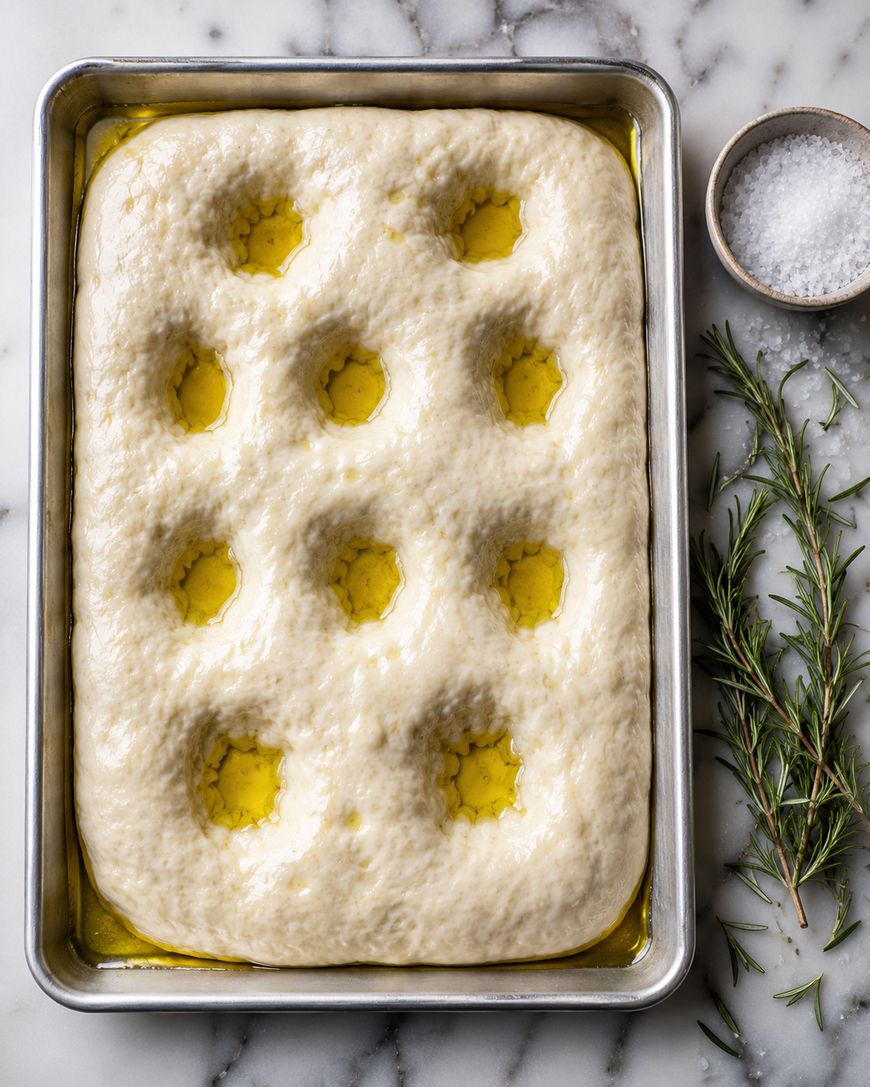
The dimples should reach nearly to the bottom of the pan. Shallow dimples fill in during baking and lose their visual appeal. Go deep and do not be timid.
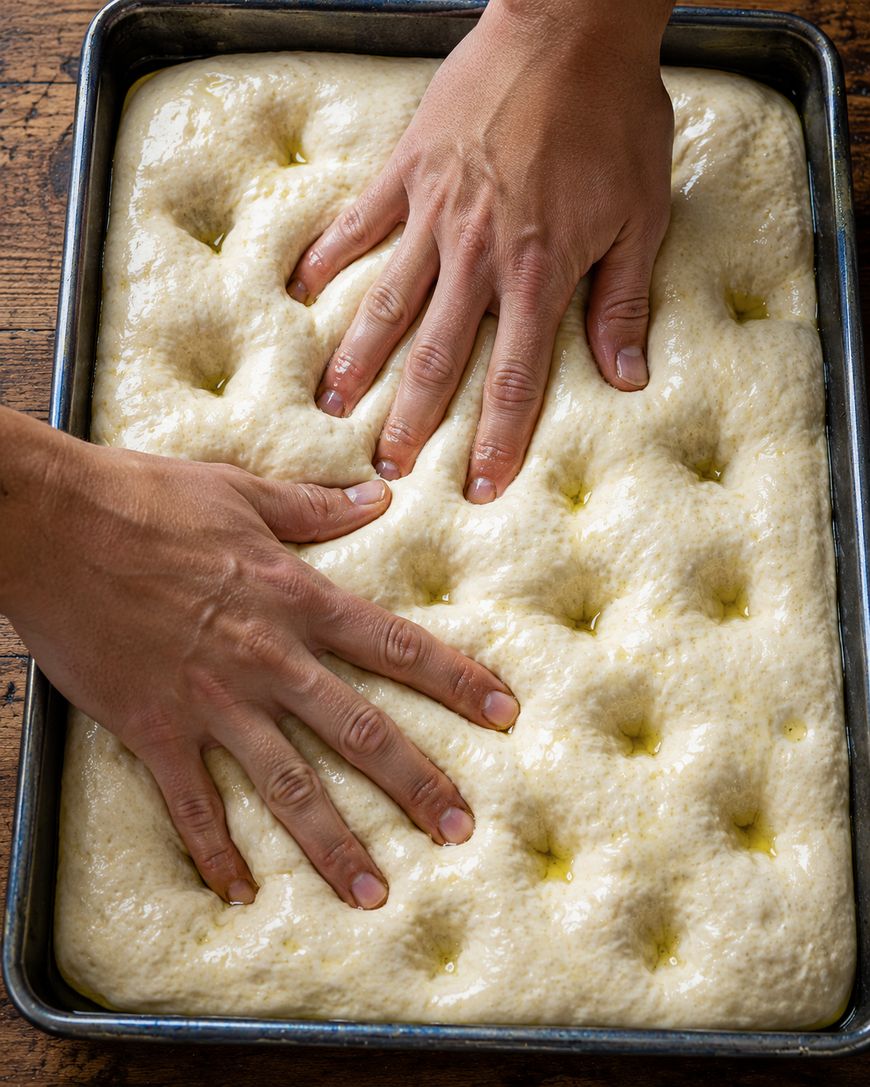
Immediately scatter flaky sea salt (Maldon or Fleur de Sel) and fresh rosemary leaves across the surface before the dough has a chance to spring back.
Baking
Preheat the oven to 450 degrees Fahrenheit with a rack in the lower third for at least 30 minutes. A hot oven is essential for the rapid oven spring that creates the open crumb and crisp crust simultaneously.
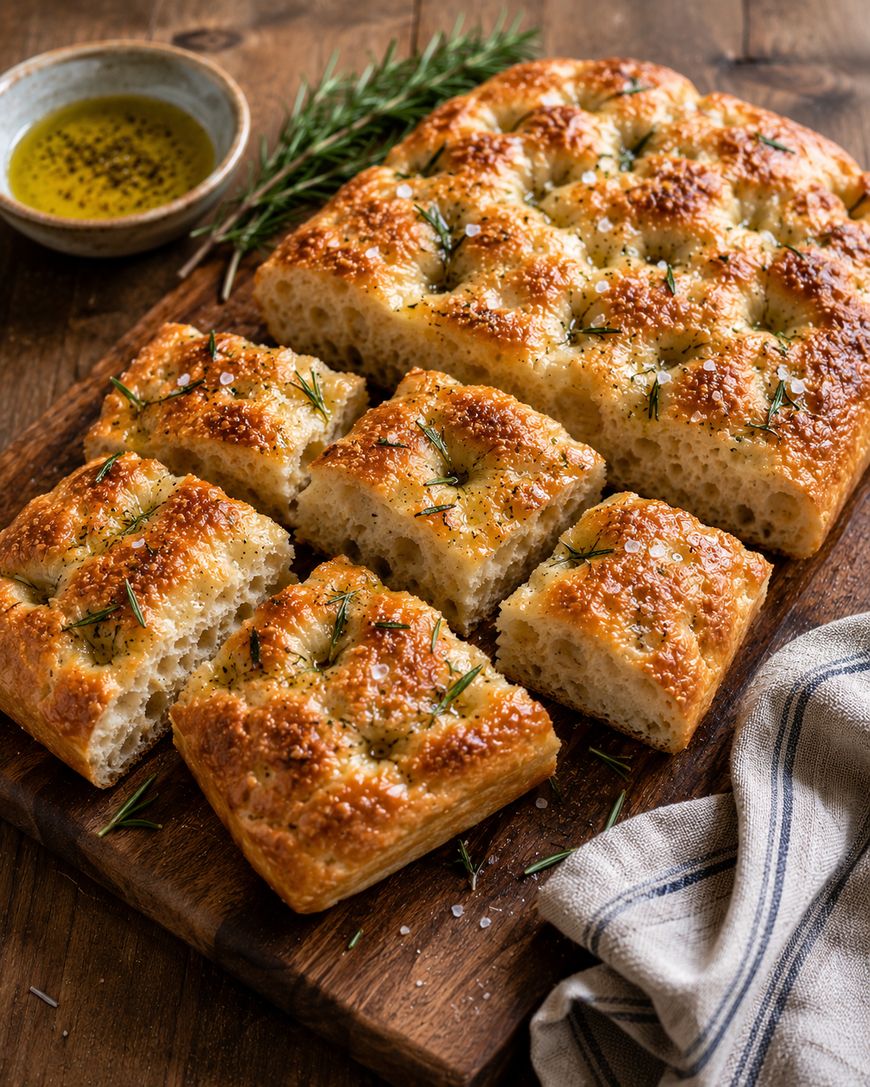
Bake for 20 to 25 minutes, rotating the pan once at the 15-minute mark, until the top is deep golden brown and the edges have pulled slightly away from the pan. The bottom should be visibly browned; lift a corner with a spatula to check.
Transfer the baked focaccia to a wire rack immediately after removing it from the oven. Leaving it in the pan causes steam to soften the bottom crust.
Focaccia Variations Worth Trying
Toppings and Flavor Combinations
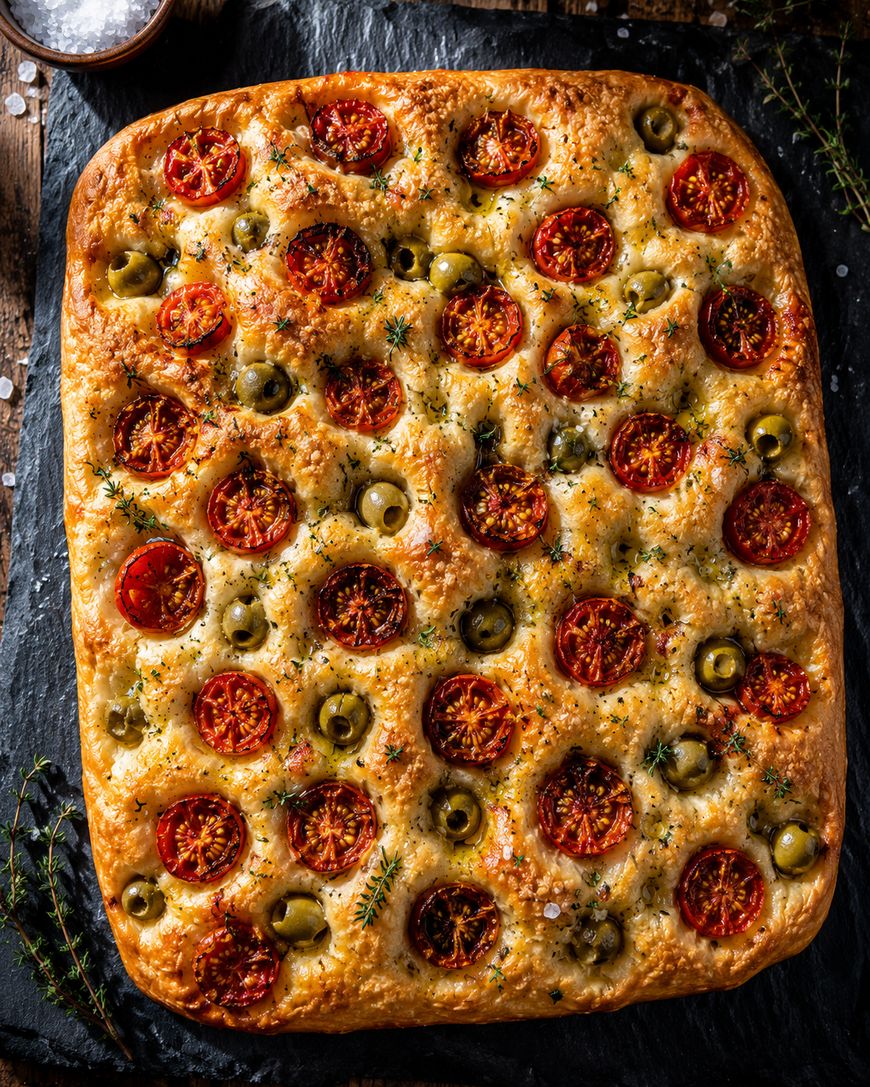
Sliced Castelvetrano olives pressed into the dimples before baking add a buttery, mild flavor that pairs beautifully with the olive oil base. Cherry tomatoes, halved and nestled cut-side up into the dough, caramelize into jammy pools during baking.
Caramelized onions spread across the surface before dimpling produce a savory, sweet topping that turns focaccia into a meal on its own. Thinly sliced red grapes and fresh thyme create the Ligurian version known as focaccia di Recco’s sweet cousin.
For a za’atar focaccia, mix two tablespoons of za’atar spice blend with three tablespoons of olive oil and drizzle it over the dough before dimpling.
Whole Wheat and Gluten-Free Substitutions
Replacing up to 30 percent of the bread flour with whole wheat flour adds a nutty depth without significantly compromising the texture. Beyond 30 percent, the crumb becomes noticeably denser.
For a gluten-free version, use a high-quality 1:1 gluten-free bread flour blend such as Bob’s Red Mill 1-to-1 Baking Flour. The texture will be slightly more cakey than wheat-based focaccia, but the flavor profile holds up well with quality olive oil.
Storing and Serving Focaccia
Storage
Focaccia is best eaten the day it is baked, within two to four hours of coming out of the oven, when the crust is at peak crispness. Store leftovers at room temperature, loosely wrapped in parchment paper, for up to two days.
Avoid plastic wrap for storage as it traps moisture and softens the crust quickly. For longer storage, freeze individual slices wrapped tightly in aluminum foil for up to one month.
Reheating
Reheat directly on the oven rack at 375 degrees Fahrenheit for eight to ten minutes. This method restores the crisp bottom and warms the interior without drying it out.
A toaster oven works equally well for single slices. The microwave is a last resort, as it produces a soft, chewy texture rather than the crisp finish the bread is known for.
Serving Suggestions
Focaccia pairs naturally with antipasto boards alongside cured meats, marinated vegetables, and fresh mozzarella. It makes an excellent base for a pressed sandwich using ingredients like mortadella, burrata, and arugula.
Tear it into rough pieces and serve alongside a bowl of ribollita or minestrone to soak up the broth. For breakfast, top a warm slice with ricotta, honey, and crushed pistachios.
The Origin of Focaccia Bread
Focaccia has roots stretching back to ancient Rome, where a flatbread called panis focacius was baked directly on the hearth (focus in Latin). The Ligurian city of Genoa claims the modern version as its own, with bakeries there producing focaccia Genovese every morning since at least the 16th century.
The word itself comes from the Latin focus, meaning hearth or fireplace, reflecting the original cooking method. Liguria’s proximity to olive groves and its strong trading history with the Mediterranean basin made olive oil the defining fat in its baking tradition, in contrast to the lard-based flatbreads of other Italian regions.
Today, the Association of Ligurian Food Products (Consorzio per la Tutela della Focaccia Ligure) actively works to protect the traditional Genovese recipe, specifying hydration ratios, olive oil quantities, and even the exact thickness of the finished bread.
When this focaccia bread recipe comes out of the oven, golden and fragrant, it carries that ancient lineage in every dimple. Use the recipe card below for exact measurements and a step-by-step guide.
Focaccia Bread Recipe
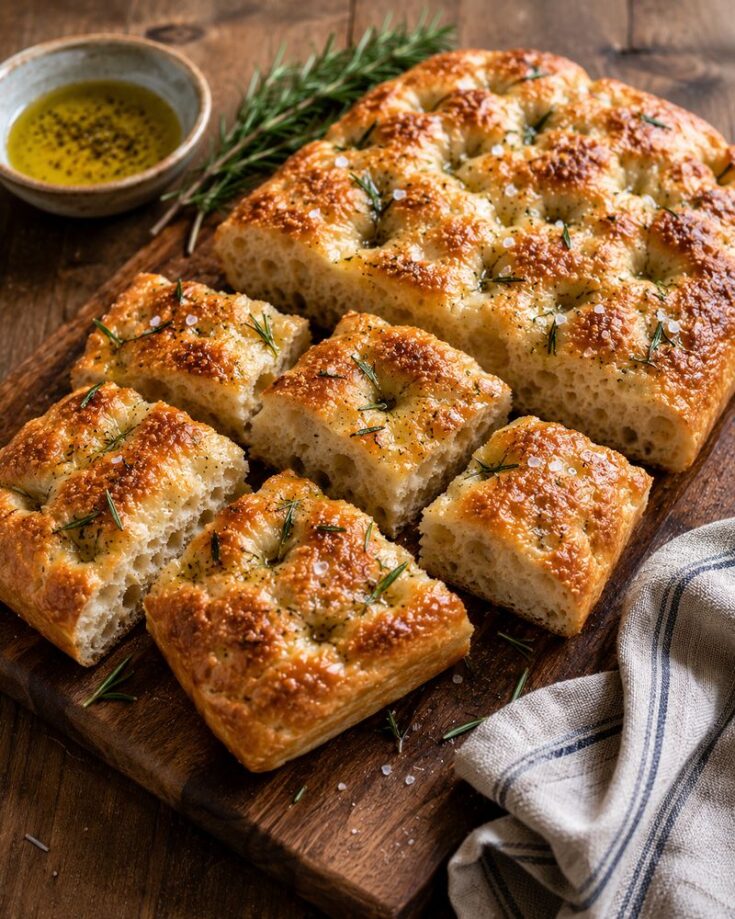
A classic Genovese-style focaccia bread recipe with a crispy olive oil-fried bottom, pillowy open crumb, and dimpled top scattered with flaky sea salt and fresh rosemary. Made with a simple overnight cold ferment for maximum flavor.
Ingredients
- For the Dough:
- 3 cups (360g) bread flour
- 1 teaspoon instant yeast
- 1.5 teaspoons fine sea salt
- 1.25 cups (300ml) warm water (100-110F)
- 2 tablespoons extra-virgin olive oil
- For the Pan and Topping:
- 5 tablespoons extra-virgin olive oil, divided
- 1.5 teaspoons flaky sea salt (Maldon or Fleur de Sel)
- 2 tablespoons fresh rosemary leaves
Instructions
- Combine bread flour, instant yeast, and fine sea salt in a large bowl, keeping the salt and yeast on opposite sides. Add warm water and 2 tablespoons olive oil. Mix with a stiff spatula until a shaggy, sticky dough forms with no dry flour remaining.
- Cover the bowl and let the dough rest for 10 minutes to hydrate fully.
- Wet your hand and perform a set of stretch-and-folds: reach under the dough, stretch it upward, and fold it over itself. Rotate the bowl 90 degrees and repeat four times. Cover and rest 30 minutes. Repeat this fold-and-rest cycle three more times (four sets total over 2 hours).
- Cover the bowl tightly with plastic wrap and refrigerate for 8 to 24 hours.
- Pour 3 tablespoons of olive oil into a rimmed half-sheet pan (18x13 inches) or 9x13-inch baking dish. Tip the cold dough into the center. Using oiled fingertips, gently press and stretch the dough toward the edges. If it resists, cover and rest 10 minutes before continuing.
- Cover the pan loosely and proof at room temperature for 2 to 4 hours, until the dough is puffy and jiggles when the pan is shaken.
- Preheat the oven to 450F with a rack in the lower third for at least 30 minutes.
- Drizzle the remaining 2 tablespoons of olive oil over the proofed dough. Press all ten fingertips firmly into the dough to create deep, even dimples across the entire surface. Immediately scatter flaky sea salt and fresh rosemary over the top.
- Bake for 20 to 25 minutes, rotating once at the 15-minute mark, until the top is deep golden brown. Lift a corner with a spatula to check that the bottom is browned.
- Transfer immediately to a wire rack. Slice and serve warm.
Notes
For a thicker focaccia, use a 9x13-inch pan and add 5 minutes to the bake time. For a crisp bottom, preheat the empty pan in the oven before adding the olive oil and dough. Store leftovers loosely wrapped in parchment at room temperature for up to 2 days, or freeze wrapped in foil for up to 1 month. Reheat at 375F directly on the oven rack for 8 to 10 minutes.
Nutrition Information:
Serving Size:
1 pieceAmount Per Serving: Calories: 198Total Fat: 9gSaturated Fat: 1gSodium: 380mgCarbohydrates: 26gFiber: 1gSugar: 0gProtein: 4g
This site provides estimated nutritional information. This information comes from online calculators. Although we try to provide accurate nutritional information, these figures are only estimates.
Frequently Asked Questions About Focaccia Bread
Why is my focaccia dense and not airy?
Dense focaccia almost always traces back to either under-fermented dough or dough that was overworked after shaping. The long cold ferment, at least eight hours in the refrigerator, is what develops the gas bubbles and gluten structure responsible for an open crumb.
If the dough was punched down or handled roughly after the bulk ferment, those gas bubbles collapse and the crumb tightens. Gentle handling during the panning and dimpling stages is essential.
Can focaccia dough be made ahead?
The dough can be made up to 72 hours in advance and kept in the refrigerator through the bulk fermentation stage. Longer cold ferments, up to three days, actually improve flavor complexity because the enzymes in the flour have more time to break down starches into sugars.
Pan the dough directly from the refrigerator without letting it come to room temperature first, then allow four hours for the second proof at room temperature.
What pan size should be used for this focaccia bread recipe?
A rimmed half-sheet pan (18 by 13 inches) produces a thin, crispy focaccia about three-quarters of an inch thick. A 9 by 13-inch baking dish produces a thicker, almost pizza bianca-style result closer to one and a half inches.
Both versions bake at the same temperature. The thicker pan version may need an additional five minutes of bake time. Check doneness by lifting a corner with a spatula to inspect the bottom color.
Why does focaccia need so much olive oil?
The olive oil serves a structural purpose beyond flavor. In the pan, it essentially fries the bottom of the dough during baking, creating the distinctively crisp bottom crust that separates focaccia from oven-baked flatbreads cooked on a dry surface.
The oil pooling in the dimples also bastes the surface during baking, which creates the glossy, slightly crunchy top. Reducing the olive oil quantity produces a drier, less flavorful result that loses the essential character of the bread.
Can focaccia be frozen after baking?
Focaccia freezes well for up to one month when wrapped tightly in aluminum foil and placed in a freezer bag. Thaw at room temperature for two hours, then reheat directly on the oven rack at 375 degrees Fahrenheit for eight to ten minutes.
The crust recovers well from freezing with this reheating method. Avoid thawing in the microwave as it makes the crumb gummy and the crust soft.
What is the difference between focaccia and ciabatta?
Both focaccia and ciabatta are high-hydration Italian breads made with similar ingredient ratios, but their forms and textures differ significantly. Ciabatta is baked as a free-form loaf with a thin, blistered crust and a very open, almost lacy crumb, while focaccia is baked in an oiled pan that shapes and contains it.
The generous olive oil in the pan gives focaccia its characteristic crisp, fried bottom, whereas ciabatta bakes on a dry stone or steel with steam injected into the oven. The two breads share a family resemblance but are distinct in technique, texture, and culinary use.
The Best Focaccia Bread Recipe Starts Here
This focaccia bread recipe rewards patience and quality ingredients above all else. Good extra-virgin olive oil, a slow cold ferment, and a properly preheated oven are the three factors that separate outstanding focaccia from merely decent bread.
Once the technique is understood, it becomes one of the most forgiving and satisfying breads to bake at home. The dough accommodates a flexible schedule, welcomes almost any topping combination, and produces results that consistently outperform most bakery versions at a fraction of the cost.